


18
■
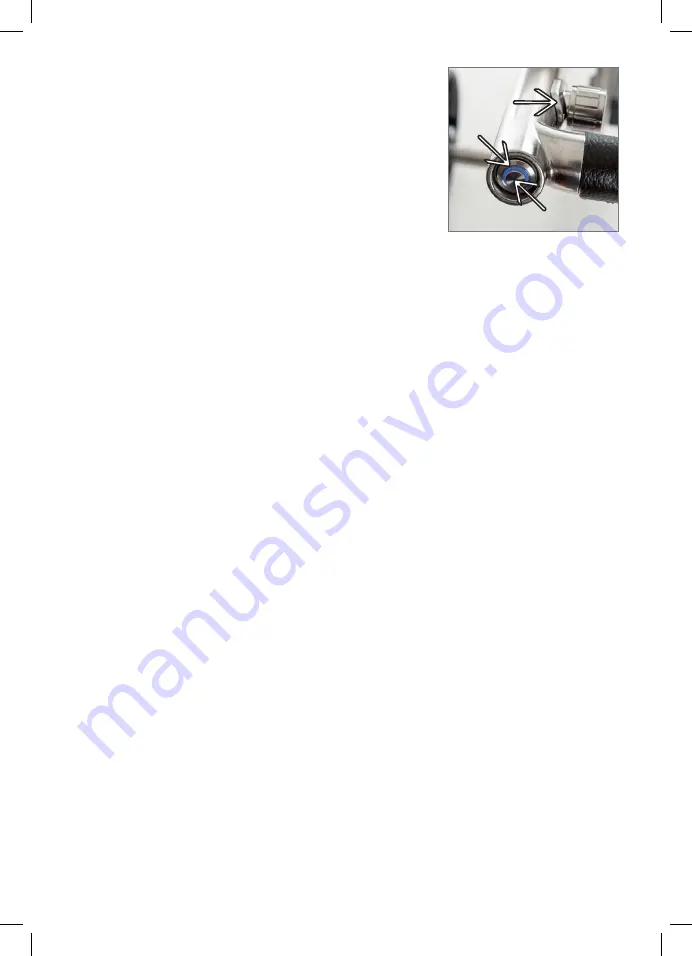
LED display:
■
No light = no power/battery not plugged in
■
Slow flashing = power too low, charge battery!
■
Fast irregular flashing = standby, parking brake
active
■
To start:
Press button A. The trolley will run at
the last speed selected.
■
To stop:
Press button A. The automatic parking brake prevents the trolley from
rolling forward.
■
Release the parking brake (to push the trolley manually):
Turn the knob back to zero
and press the Start/Stop button.
■
Activating the brake again:
Press the Start/Stop button.
■
Distance timer (this function allows the trolley to drive on for 10 or 20 seconds):
■
While the trolley is stationary, press button A for 3 seconds until the LED display
flashes quickly, then release it. The trolley will move forward for 10 seconds
at the set speed.
■
While the trolley is stationary, press button A for at least 5 seconds until the LED
display flashes slowly, then release it. The trolley will move forward for 20 seconds
at the set speed.
■
Setting the speed:
Speed can be set variably by turning the potentiometer (cog B).
■
Turn in the direction of travel = faster
■
Turn backward = slower
Cleaning/Care/Storage
■
Clean the trolley with a damp cloth and/or compressed air. Avoid spraying it with water.
■
Always store the trolley in a dry location.
Operating
Transport
■
Please use the transport bag to transport the caddy. This bag has a compartment for
the rear wheels at the bottom and dividers for 3 compartments in the upper storage
area. To prevent damage during transport (e. g. scratches), put the motor axle, the
control arm, and the front axle with wheel in separate compartments.
■
Important:
The zipper for the wheel compartment should be opened and closed only
when the compartment above is empty to prevent it from tearing.
B
LED
A
User Manual_Genius 2020_Print.indd 18
User Manual_Genius 2020_Print.indd 18
23.12.19 18:36
23.12.19 18:36


