


Warning: (Troubleshooting)
1.
Please do not use the wireless optical mouse on a desk that is made of glass,
mirror, iron, or black velvet. Also a desk that is made of metal will reduce the
receiving distance of the keyboard and mouse.
2.
Before the first installation is completed (channel setting ready), the keyboard
will not work in DOS. If your USB keyboard does not work in BIOS, DOS or
Windows, then use another PS2 keyboard to make the USB controller (USB
function) and USB legacy (USB keyboard) “On” in the BIOS setup. This may
occur with older BIOS versions. Then unplug the PS/2 keyboard and plug in
your USB keyboard and everything should be working properly.
3.
The SlimMate 3000 channel provides 256 ID-codes, and it automatically selects
the ID # for your keyboard and mouse. You can only set up one SlimMate 3000
at a time. But if you have additional SlimMate 3000 sets in an area of 10 square
meters, more interference may occur between the receiver and your keyboard
and mouse.
4.
The SlimMate 3000 with radio frequency gives you free movement and an en-
joyable experience. For optimal performance, place the receiver at least 8 inches
(about 20 cm) away from the mouse and other electrical devices, such as the
computer, monitor, and etc.
Factory Setting
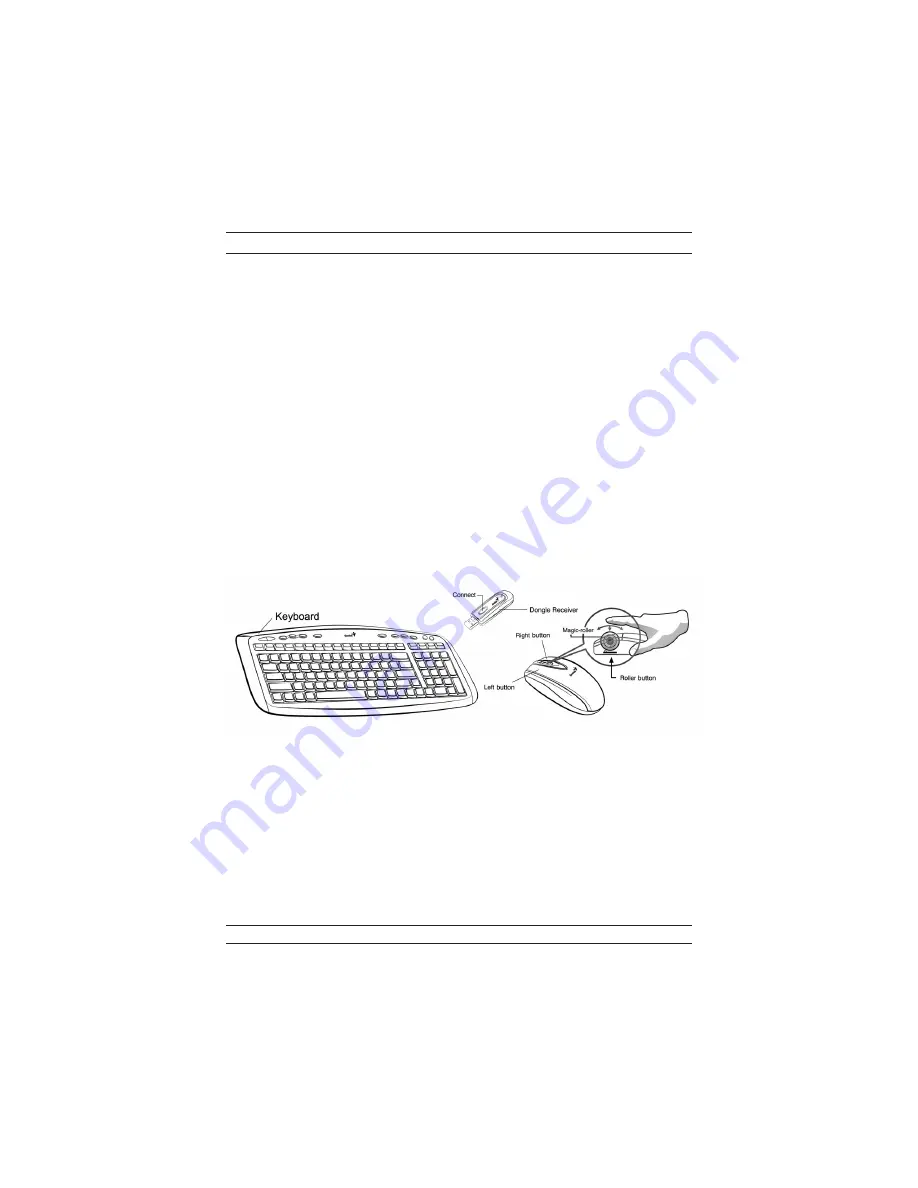
1. Mouse:
Button Assignments
The Button Assignment feature lets you work in a more efficient way because you
can assign the most frequently used commands in Windows to the mouse buttons.
Magic-Roller
Press the “Magic-Roller” to surf the Internet and Windows docu-
ments
Left Button
Provides traditional mouse functions such as click, double click and
drag.
Right Button
You can assign this button frequently used keyboard and mouse func-
tions in addition to features like EasyJump, Auto-Panning, Zoom, etc.
2