ENGLISH
1
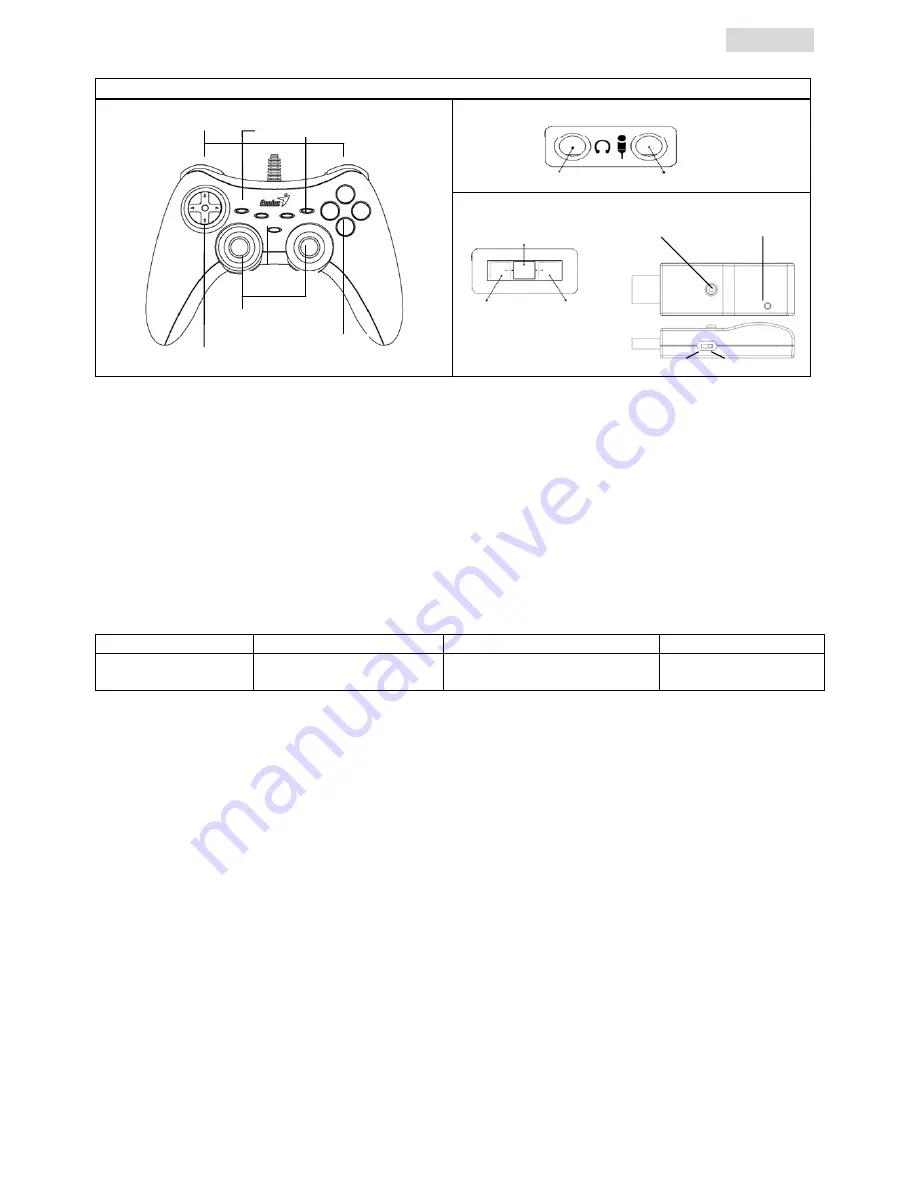
Audio Interface for Grandias Commander only:
Earphone
Microphone
Receiver for Wireless Grandias 12V only:
ON
Link
Power LED
OFF
Vibration
PS3
PC
Software Installation:
Install the software first before you install Grandias12V or Wireless Grandias 12V. The Game Pad will
work without the vibration function even if the driver is not installed.
1.
Insert the driver CD into your CD-ROM; wait for a few seconds for your PC to load the disc; the auto run program is
executed and the opening installation screen appears. Please follow the on-screen instructions.
2.
If your system doesn
’
t launch the installation software automatically, you can locate the file in the directory of your CD drive
and click on it, then follow the on-screen instruction to install the software.
Hardware Installation
1.
Plug the game pad to a USB port on the PC or a USB Hub. After connection, the
“
Find a new hardware
”
message appears
and the standard USB driver will be located for you to finish the installation.
2.
Go to Game Controllers page and select
“
Advanced
“
. The Game Pad should work as an USB, 2-axis 12-button game pad.
Check the installation again if it is not correct.
Set wireless function (for Wireless Grandias 12V only):
Once you complete the Wireless Grandias 12V installation, it will automatically search and link with the receiver. The yellow
LED on the Game Pad will be lit for five seconds then will turn off if you have a successful connection.
Searching Mode
Wake suspend mode up
Suspend Mode
Low Battery Indicator
START+MODE button
START button or SELECT
button.
After 2 minutes without any button
activity.
Yellow LED continues to
flash slowly.
Set audio output (for Grandias Commander only):
If there is more than one audio device inside the system; you need to go to the audio setup screen and select the audio device
to be
“
USB Audio
”
.
Turbo/Macro Functions
1.
Set/Clear Turbo Functions: Press and hold the TURBO button, then press any action button to set the turbo function for it.
To release the Turbo function, repeat the same procedure again.
Macro Functions
1.
Set MACRO Functions: The Macro function only can be programmed for Buttons 5~8 (L1/R1/L2/R2). Press the MACRO
key, and the green LED will be flashing slowly to initiate the macro function. Press any of the action buttons (Button 1~4, 11,
12) or direction pad step by step. The green LED will flash faster during the setting. Then press the MACRO button again to
complete the setting. The contents of the macro function will remain at the programmed macro buttons, even if the
Grandias 12 V is unplugged from the computer.
2.
Clear Macro Functions: Press and hold the programmed Macro button, then press the TURBO button twice to remove the
macro function from this button.
Set Turbo/Macro Speed: Press the Turbo or MACRO button and hold, then press the START button only. The Turbo/Macro
speed will be adjusted cyclically from 2->4->8->16->2 Hz, each time the START button is pressed.
3.
MODE: Press MODE button to toggle between Analog to Digital Mode. The red LED will be lit in Analog MODE.
Importance & Attention
1.
Make sure your software supports the Game Controller/Joystick.
2.
Not every game requires all functioning buttons. If you find some buttons do not work inside the game, please check the
game settings again.
3.
The function of the game pad buttons may vary in different games. Before proceeding to game settings from the OPTION
inside the game, always read your game
’
s manual carefully to set the best game settings.
Wireless Grandias 12V / MaxFire Grandias 12V/Grandias Commander
Buttons
1~4
8-Way D-Pad
MODE/LED
Analog Mini Stick
Buttons 5~8
TURBO/SELECT/START/MACRO


