

Hardware Installation
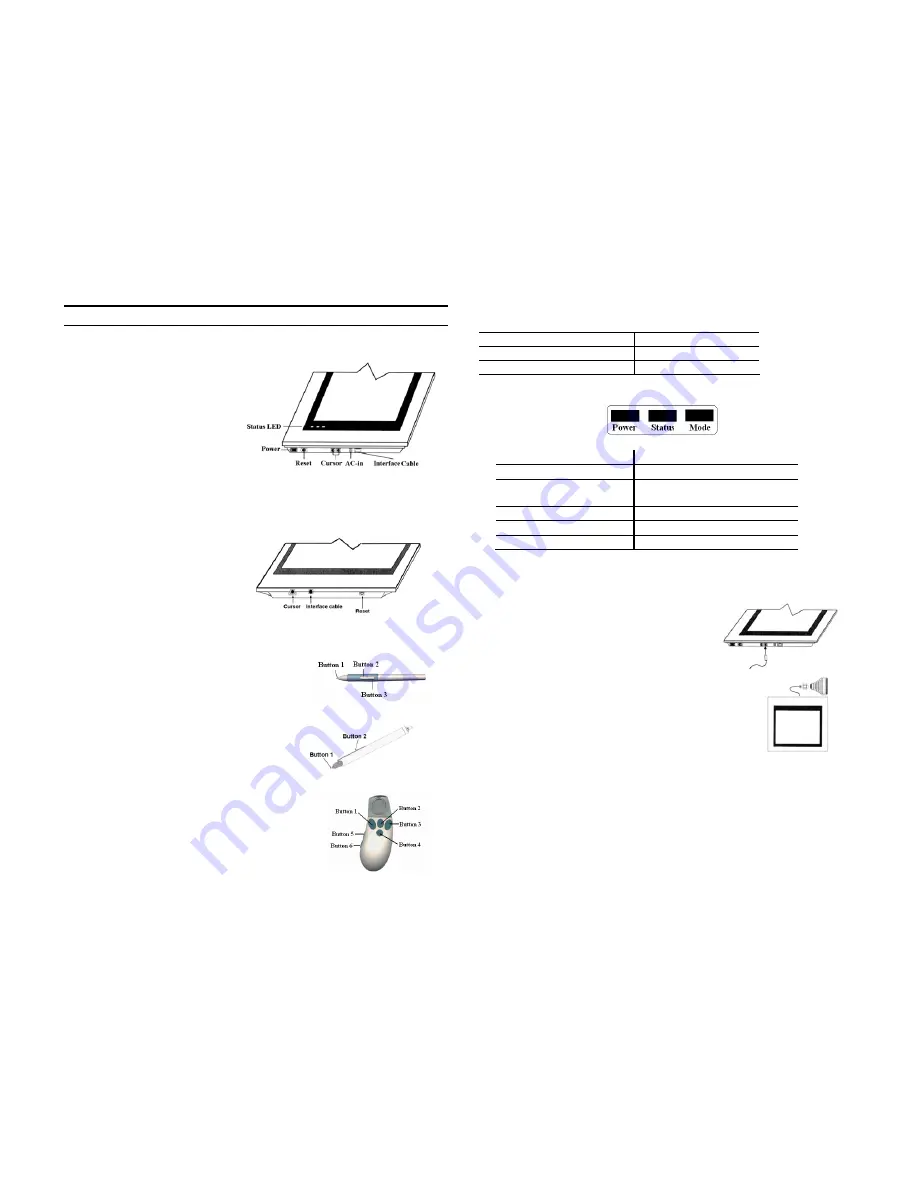
Looking Around the NewSketch 1212HRIII
1.
Status LED:
Shows the
“Power, Status, Mode” of
NewSketch 1212HRIII.
2.
Power:
The location of the
ON/OFF switch.
3.
Interface cable:
Connects
the tablet to the PC.
4.
Cursor:
Plug the puck or
stylus into this area.
5.
Reset:
Resets the communication data for NewSketch 1212HRIII.
6.
AC-in:
Connects the tablet to the power adapter.
Looking Around the NewSketch 1812HR
1.
Interface cable:
Connects the
tablet to the PC.
2.
Cursor:
Plug the puck or
stylus into this area.
3.
Reset:
Resets the
communication data for
NewSketch 1812HR
The Stylus of NewSketch 1212HRIII
There are three buttons on the stylus.
Button 1: Simulates the “LEFT Mouse Button“
Button 2: Simulates the “RIGHT Mouse Button“
Button 3: Simulates the “MIDDLE Mouse
Button“
The Stylus of NewSketch 1812HR
Button 1: Simulates the “LEFT Mouse Button“
Button 2: Simulates the “RIGHT Mouse
Button“
The Four-Button Puck
for NewSketch
1212HRIII/1812HR.
There are six buttons on the puck and they are used
to select different functions.
You can use the Tablet Control Panel to change the button assignments.
Status LED of NewSketch 1212HRIII
The LED’s on the tablet indicate the following.
Power Status
Mode Indicates:
On
Power
ON
Blinking
Pointing device (puck or stylus)
is not in working area
Red
OFF
K
Mode
Green
Red
MM
Mode
Green
Green UIOF
Mode
K Mode: It can connect the puck and stylus at the same time.
MM Mode: Supports Summagraphics Mode
UIOF Mode: Supports Summagraphics Mode
Installing NewSketch 1212HRIII
Follow these steps to install your NewSketch
1212HRIII tablet. Make sure to turn off your
computer before installing the tablet.
1.
Plug the stylus or puck into the cursor socket.
2.
Connect the tablet to the computer. Plug the 9-pin
connector of the interface cable into the host
communications port. If the computer has a 25-pin
serial port, connect the 9-to-25 pin adapter between the
tablet cable and the computer.
3.
Turn on your computer and the power of the
NewSketch 1212HRIII. The tablet is now ready to operate once you have
installed the driver.
Installing NewSketch 1812HR
Follow these steps to install your NewSketch 1812HR tablet. Make sure to turn
off your computer before installing the tablet.
1.
Plug the stylus or puck into the cursor socket.
Button 1: Right button
Button 2: Left button
Button 3: Left and right button Button 4: Middle button
Button 5: Scroll Up
Button 6: Scroll Down


