background image

9

Access Main Menu

1.  Press Enter       key of the rear panel or cable of the camera to go to the main 

menu.

2.  Select the preview window and right click the mouse to show the following 

menu list on the DVR.

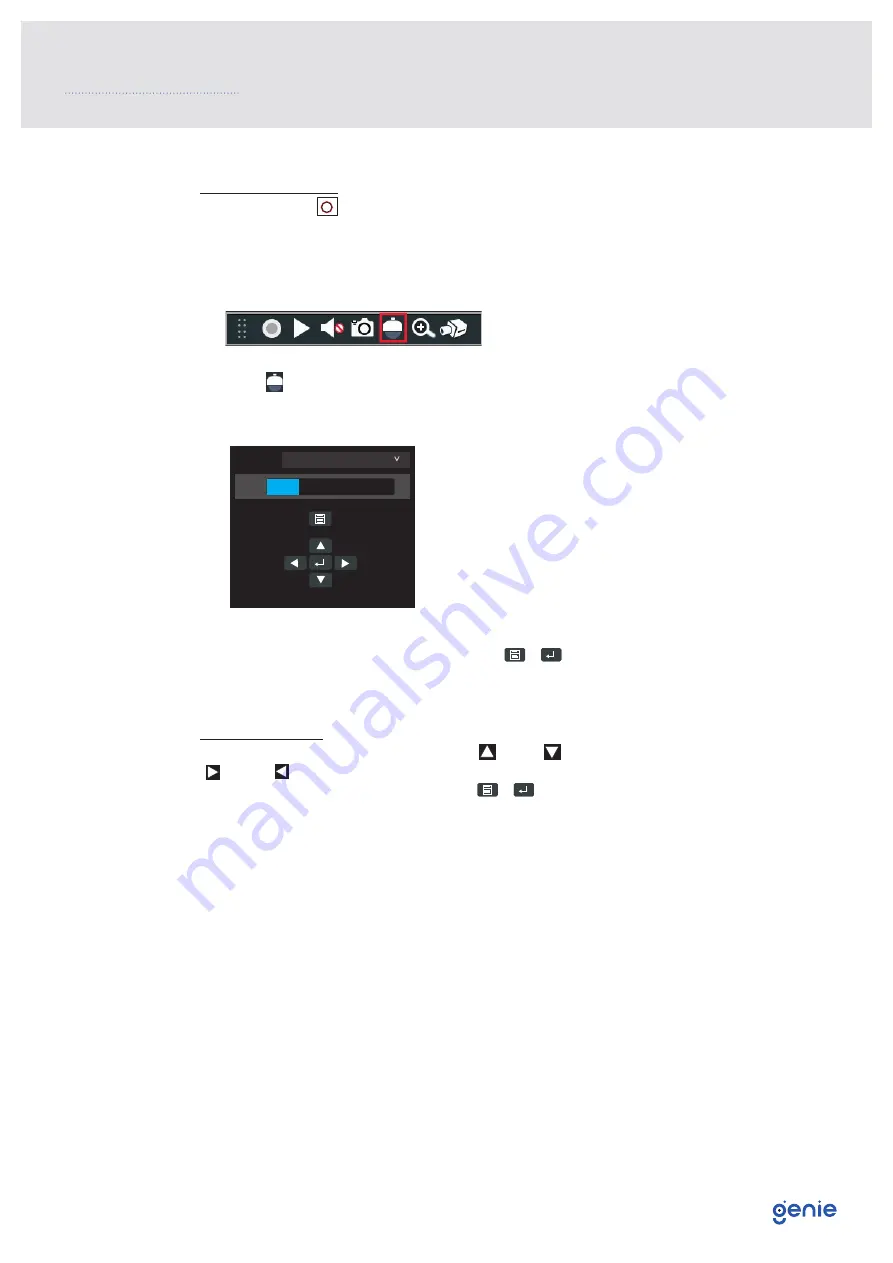
3.  Click      on the toolbar at the bottom of the live preview window (or right click 

the mouse to select “PTZ Control”).

4.  Select the “OSD” tab and then click      /      to call up the main menu.

Menu Operation

You can select the menu by clicking     (U) or     (D) key on the direction area. Click              

      (L) or      (R) key to select the menu on the left. The menu with arrow icon 

which means it has sub-menu. Click      /       to go to the sub-menu or confirm the 

settings.

If there are direction keys and enter key on the cables of the camera, you can also 

use these direction keys to select menu and the enter key to go to the sub-menu 

or confirm the settings.

Note: This series of the camera must be connected to the DVR which supports 

calling up main menu of camera. Different DVRs manufactured by different DVR 

manufacturers may

have different modes of menu operation. Please refer to the relevant User Manual 

of DVR.

* Some models may not support calling up main menu, please take the final 

product as the standard.

4.0 Call Up Main Menu

Camera

Camera 1

OSD

Preset    Cruise


Summary of Contents for WHD5EBVAF

Page 1: ...User Manual Please read these instructions carefully before operating the unit and keep for further reference 5MP 4 in 1 AHD Starlight IR Eyeball Camera with 2 8 12mm Auto Focus Lens WHD5EBVAF...

Page 2: ...electrical safety regulations of the nation and region When the product is mounted on wall or ceiling the device needs to be firmly fixed Make sure the power supply voltage is correct before using th...

Page 3: ...Contents iii 1 0 Introduction 4 1 1 Product Features 4 1 2 Product Dimensions 4 1 3 Specification 5 1 4 Functions 6 2 0 Cables 7 3 0 Product Installation 8 4 0 Call Up Main Menu 9...

Page 4: ...up to 50m viewing when the IR illumination is switched on 1 1 Product Features 5MP 20fps 4MP 30fps image high resolution true colour Switchable AHD TVI CVI CVBS 960H output CMOS progressive scan impro...

Page 5: ...5MP 20fps Video Output AHD TVI CVI CVBS Functions IR Distance 30 50 m Function Control OSD COC Control Day Night ICR Digital WDR Yes Digital NR Yes AGC Yes Auto White Balance Yes BLC Yes LSC Yes HLC Y...

Page 6: ...alance Adjust the colour temperature according to the environment automatically ICR Auto Switch The filter will filter infrared light during the daytime and change to normal at night to ensure a high...

Page 7: ...ycle by holding and pressing the button in the video switch cable for 5 seconds Dial Switch Please set the video output according to the directions described on the tag of the video switch cable Note...

Page 8: ...hen secure the mounting base to the ceiling or wall with the screws provided 4 Install the dome and enclosure to the mounting base and then adjust the dome to obtain an optimum view angle 5 Adjust the...

Page 9: ...t The menu with arrow icon which means it has sub menu Click to go to the sub menu or confirm the settings If there are direction keys and enter key on the cables of the camera you can also use these...

Page 10: ...Sales 44 0 1707 330541 Enquiries sales genieproducts co uk Website www genieproducts co uk...

Reviews: