AutoVu SharpX mobile installation
tip.genetec.com | AutoVu Hardware Guide for SharpX Mobile Installation
EN.410.018-XS(6) | Last updated: October 6, 2016
69
2 From the height of the camera lens, measure the X distance.
Measure parallel to the ground and perpendicular to the vehicle’s wheel line. Use the plumb-bob
weight and chalk to mark the ground where X falls.
3 From the X point you marked on the ground, measure the Y distance.
Measure on the ground, and parallel to the vehicle wheel line. Use the chalk to mark Y on the
ground.
4 To validate D, measure the D distance from the height of the camera lens.
Measure parallel to the ground. Use the provided plumb-bob weight to see where D falls on the
ground. If you are more than three inches off from the Y point, you will need to re-measure X and
Y.
5 Set up the tripod on the Y point you marked, raise the target so that its center is 36 in. (0.9 m) from
the ground, and orient the target so it’s facing the camera.
Attaching the target to the tripod
After you determine where to set up the tripod, you must attach the target to it, and raise it to the
proper height for camera alignment.
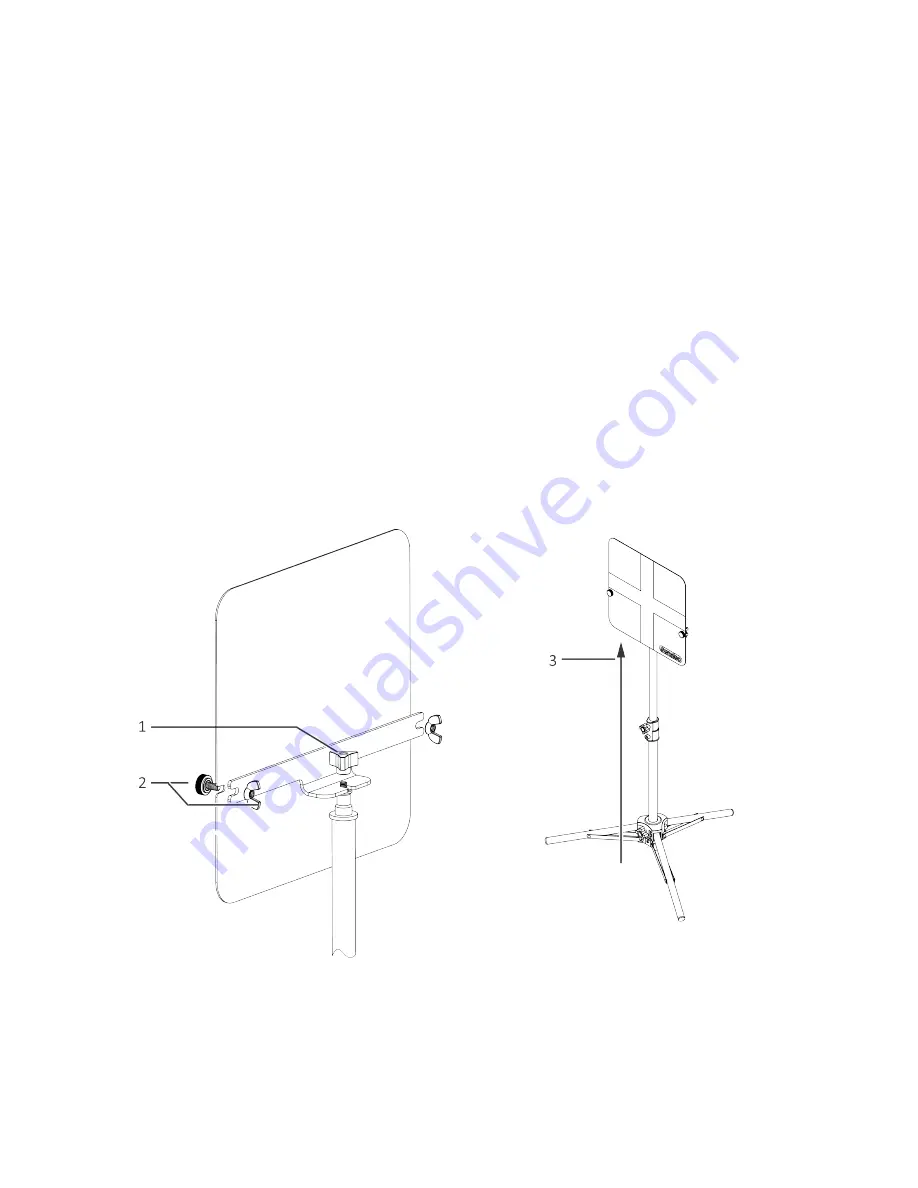
To attach the target, refer to the illustration below and the steps that follow:
1 Attach the three-arm knob to the tripod base using the provided wing nut.
2 Attach the plastic thumb-head screw to the wing nut (both sides).
3 Raise the tripod to its full length. The center of the target should be 36 in. (0.9 m) from the ground.


