Genesys GeneLink User Manual Download Page 4

GeneLink

T M

 User Guide Ver1.4 


GeneLink

TM 

is a trademark of Genesys Logic, Inc. 

For more information about products, please visit 

www.shinny.com

 or Email: 

[email protected]


4


Enter a user name and a password when you prompted. This user name should be a unique 
name for your desktop or notebook; otherwise, you’ll cause a network conflict and make your 
network mal-function. 

Notice: Entering a Password is optional. If you don’t enter your password when you were 
prompted for a user name and password in the very first time, you can just click “OK” button at 
network login screen to complete your login procedure. But remember, please don’t just press 
“ESC” or click “CANCEL” button to bypass this login screen, or your GeneLink

TM  

cable may not 

work correctly.  


Step 3 – Connect the GeneLink

TM

 cables 

Well, it’s easy. Just find an available USB port on your Desktop/Notebook and plug GeneLink

TM  

cable in it. 


Step 4 – Sharing your resource 

You need to manually share your resources to make your resources (files, folders, drives and 
printers) accessible for other computers. Similarly, other computer’s resources have to been 
shared if you want to access them. 


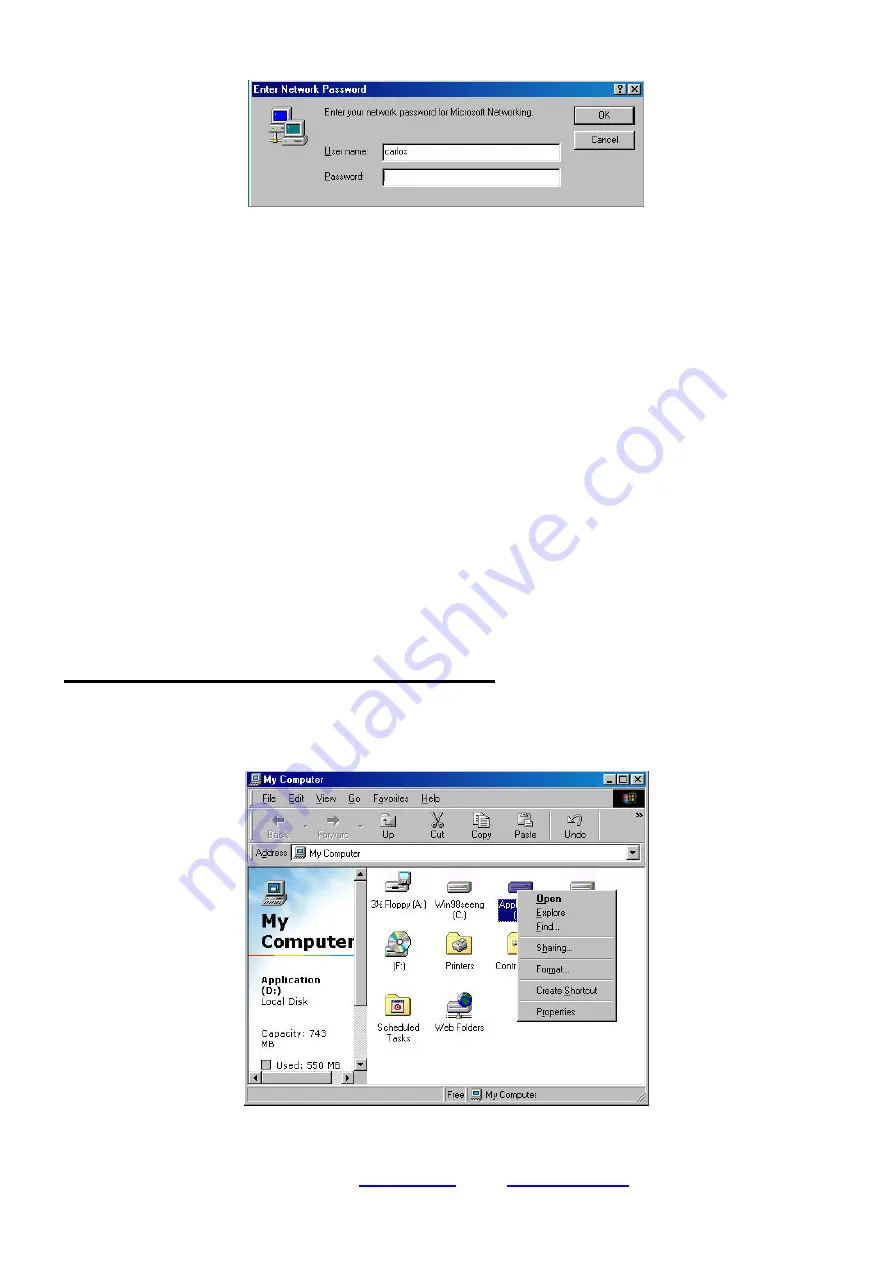
How to share your files, folders, drives and printers 

a.  Go to the file, folder, drive or printer that you want to share. 

b.  Right click your mouse pointer on the resource you want to share, you’ll see a POP-UP 

Menu. 


Summary of Contents for GeneLink

Page 1: ...share their resources such as files or printers to each other Further more GeneLinkTM also give you the ability of connecting you GeneLinkTM LAN to your existing Home or Office LAN for network resourc...

Page 2: ...be installed in each computer of GeneLinkTM LAN The installation procedures are described as follows Step 1 Install driver 1 Insert the GeneLinkTM setup diskette into your floppy disk drive 2 Run Gen...

Page 3: ...io button and click Finish button to reboot your computer After you complete the installation procedures you ll find Setup Program has installed GeneLinkTM network driver in your computer It binds TCP...

Page 4: ...een to complete your login procedure But remember please don t just press ESC or click CANCEL button to bypass this login screen or your GeneLinkTM cable may not work correctly Step 3 Connect the Gene...

Page 5: ...inters to complete your sharing processes and make your resources available on GeneLinkTM LAN Connecting to your existing Home or Office LAN To connect your PC or GeneLinkTM LAN to another existing Ho...

Page 6: ...oftware Driver 1 Insert the GeneLinkTM setup diskette into your floppy disk drive 2 Run GeneLinkDriver exe and the welcome dialog box appears 3 Click Next button 4 Choose the destination folder If you...

Page 7: ...com or Email technical shinny com 7 5 Select components that you want to install Click GeneLinkTM Software Router check box Click Next button 6 The setup program will install all necessary components...

Page 8: ...ther The Setup Program installs TCP IP NetBEUI and IPX protocols for GeneLinkTM LAN by default If your Home Office LAN uses other protocol please install the same protocol for those computers within G...

Page 9: ...User Guide Ver1 4 l GeneLinkTM is a trademark of Genesys Logic Inc l For more information about products please visit www shinny com or Email technical shinny com 9 Click on Properties you ll see ano...

Page 10: ...or Email technical shinny com 10 Choose TCP IP in Configuration tag and then press Properties button You ll see TCP IP Properties menu Now you need to navigate between IP Address Gateway and DNS Confi...

Page 11: ...OFFICE network IS using DHCP to assign client s IP address your Network Sever will configure your network configuration automatically So you can skip those procedures described in previous session SP...

Reviews: