5
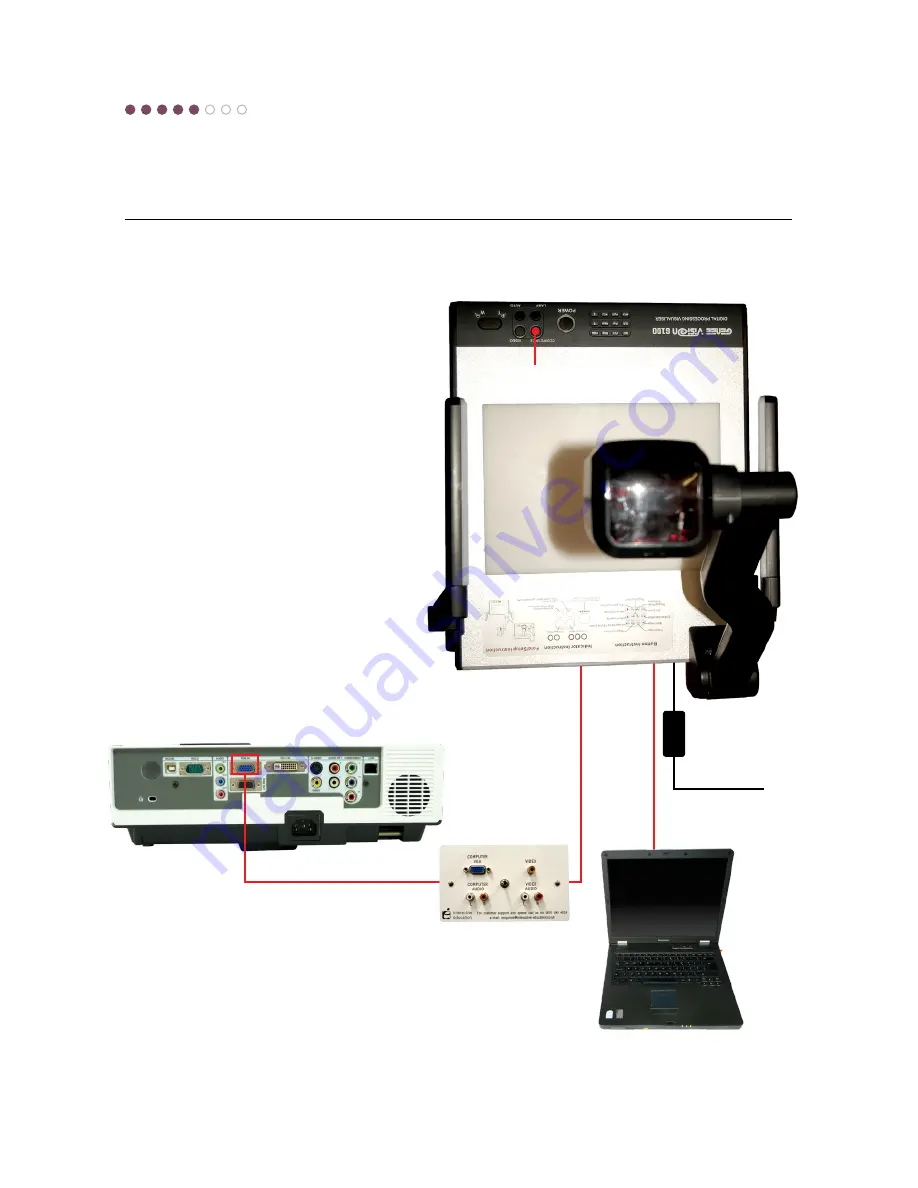
Switching projector inputs
By linking your visualiser to a PC
or laptop you can switch projector
inputs using the ‘CCD/PC1/PC2’
button on the unit’s control panel.
This integrates seamlessly with an
interactive whiteboard and only
requires a second VGA lead:
When you press the CCD/PC1/PC2
button it will change from blue to
green and the computer desktop
image will be shown (you may have
to clone the screen when linked to a
laptop).
If your PC is connected to a splitter box, simply connect the
VGA lead that comes from the wall-plate socket into the
visualiser’s ‘Projector’ socket, then use another VGA lead to
link the splitter box to the visualiser’s ‘Computer In’ socket.
(The visualiser itself can be used as a splitter box!).
‘RGB in’
socket
‘Projector’
socket
CCD/PC1/PC2
button
‘12V IN’
socket
‘Computer
in’ socket
Projector
Laptop
VGA lead
(direct to projector,
screen or wall plate
socket)


