Gefen HDSDI-2-DVIS User Manual Download Page 10

7

RMT-8HDS-IR INSTALLATION

1. Remove battery cover from the back of the RMT-8HDS-IR remote.

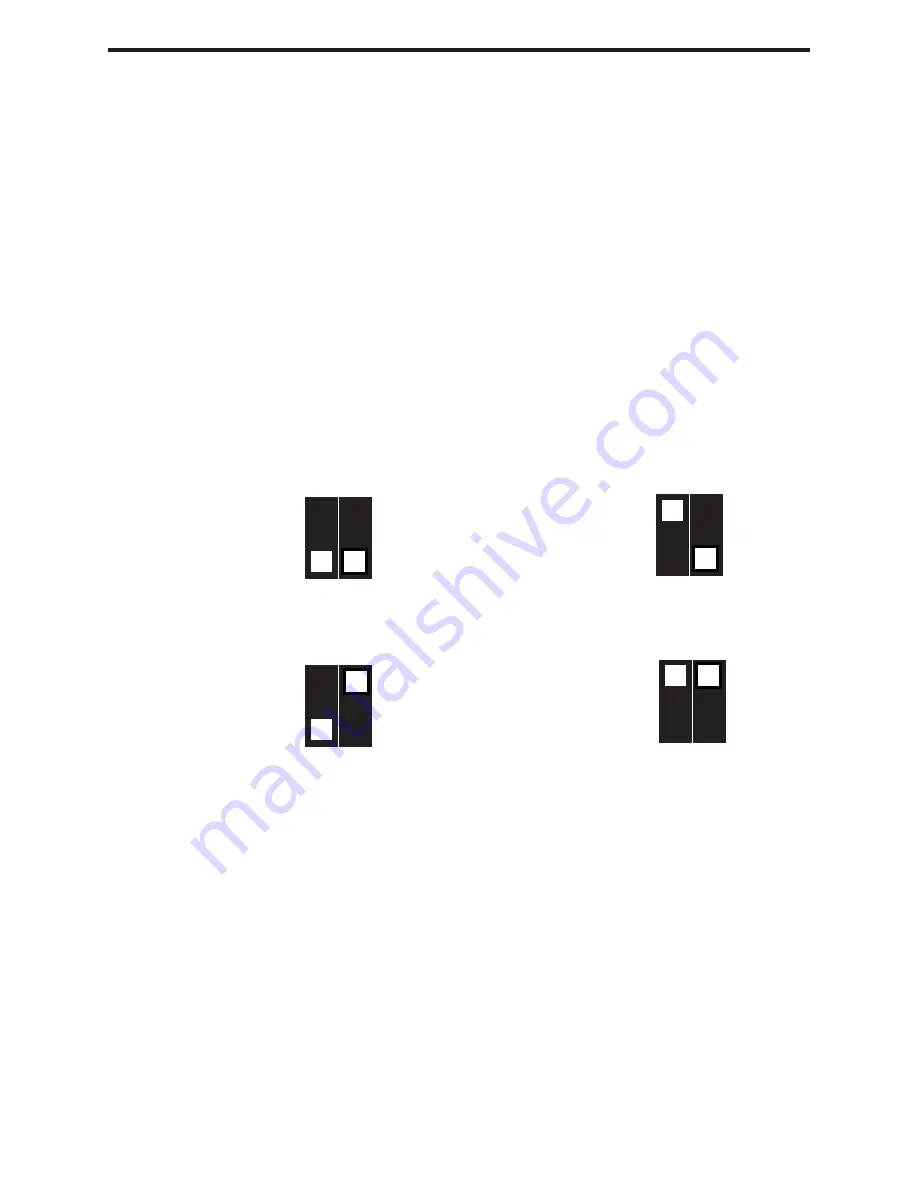
2. Verify that dip switches 1 & 2 are in the down (OFF) position.

3. Insert the battery, hold the battery so that you can see the positive side facing up. The 
side that is not marked must be facing down. 

4. Test the RMT-8HDS-IR remote by pressing ONLY one button at a time. The indica-
tor light on the remote will fl ash once each time you press a button. WARNING: Do not 
press multiple buttons simultaneously and do NOT press buttons rapidly. These actions 
will cause the remote to reset and steps 1-4 will have to be repeated.

Note: The RMT-8HDS-IR ships with two batteries. One battery is required for operation, 
the second battery is complimentary.

The following are the dip switch combinations that correspond to the Remote Code 
menu option on the HD-SDI to DVI Scaler (Please see Menu Functions section for more 
information):

1

2

Remote Channel 0:

1

2

Remote Channel 1:

1

2

Remote Channel 2:

1

2

Remote Channel 3:

Summary of Contents for HDSDI-2-DVIS

Page 1: ...HD SDI to DVI Scaler U S E R M A N U A L www gefen com...

Page 2: ...en Inc c o Customer Service 20600 Nordhoff St Chatsworth CA 91311 www gefen com support gefen com Notice Gefen Inc reserves the right to make changes in the hardware packaging and any accompanying doc...

Page 3: ...OF CONTENTS Introduction Operation Notes Panel Descriptions Menu Functions Supported Input Output Resolutions RMT 8HDS IR Installation Firmware Update Procedure Specifications Warranty 1 2 3 4 6 7 8...

Page 4: ...ink HDSDI input or two switchable Single Link HDSDI inputs 10 bit resolution for greater precision and dynamic range Proprietary 10 bit motion adaptive video de interlacing with edge interpolation for...

Page 5: ...s and output modes can be accessed through the onscreen menu To Restore I O settings simply recycle power on the Scaler To bring up the onscreen menu press the MENU button Navigation is done using the...

Page 6: ...PANEL DESCRIPTIONS 3 DVI D Output RS 232 Uplink Port HD SDI Input 1 5V Power Connector HD SDI Input 2 Infrared Eye Power Indicator Light HD SDI Loop Out 1 HD SDI Loop Out 2 Audio Output...

Page 7: ...Vertically Image Border Select color for the image border Picture Image Color Contrast Individually adjust the contrast for red green and blue Brightness Individually adjust the brightness for red gr...

Page 8: ...orted Input Output Resolutions for more information Custom Output Format Total Pixels Total Horizontal and Vertical pixels for the DVI monitor Total Active Pixels Total Horizontal and Vertical pixels...

Page 9: ...0p 23 97 1080sf 24 1280x960 60 720p 24 1080sf 25 1280x960 85 720p 25 1080sf 29 97 1280x1024 60 720p 29 97 1080sf 30 1280x1024 75 720p 30 2K p 23 98 1280x1024 85 720p 50 2K p 24 1360x768 60 720p 59 94...

Page 10: ...flash once each time you press a button WARNING Do not press multiple buttons simultaneously and do NOT press buttons rapidly These actions will cause the remote to reset and steps 1 4 will have to b...

Page 11: ...Please check http www gefen com kvm support download jsp for firmware updates and procedures FIRMWARE UPDATE PROCEDURE 8...

Page 12: ...Maximum Output Resolution 1920x1200 60Hz DVI Connector DVI I 29 pin female digital only SDI HDSDI Connector BNC female Data Port Serial RS 232 Audio Port 2 channel RCA analog audio Power Supply 5V DC...

Page 13: ...y implied warranty or merchantability or fitness for any particular purpose all of which are expressly disclaimed 1 Proof of sale may be required in order to claim warranty 2 Customers outside the US...

Reviews: