


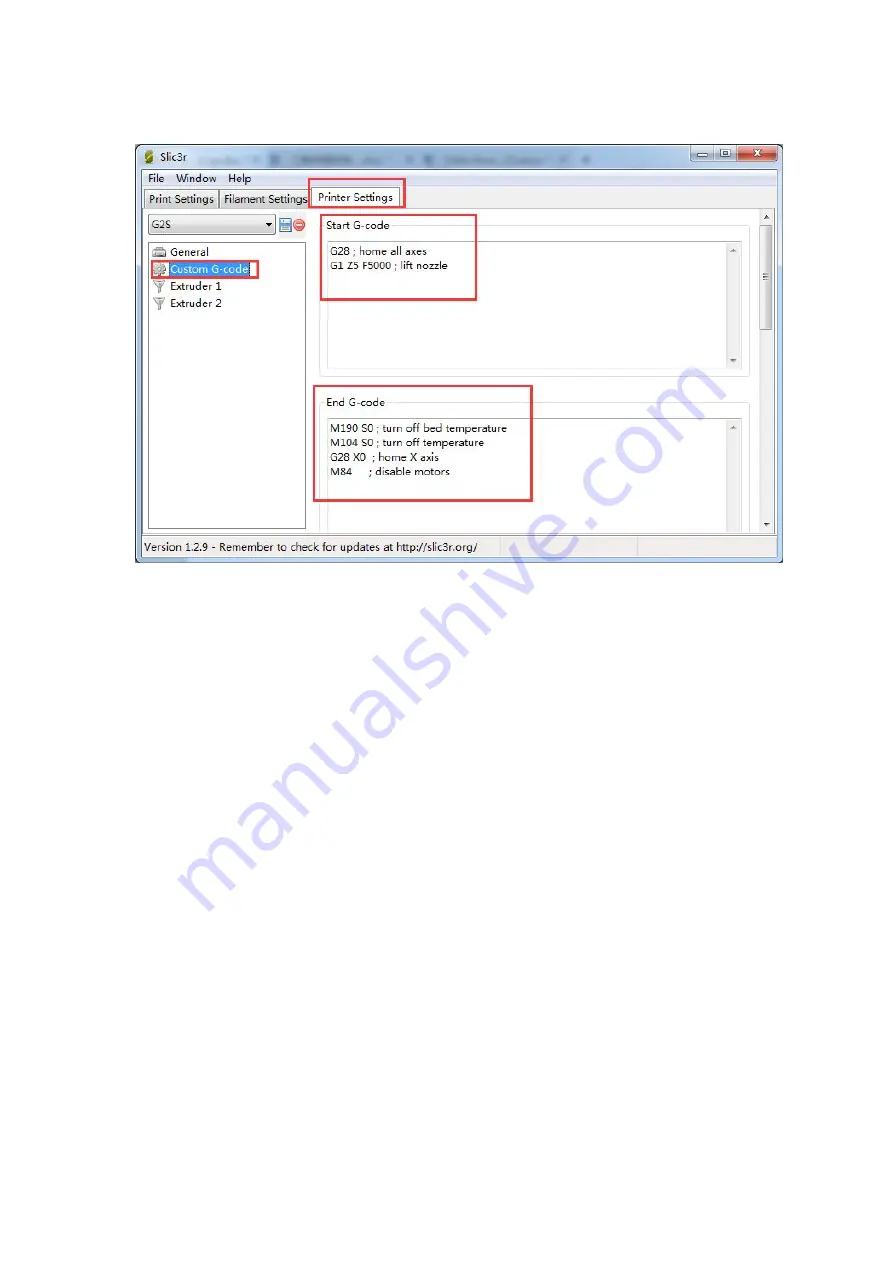
6. Confirm the start and end G-code. They should be like this.
We have covered all the important settings. For other parameters you need to learn by
yourself with the increasing of your 3D printing experience.
7.
Choose the printer and printing settings, filament settings we just saved in the
drop-down menu.
Here we choose G2.
Summary of Contents for Delta Rostock mini G2
Page 2: ......
Page 3: ......
Page 5: ...Compiling ...
Page 6: ...Uploading ...
Page 9: ... To protect the bed and the nozzle from crashing please attach a piece of tape on the bed ...
Page 14: ......
Page 18: ...Write the script 1 2 3 4 5 Here we take the G2 G2 pro as example Script 1 G0 X0 Y0 Z2 ...
Page 19: ......
Page 20: ...Script 2 G0 X0 Y50 Z2 ...
Page 21: ...Script 3 G0 X43 3 Y 25 Z2 ...
Page 22: ...Script 4 G0 X 43 3 Y 25 Z2 ...
Page 25: ......
Page 31: ... endif 2 Upon uploading change the corresponding setting in the Repetier Host and connect ...
Page 33: ......
Page 42: ......
Page 45: ......
Page 46: ...2 Confirm the parameters 1 confirm the start and end G code They should be like this ...
Page 49: ...Step2 Choose printer setting Custom G code You can see from the start G code there is no G29 ...
Page 52: ...2 Put down the auto level probe And make sure the probe is not blocked by the red wires ...
Page 53: ...3 Homing the printer 4 Send M119 command Send the command M119 to verify the endstop first ...
Page 57: ...2 Homing the printer ...
Page 59: ...5 Hook up the probe manually ...
Page 61: ...5 Send M114 command to get the present coordinates ...
Page 62: ...6 If the coordinate is 0 0 0 the auto leveling is successful ...
Page 66: ...3 Open slis3r configuration 4 Click file Load the config file you download before ...
Page 67: ...5 Save the three parameters as G2 or anything you like ...
Page 72: ...11 Click Slic3r slice with Slic3r ...
Page 73: ...12 After slicing you will get the following information about this printing job ...
Page 79: ...Now you can see the two files are separated You need to put them together ...
Page 81: ...10 Assign extruder for each file 11 Click Slic3r slice with Slic3r Choose No to continue ...
Page 82: ...12 After slicing you will get the following information about this printing job ...


