background image

17

Safety Instructions

Operating Instructions

Safety Instructions

Operating Instructions

Care and Cleaning

Troubleshooting T

ips

Customer Service

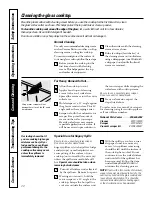
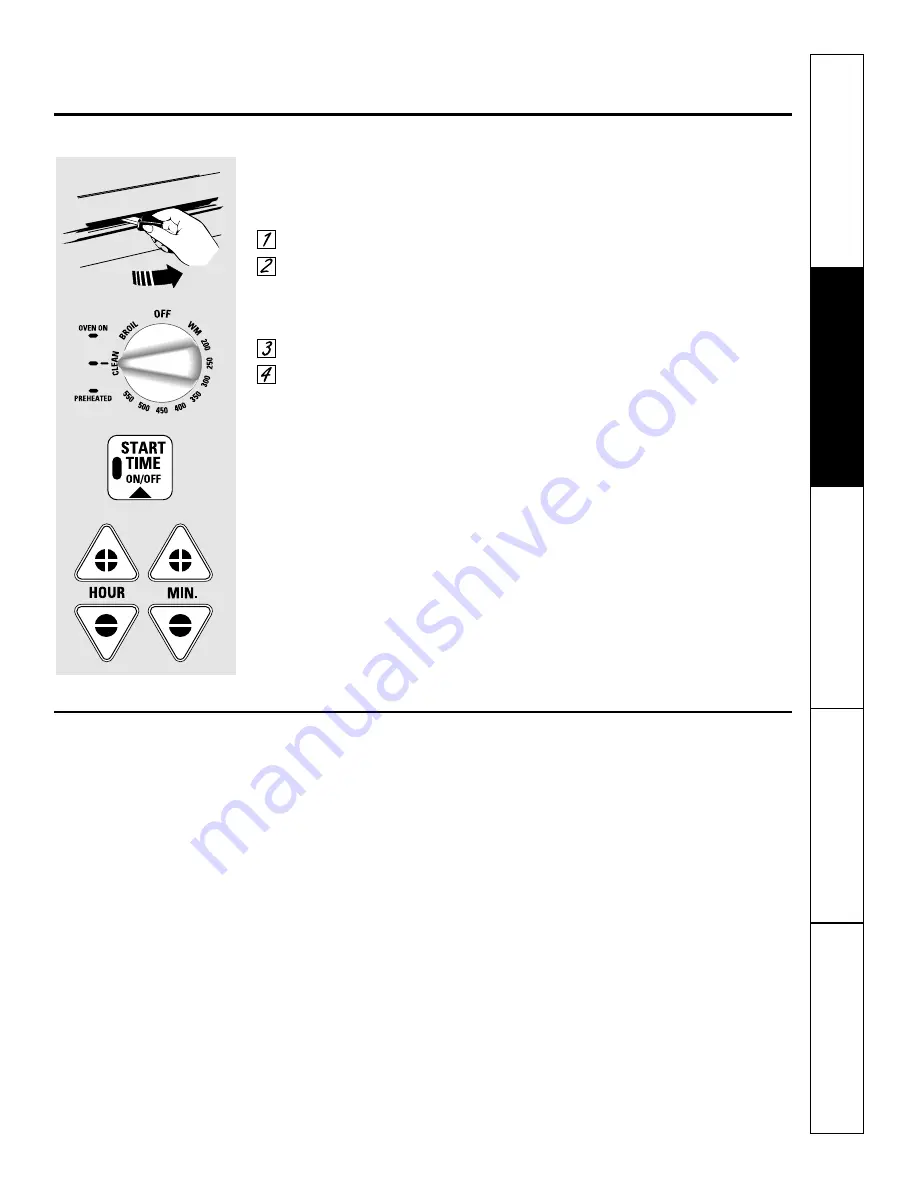
How to Delay the Start of Cleaning

Make sure the clock shows the correct

time of day.

Latch the door.
Turn the Oven Temperature knob 

to 

CLEAN.

On some models, you must push the

knob in before turning.
Press the 

START TIME ON/OFF

pad.

Press the 

HOUR

and 

MIN.

pads to set

the time cleaning will start.

When the 

CLEAN

light flashes, slide 

the latch handle to the left as far as it 

will go and turn the Oven Temperature

knob to

OFF.

After a Clean Cycle

You may notice some white ash in the

oven. Wipe it up with a damp cloth after

the oven cools. 

If white spots remain, remove them with a soap-
filled steel wool pad and rinse thoroughly with a
vinegar and water mixture. 

These deposits are usually a salt residue

that cannot be removed by the clean cycle.
If the oven is not clean after one clean

cycle, repeat the cycle. 

You cannot set the oven for cooking

until the oven is cool enough for the

door to be unlatched.

While the oven is self-cleaning, you

can press the 

CLOCK

pad to display 

the time of day. To return to the clean

countdown, press the 

COOK TIME

ON/OFF

pad.

If the shelves become hard to slide,

apply a small amount of vegetable oil or

cooking oil to a paper towel and wipe

the edges of the oven shelves with the

paper towel.

Summary of Contents for EER2000

Page 1: ...6 Operating Instructions Using the Surface Units 7 9 Using the Oven 10 17 Using the Clock and Timer 13 Timed Baking Roasting 14 Oven Thermostat 15 Self Cleaning 16 17 Care and Cleaning Control Knobs 18 Lift Off Oven Door 19 Oven Shelves 20 Oven Light 21 Broiler Pan Grid 21 Glass Cooktop 22 Troubleshooting Tips Before You Call For Service 23 26 Customer Service Product Registration 29 30 Warranty 3...

Page 2: ...rs to common problems in the Before You Call For Service section If you review our chart of Troubleshooting Tips first you may not need to call for service at all If you do need service you can relax knowing help is only a phone call away A list of toll free customer service numbers is included in the back section of this manual Or you can always call the GE Answer Center at 800 626 2000 24 hours ...

Page 3: ...arm and requires businesses to warn customers of potential exposure to such substances The fiberglass insulation in self clean ovens gives off a very small amount of carbon monoxide during the cleaning cycle Exposure can be minimized by venting with an open window or using a ventilation fan or hood Fluorescent light bulbs contain mercury If your model has a surface light you must recycle the fluor...

Page 4: ...ooking grease or other flammable materials accumulate in or near the range Do not touch the surface units the heating elements or the interior surface of the oven These surfaces may be hot enough to burn even though they are dark in color During and after use do not touch or let clothing or other flammable materials contact the surface units areas nearby the surface units or any interior area of t...

Page 5: ...is added If a combination of oils or fats will be used in frying stir together before heating or as fats melt slowly Always heat fat slowly and watch as it heats Use a deep fat thermometer whenever possible to prevent overheating fat beyond the smoking point Avoid scratching the glass cooktop The cooktop can be scratched with items such as sharp instruments rings or other jewelry and rivets on clo...

Page 6: ...ils or food in the oven when not in use Do not use aluminum foil to line oven bottoms except as suggested in this manual Improper installation of aluminum foil may result in a risk of electric shock or fire Stand away from the range when opening the oven door Hot air or steam which escapes can cause burns to hands face and or eyes Do not use oven cleaners No commercial oven cleaner or oven liner p...

Page 7: ...me models The WARMING ZONE located in the back center of the glass surface will keep hot cooked food at serving temperature Always start with hot food Do not use to heat cold food Placing uncooked or cold food on the WARMING ZONE could result in food borne illness Push and turn the control knob to any desired setting Forbestresults allfoodsonthe WARMING ZONE should be covered with a lid or aluminu...

Page 8: ...g remove pans from the surface units when the food is cooked Avoid placing anything on the surface unit until it has cooled completely Water stains mineral deposits are removable using the cleaning cream or full strength white vinegar Use of window cleaner may leave an iridescent film on the cooktop The cleaning cream will remove this discoloration Don t store heavy items above the cooktop If they...

Page 9: ...etely with porcelain enamel this cookware is recommended Caution is recommended for cast iron cookware that is not completely covered with smooth porcelain enamel as it may scratch the glass ceramic cooktop Glass ceramic usable but not recommended Poor performance May scratch the surface Stoneware usable but not recommended Poor performance May scratch the surface Home Canning Tips Be sure the can...

Page 10: ...ven Temperature knob to OFF Oven Temperature Knob Turn this knob to the setting you want On some models you must push the knob in before turning The temperature will be displayed to indicate setting Display will change back to time after a few seconds PREHEATED Light Glows when the oven reaches your selected temperature On some models opening the oven door will not automatically turn the oven ligh...

Page 11: ...ype of Food Shelf Position Frozen pies on cookie sheet D Angel food cake C or D bundt or pound cakes Biscuits muffins brownies C or D cookies cupcakes layer cakes pies Casseroles C or D Turkey A Preheating and Pan Placement Preheat the oven if the recipe calls for it Preheating is necessary for good results when baking cakes cookies pastry and breads To preheat set the oven at the correct temperat...

Page 12: ...fat Rare 1 1 2 thick D 10 8 Medium 2 to 2 1 2 lbs D 15 10 12 Well Done E 20 20 Chicken 1 whole cut up C 25 25 Brush each side with 2 to 2 1 2 lbs melted butter split lengthwise Broil skin side down Breast C 25 15 first Bakery Product Bread toast 2 to 4 slices E 3 1 Space evenly Place English Muffin 2 split F 3 4 English muffins cut side up and brush with butter if desired Lobster Tails 2 4 C 18 20...

Page 13: ... operations The maximum setting on the timer is 11 hours and 59 minutes End of Cycle Tones Clear the tones by pressing the pad of the function you are using or To Reset the Timer If the display is still showing the time remaining you may change it by pressing the HOUR and MIN pads until the time you want appears in the display If the remaining time is not in the display recall the remaining time b...

Page 14: ...mperature knob to the desired temperature On some models you must push the knob in before turning The display will show the cooking time remaining When the oven reaches the set temperature a tone sounds When the oven automatically turns off the AUTOMATIC OVEN light will flash and the oven will signal Turn the oven control to OFF to stop the flashes and signal How to Set a Delayed Start and Automat...

Page 15: ...oler than the factory setting a minus sign and the adjusted temperature will appear in the display Wait several seconds for the control to automatically set and return to its previous setting NOTE This adjustment will not affect the broiling or the self cleaning temperatures The adjustment will be retained after a power failure The type of margarine will affect baking performance Most recipes for ...

Page 16: ...not withstand abrasion It is essential for the gasket to remain intact If you notice it becoming worn or frayed replace it Wipe up any heavy spillovers on the oven bottom Make sure the oven light bulb cover is in place and the oven light is off IMPORTANT The health of some birds is extremely sensitive to the fumes given off during the self cleaning cycle of any range Move birds to another well ven...

Page 17: ...Cycle You may notice some white ash in the oven Wipe it up with a damp cloth after the oven cools If white spots remain remove them with a soap filled steel wool pad and rinse thoroughly with a vinegar and water mixture These deposits are usually a salt residue that cannot be removed by the clean cycle If the oven is not clean after one clean cycle repeat the cycle You cannot set the oven for cook...

Page 18: ...is baked on Control Knobs To Remove BesuretheknobisintheOFFposition Pull straight off the stem Using a pieceofstringcanmakeremovingthe knob easier Slip the string under and around the knob pull straight out Wash the knob thoroughly with warm soapy water Dry completely with a soft cloth DO NOT let the knob soak To Replace Check the back of the knob The molded rib of the knob is designed to fit perf...

Page 19: ...and the door liner can be cleaned with a soap filled steel wool or plastic pad hot water and detergent Rinse well with a vinegar and water solution To clean the outside of the door Use soap and water to thoroughly clean the top sides and front of the oven door Rinse well You may also use a glass cleaner to clean the glass on the outside of the door Do not let water drip into the vent openings If a...

Page 20: ...oven use It is normal for steam to come out of the vent and moisture may collect underneath it when the oven is in use The vent is important for proper air circulation Never block this vent Oven Shelves Clean the oven shelves with an abrasive cleanser or steel wool After cleaning rinse the shelves with clean water and dry with a clean cloth NOTE The oven shelves may be cleaned in the self cleaning...

Page 21: ...r to the range Broiler Pan Grid Do not clean the broiler pan or grid in a self cleaning oven After broiling remove the broiler pan from the oven Remove the grid from the pan Carefully pour out the grease from the pan into a proper container Wash and rinse the broiler pan and grid in hot water with a soap filled or plastic scouring pad If food has burned on sprinkle the grid with detergent while ho...

Page 22: ...raping the soiled area with cooktop cream Be sure to use a new sharp razor scraper Do not use a dull or nicked blade If any soil remains repeat the steps listed above To order more cream and or scrapers for cleaning your glass cooktop please call our toll free number National Parts Center 800 626 2002 Cleaner WX10X300 Scraper WX5X1614 Cream scraper kit WB64X5027 Special Care for Sugary Spills Be s...

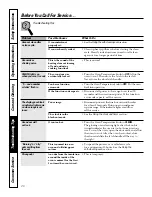
Page 23: ...come less the cookware and the surface visible in time as a result of cleaning of the cooktop Cookware has been slid across the cooktop surface Areas of discoloration Improper cookware Marks from aluminum and copper pans as well as on the cooktop being used mineral deposits from water or food can be removed with the cleaning cream Plastic melted Hot cooktop came into See the Special Care informati...

Page 24: ... Shelf position is incorrect or See the Using the oven section the shelf is not level Incorrect cookware or See the Using the oven section cookware of improper size being used Oven thermostat needs See the Adjust the oven thermostat Do it yourself adjustment section Food does not Oven controls improperly set Make sure you turn the knob all the way to the broil properly BROIL position Door not open...

Page 25: ...instructions in the Care and cleaning of your range section Oven will not self clean The oven temperature Allow the range to cool to room temperature and reset is too high to set a the controls self clean operation Oven controls improperly set Make sure you turn the control knob all the way to the CLEAN position Oven door is not in Make sure you move the door latch handle all the the locked positi...

Page 26: ...s Disconnect all power to the range for at least 30 seconds and then reconnect power If the function error code repeats call for service The display goes blank Power surge Disconnect power at the fuse box or circuit breaker or indicator lights come for at least 10 seconds Turn power on and power on when range is not up your range If the indicator lights are still on in use call for service The clo...

Page 27: ...27 Safety Instructions Operating Instructions Safety Instructions Operating Instructions Care and Cleaning Troubleshooting Tips Customer Service Notes ...

Page 28: ...28 Customer Service Troubleshooting Tips Care and Cleaning Operating Instructions Safety Instructions Notes ...

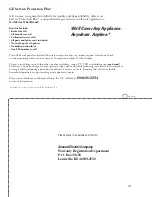
Page 29: ...otection or you may request your money back on the remaining value of your contract No questions asked It s that simple Protect your refrigerator dishwasher washer and dryer range TV VCR and much more any brand Plus there s no extra charge for emergency service and low monthly financing is available Even icemaker coverage and food spoilage protection is offered You can rest easy knowing that all y...

Page 30: ... that your product is registered or register online at www geappliances com 1 2 3 Model Number Serial Number Cut here Complete and mail your Consumer Product Ownership Registration today Have the peace of mind of knowing we can contact you in the unlikely event of a safety modification After mailing the registration below store this document in a safe place It contains information you will need sh...

Page 31: ...roduct Improper installation Failure of the product if it is abused misused or used for other than the intended purpose or used commercially Damage to the glass cooktop caused by use of cleaners other than the recommended cleaning creams Damage to the glass cooktop caused by hardened spills of sugary materials or melted plastic that are not cleaned according to the directions in the Owner s Manual...

Page 32: ...scount GE Consumer Service will still be there after your warranty expires Parts and Accessories 800 626 2002 Individuals qualified to service their own appliances can have parts or accessories sent directly to their homes VISA MasterCard and Discover cards are accepted Instructions contained in this manual cover procedures to be performed by any user Other servicing generally should be referred t...

Reviews: