background image

24. 

Reinstall the evaporator fan/motor assembly. Check for

proper rotation and clearance.

25. 

Reinstall freezer rear panel (plenum) and icemaker.

Check to be sure icemaker fill tube is positioned
correctly over the fill cup.

26. 

Reinstall light shield or ice bucket depending on the

model.

FINAL INSTALLATION and CHECKLIST:

Again, check PermaGum seals on the heat exchanger, wire
grommet and drain tube hole on the machine compartment
side.

Check to be sure that drain tube is secured with clamps and
discharges into the compressor drain pan.

Connect power.

Install front grille panel cover.

Turn temperature control to position 5.

Wait to verify that evaporator fan is running. Allow several
minutes for the evaporator fan delay to reset.

HEATER

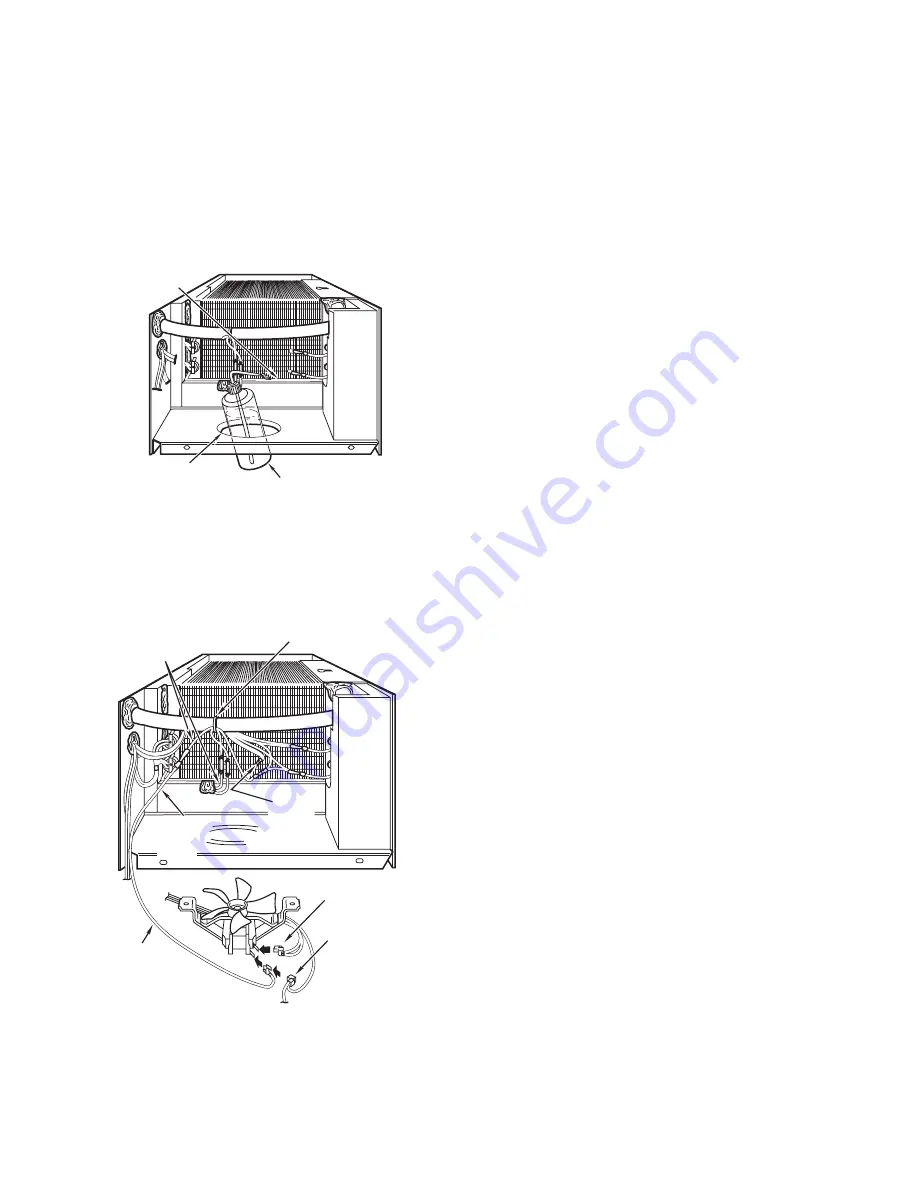
WIRES

WIRE TIE

BLUE
WIRE
MOTOR

ORANGE
JUMPER

WIRE

ORANGE
WIRE 
MOTOR

ORANGE

JUMPER 

WIRE

PINK 

WIRES

(FEMALE

CONNECTOR)

REAR VIEW

522-08P

SPECIFICATIONS SUBJECT TO CHANGE WITHOUT NOTICE

N.D. 522-08M 6/00

Installation Instructions

Page 4 of 4

70836-00

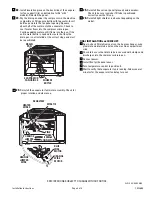
22. 

Install insulation piece on the back side of the evapora-

tor fan support (trim on dotted line for 36" or 42"
models). Reinstall the panel.

23. 

Dry the drain pan under the compressor in the machine

compartment. Fill squeeze bottle with tap water. Insert
bottle up and into the fan panel opening. Squeeze
about half of the water onto the evaporator. Check to
see if water flows into the compressor drain pan.
Continue adding water until it flows into the pan. If the
entire water bottle is needed to create the flow, the
drain pan is not installed at the correct slope and must
be repositioned.

DRAIN 

PAN

EVAPORATOR

FAN ORIFICE

SQUEEZE 

BOTTLE

522-08M

Summary of Contents for WR49X10021

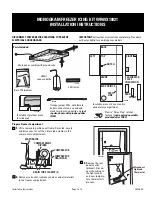
Page 1: ...ieces to cover entire evaporator compartment 2 Wire ties Prepare Freezer Compartment 1 Lift to remove top grille panel frame Set aside Locate and disconnect or cut the 2 drain tube clamps in the compressor compartment 2 Remove ice bucket icemaker shelves and all materials in the freezer compartment 3 Remove the rear panel section plenum Discon nect the wiring to the light socket and over tempera t...

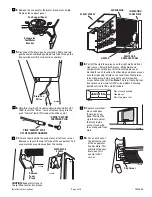
Page 2: ...ft sides rear and front Next place top ceiling piece being sure not to cover mounting screw hole on the left side Note The top front and rear front pieces are sized to fit 48 wide models Cut along dotted cut line for 36 and 42 models 9 Replace styrofoam piece with new foam piece sup plied Position the styrofoam against the front inside corner flush with the ceiling and front wall 10 Cut a notch ou...

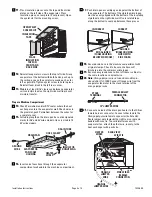
Page 3: ...t in the same location as original wire 20 Note Orange jumper wire not used on models pro duced after Oct 1994 Connect Orange wire from the evaporator fan motor to the stack terminal of the orange jumper wire 21 Connect one lead of the drain pan heater to the Yellow female harness connector Connect other lead to the Orange jumper wire female connector bullet end Route jumper wire towards the right...

Page 4: ...n delay to reset HEATER WIRES WIRE TIE BLUE WIRE MOTOR ORANGE JUMPER WIRE ORANGE WIRE MOTOR ORANGE JUMPER WIRE PINK WIRES FEMALE CONNECTOR REAR VIEW 522 08P SPECIFICATIONS SUBJECT TO CHANGE WITHOUT NOTICE N D 522 08M 6 00 Installation Instructions Page 4 of 4 70836 00 22 Install insulation piece on the back side of the evapora tor fan support trim on dotted line for 36 or 42 models Reinstall the p...

Reviews: