GE H
EALTHCARE
D
IRECTION
FQ091013, R
EVISION
1
V
IVID
I
N
AND
V
IVID
Q
N S
ERVICE
M
ANUAL
3-68
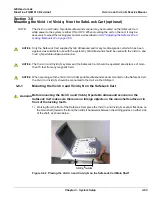
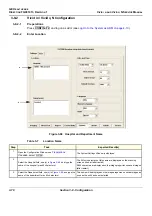
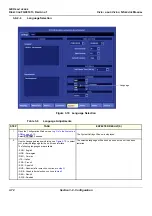
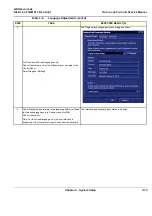
Section 3-8 - Mounting the Vivid i n/ Vivid q N on the SafeLock Cart (optional)
3-8-2
Adjusting the SafeLock Cart Locking Mechanism
NOTE:
The alignment procedure below is recommended in the event that when mounting the Vivid i n
and Vivid q N portable ultrasound scanner on the SafeLock Cart, the unit does not lock firmly
in position when inserted into the safelocks. Alternatively, if when removing the unit from the
Cart, it is difficult to disengage the safelocks.
1.) Working from the left side of the SafeLock Cart, remove the DVD from the DVD/CD-RW device.
Working from underneath the main shelf, loosen and remove the four screws (two each side) from
the DVD/CD-RW device bracket, then remove the bracket and the device - see
2.) Working from the underneath the main shelf, use a Phillips screwdriver to loosen the two screws
(half turn counter-clockwise) holding the middle locking tooth in position on both the left and right
sides of the main shelf, as shown below.
3.) Check that the Vivid
i
n and Vivid q N portable ultrasound scanner is locked correctly onto the two
rear locking teeth (if not, push the scanner fully back into position until an audible click is heard).
4.) Carefully tighten the four screws previously loosened in
5.) Reconfirm that the scanner is firmly locked into position and there is no excess play (movement)
between the scanner and the Cart before returning the DVD/CD-RW device and bracket.
Figure 3-66 Figure 3-85--DVD/CD Device and Bracket
Figure 3-67 Figure 3-86--Adjusting the SafeLock Cart Locking Mechanism
Note
: only two screws
visible in picture
Screw
Screw
Middle Locking Teeth Viewed from Top of Shelf
Screws Viewed from Beneath Shelf
Summary of Contents for Vivid in
Page 2: ......
Page 30: ...GE HEALTHCARE DIRECTION FQ091013 REVISION 1 VIVID I N AND VIVID Q N SERVICE MANUAL xxviii...
Page 739: ......

