background image

30

How to Use the Shelf
When Microwaving

Food microwaves best when
placed on the turntable.

Only use the shelf when
reheating on more than
one level. Do not store the
shelf inside the oven cavity.

Make sure the shelf is
positioned properly
inside the microwave
to prevent damage to
the oven from arcing.

Do not use a
microwave browning
dish on the shelf. 
The shelf could 
overheat.

Do not use the oven
with the shelf on the
microwave floor. This
could damage the
microwave.

Use pot holders when
handling the shelf—
it may be hot.

Do not use the shelf
when cooking
popcorn.

Do not use the shelf
with Sensor Cooking
or Reheat.

For best results

2-level reheating

Operating Instructions

Other Features Your Model May Have

Shelf

Summary of Contents for SpacemakerXL JVM1640WH001

Page 1: ...Call For Service 38 GE Service Numbers 42 Warranty Back Cover GE Appliances 11 Important Safety Information Precautions to Avoid Possible Exposure to Excessive Microwave Energy 2 Special Notes About...

Page 2: ...n door operation can result in harmful exposure to microwave energy It is important not to defeat or tamper with the safety interlocks Do Not Place any object between the oven front face and the door...

Page 3: ...he inside back cover of this manual You will need it to obtain service under warranty Help us help you Before you call for service there are a few things you can do to help us serve you better Read th...

Page 4: ...oking equipment Do not operate this appliance if it has a damaged power cord or plug if it is not working properly or if it has been damaged or dropped If the power cord is damaged it must be replaced...

Page 5: ...the oven Do not use the oven for storage purposes Do not leave paper products cooking utensils or food in the oven when not in use If materials inside oven ignite keep the oven door closed turn the o...

Page 6: ...pcorn labeled for use in microwave ovens Some products such as whole eggs and sealed containers for example closed jars are able to explode and should not be heated in this microwave oven Such use of...

Page 7: ...glass jars even with the lid off Make sure all infant food is thoroughly cooked Stir food to distribute the heat evenly Be careful to prevent scalding when warming formula or breast milk The containe...

Page 8: ...ontaining nylon or nylon filaments should be avoided as they may also ignite Some styrofoam trays like those that meat is packaged on have a thin strip of metal embedded in the bottom When microwaved...

Page 9: ...without complete supervision The fan will operate automatically under certain conditions see Automatic Fan feature Take care to prevent the starting and spreading of accidental cooking fires while th...

Page 10: ...prong wall outlet Do not under any circum stances cut or remove the third ground prong from the power cord Do not use an adapter plug with this appliance Do not use an extension cord with this applia...

Page 11: ...g microwaves confined in the oven 4 Shelf Lets you microwave several foods at once Food microwaves best when placed directly on the oven floor or turntable 5 Touch Control Panel You must set the clock...

Page 12: ...Press twice Amount of defrosting time EXPRESS COOK Starts immediately POWER LEVEL Power level 1 10 ADD 30 SEC Starts immediately 12 Quick Start The Controls on Your Microwave Oven Throughout this man...

Page 13: ...mediately 1 3 servings COOK Food type1 9 weight REHEAT Food type 1 6 1 3 servings DEFROST AUTO TIME Food weight Press once 2 HELP Press this pad and any feature pad for usage instructions and tips GUI...

Page 14: ...icrowave energy cycles off give time for the food to equalize or transfer heat to the inside of the food An example of this is shown with power level 3 the defrost cycle If micro wave energy did not c...

Page 15: ...ng Here s how to do it 1 Press TIME COOK 2 Enter the first cook time 3 Change the power level if you don t want full power Press POWER LEVEL Select a desired power level 1 10 4 Press TIME COOK again 5...

Page 16: ...10 min In 2 qt casserole place 1 2 cup water 11 4 to 11 2 lbs fresh spears 1 bunch 9 to 13 min In 2 qt oblong glass baking dish place 11 4 to 11 2 lbs 1 4 cup water frozen 10 oz package 5 to 7 min In...

Page 17: ...1 4 cup water frozen 10 oz package 5 to 7 min In 1 qt casserole place 2 tablespoons water Potatoes fresh cubed 4 potatoes 9 to 12 min Peel and cut into 1 inch cubes Place in white 6 to 8 oz each 2 qt...

Page 18: ...in paper or plastic can be defrosted in the package Tightly closed packages should be slit pierced or vented AFTER food has partially defrosted Plastic storage containers should be at least partially...

Page 19: ...fter half the time and shield warm areas with foil When finished separate pieces and let stand to complete defrosting Poultry Chicken broiler fryer 15 to 19 min Place wrapped chicken in dish Unwrap cu...

Page 20: ...ick way to set 30 seconds of cooking time Add 30 Seconds This is a quick way to set cooking time for 1 6 minutes Press one of the Express Cook pads from 1 to 6 for 1 to 6 minutes of cooking at power l...

Page 21: ...overcooks consistently you can add or subtract 20 30 seconds to the automatic popping time To add time After pressing POPCORN press 9 immediately after the oven starts for an extra 20 seconds Press 9...

Page 22: ...en starts immediately The serving size is automatically set at 1 but can be changed by pressing 2 or 3 right after pressing BEVERAGE Drinks heated with the Beverage feature may be very hot Remove the...

Page 23: ...o 16 oz Use microwave safe casserole or bowl Add 2 tablespoons water for each serving Cover with lid or vented plastic wrap 4 Potatoes 8 to 40 oz Pierce skin with fork Place potatoes on oven floor or...

Page 24: ...ve safe dish Twice during defrost the oven signals TURN At each TURN signal turn the food over Remove defrosted meat or shield warm areas with small pieces of foil After defrosting most meats need to...

Page 25: ...o remind you that you have food in the oven the oven will display FOOD IS READY and beep once a minute until you either open the oven door or press CLEAR OFF Cooking Complete Reminder Press to enter t...

Page 26: ...display the clock repeat Display On Off Delay Start allows you to set the microwave to delay cooking up to 24 hours 1 Press DELAY START 2 Enter the time you want the oven to start Be sure the microwav...

Page 27: ...REMINDER When Reminder signal occurs press REMINDER to turn it off The Reminder time may be displayed by pressing REMINDER NOTE The REM indicator will remain lit to show that the Reminder is set To cl...

Page 28: ...tarted or used by children To lock or unlock the controls press and hold CLEAR OFF for about three seconds When the control panel is locked an L will be displayed to the extreme right Child Lock Out F...

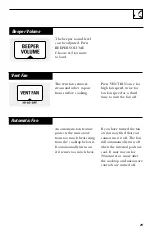
Page 29: ...se 0 3 for mute to loud Beeper Volume An automatic fan feature protects the microwave from too much heat rising from the cooktop below it It automatically turns on if it senses too much heat If you ha...

Page 30: ...ve to prevent damage to the oven from arcing Do not use a microwave browning dish on the shelf The shelf could overheat Do not use the oven with the shelf on the microwave floor This could damage the...

Page 31: ...reheat on 2 levels or To reheat 2 dishes on the lower level 1 Multiply reheat time by 11 2 2 Switch places after 1 2 the time Shelf and Reheating Switch places after 1 2 time Switch places after 1 2...

Page 32: ...er allows excess steam to escape Shielding In a regular oven you shield chicken breasts or baked foods to prevent over browning When microwaving you use small strips of foil to shield thin parts such...

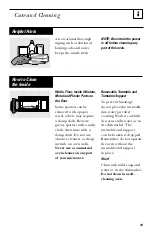
Page 33: ...h then rinse with a damp cloth Do not use abrasive cleaners or sharp utensils on oven walls Never use a commercial oven cleaner on any part of your microwave Removable Turntable and Turntable Support...

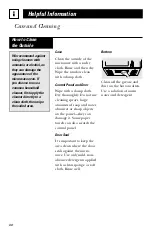
Page 34: ...tch the control panel Door Seal It s important to keep the area clean where the door seals against the micro wave Use only mild non abrasive detergents applied with a clean sponge or soft cloth Rinse...

Page 35: ...your GE supplier Cooktop Light 1 To replace the oven light first disconnect the power at the main fuse or circuit breaker panel or pull the plug 2 Remove the top grille by taking out the 2 screws that...

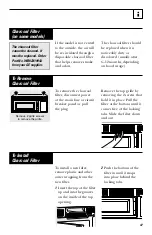
Page 36: ...n the filters must ALWAYS be in place when the hood is used The grease filters should be cleaned once a month or as needed Reusable Grease Filters To remove slide it to the rear using the tab Pull it...

Page 37: ...e the charcoal filter disconnect power at the main fuse or circuit breaker panel or pull the plug Remove the top grille by removing the 2 screws that hold it in place Pull the filter at the bottom unt...

Page 38: ...ck in Plug not fully inserted Make sure the 3 prong plug on the into wall outlet oven is fully inserted into wall outlet The cooktop light is This is normal located below the oven floor When the light...

Page 39: ...le oven is operating TV radio interference might be noticed while using the microwave Similar to the interference caused by other small appliances it does not indicate a problem with the microwave Plu...

Page 40: ...40 Notes...

Page 41: ...41 Notes...

Page 42: ...com 800 TDD GEAC 800 833 4322 GE supports the Universal Design concept products services and environments that can be used by people of all ages sizes and capabilities We recognize the need to design...

Page 43: ...cedures to be performed by any user Other servicing generally should be referred to qualified service personnel Caution must be exercised since improper servicing may cause unsafe operation Parts and...

Page 44: ...VEN WARRANTY What Is Covered What Is Not Covered Staple sales slip or cancelled check here Proof of original purchase date is needed to obtain service under warranty Service trips to your home to teac...

Reviews: