Refer to your Simon XT panel documentation for other
programming options.
Sensor test
The touch screen is sensitive to its orientation to the control panel.
For that reason, we recommend you test the touch screen before
you mount it on the wall.
To test the touch screen with the Simon XT panel:
1. Make sure the panel is disarmed.
2. Press the down arrow button on the panel and scroll to
System Programming.
3. Press
OK.
4. When the panel displays
Enter Code
, enter the appropriate
code and press OK.
5. Scroll until the panel displays
Sensor Test
, press OK to
start the sensor test.
The panel will prompt you to trip each sensor one at a time.
6. To trip the touch screen, press and hold the Emergency
button for 5 seconds.
You can follow the panel voice prompting to test the sensors
in any order. You should hear the panel beep the number of
packets received. The panel will also display the number of
packets received. If you do not hear 6 to 8 panel beeps, see
“To relocate the touch screen:” below.
We recommend that you test the touch screen after all
programming is completed and whenever a touch screen related
problem occurs.
To verify communication between the panel and the touch screen,
exit programming mode and then press the System Status icon on
the touch screen. The touch screen should announce the correct
system status.
To relocate the touch screen:
1. Test the touch screen a few inches from the original position.
2. Increase the distance from the original position. Retest until
an acceptable location is found.
3. Mount the touch screen in the new location (see Mounting).
Note:
If you cannot get the touch screen to trip, test a known good
touch screen at the same location. If the replacement touch
screen functions, contact GE Security for repair or replacement of
the faulty touch screen.
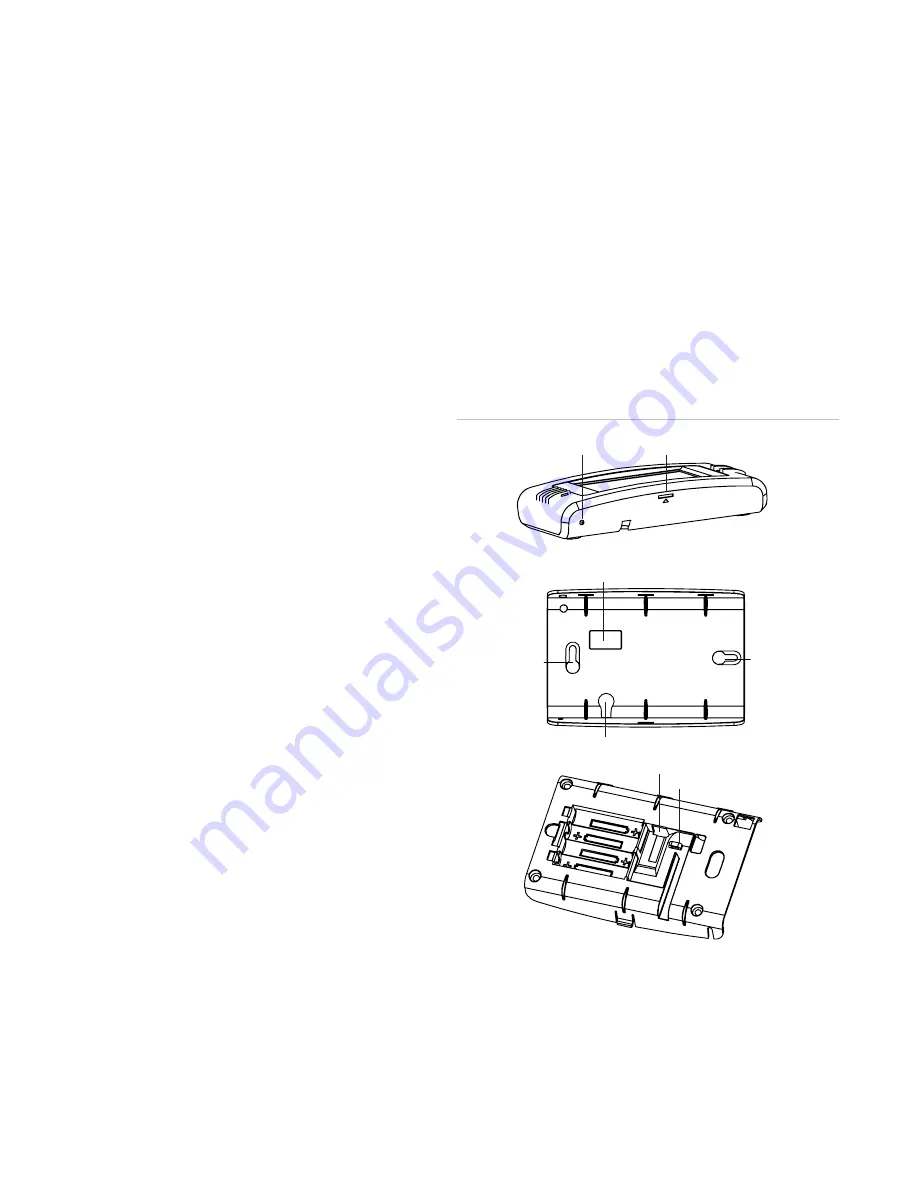
To mount the touch screen:
1. Remove the touch screen from the mounting base by
inserting a small screwdriver into the slot on the bottom of
the touch screen (see Figure 1 below).
2. Hold the base on the wall at the mounting location and mark
the mounting holes, antenna drop, and power drop.
3. Drill 1/8 inch holes into the wall for plastic anchors at the
mounting hole locations. Cut both the antenna and power
wire drop openings to the size of the opening in the base.
4. Push the two plastic anchors into the drilled holes and tighten
screws within a ¼ inch of the anchors.
5. Feed the power supply plug through the power wire opening.
6. Hang the base over the screws, level, and tighten the screws.
7. Load four AAA batteries into the battery compartment on the
back of the touch screen.
8. Plug the power into the back of the touch screen, and secure
the power wire to the loop with the tie wrap provided.
9. Feed the antenna wire from the back of the touch screen
through the rectangular wire drop opening in the wall.
10. Angle the top of the touch screen into the hooks on the top of
the base. Start feeding the power cable through the wire
drop, and swing the bottom of the touch screen into the
lower part of the base until you hear it click.
Note:
If necessary, use a soft cloth to clear smudges on the
screen; do not use glass cleaner on the screen.
Figure 1: Mounting
Opening slot
Reset button
Antenna wire opening
Mounting
hole
Mounting
hole
Power wire opening
Power plug-in
Power wire loop
Batteries
Operation
Refer to the Simon XT Touch Screen Quick Operation Guide for
basic touch screen operation information. Refer to the panel
documentation for complete Simon XT programming and
operation information.
2 of 4
P/N 466-2383 • REV A • ISS 02MAR10


