49-5000400 Rev. 5
5
Installation Instructions
To Install Thermostat and Main Control
IMPORTANT: Thermostat installation must conform to
local and national building and electrical codes and
ordinances.
NOTE:
It is recommended to mount the thermostat between
4 and 5 feet above the floor. It is not recommended to
mount the thermostat on an outside wall, in direct sunlight,
behind a door, or in an area affected by a vent or duct.
1. Turn off power to the heating and cooling system by
removing the fuse or switching off the appropriate
circuit breaker. (115 VAC and 12VDC).
2. Mount main control box to the mounting template
using four screws.
3. Remove three screws from the main control box,
allowing the bottom section to hinge open. Control
board is now visible and accessible.
4. Route the 115 VAC power cord through the strain
relief of the control box. Tighten the strain relief,
making sure not to damage the wires.
5. Using wire connectors, connect line to black, neutral
to white, and ground to green.
6. Using electrical tape or wire nuts, secure the
connectors to prevent any potential movement due
to vehicle vibration.
7. Route the 6 pin connector through the opening of the
hemmed strain relief of the control box. Mate 6 pin
connector to the control box’s wire harness.
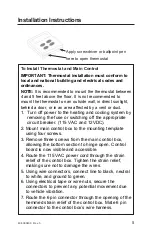
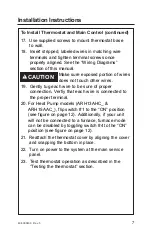
Apply screwdriver or ballpoint pen
here to open thermostat


