


Installation Instructions
10
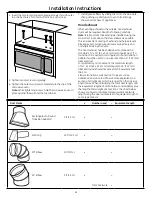
6.
Replace the blower plate and secure with the screws
removed in Step 1.
7.
Attach the exhaust adapter to the rear of the oven by
sliding it into the guides. Push in securely until it is in the
lower locking tabs. Make sure the damper hinge swings
freely.
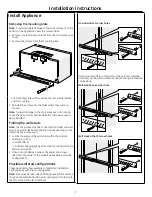
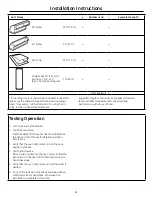
Preparing cabinet
1.
Remove power to outlet.
2. Remove all contents from upper cabinet.
3. Tape the TOP CABINET TEMPLATE onto the bottom surface.
Make sure the template centerline aligns with the vertical
line on the wall. Rear wall arrows must be against rear wall.
Note: For recessed cabinet bottom, trim the template
edges so that it fits inside the recessed area. The template
has trim lines to use as guides.
4. Drill 3\8" (10 mm) holes at "A", "B" and "C".
Note: Wear safety goggles when drilling holes in the
cabinet bottom.
5. Cut out the 2" (51 mm) hole at "D". This hole is for the power
supply cord.
Note: If the cabinet is metal, use the nylon grommet
around the opening to protect the cord.
6. Roof venting installation only: Cut out the shaded area "E" on
the TOP CABINET TEMPLATE using a saber or keyhole saw.
7. Remove templates from back wall and cabinet.
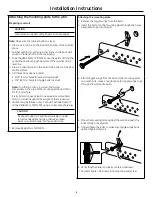
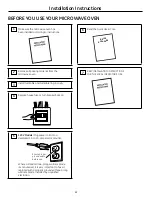
Mounting the microwave oven
Notes
• If the bottom of the upper cabinet is recessed or has front
overhang, you will need to prepare 2" x 2" (51 mm x 51 mm) -
depth equivalent to cabinet recess or overhang) filler blocks
to provide additional support for the bolts:
• mark the center of each filler block and drill a 3\8"
(10 mm) diameter hole
• align filler blocks over the three openings on top of
the microwave oven and attach with masking tape
• Use at least two people to install the microwave oven.
Do not grip or use handle during the installation.
• When mounting the microwave oven, thread power cord
through hole in bottom of top cabinet. Keep the cord tight
and do not pinch it, especially when mounting flush to
bottom of cabinet. Do not pull the cord to lift the oven.
1. Lift the microwave, tilt it forward, and hook slots at back
bottom edge onto four lower tabs of the mounting plate.
2. Rotate the front of the oven up against cabinet bottom.
3. Insert a self-aligning screw (item A) through top center
cabinet hole. Temporarily secure the oven by turning
the screw at least two full turns after the threads have
engaged.