background image

49-2000723  Rev. 0

27

TROUBLESHOOTING TIPS

Problem

Possible Cause

What To Do

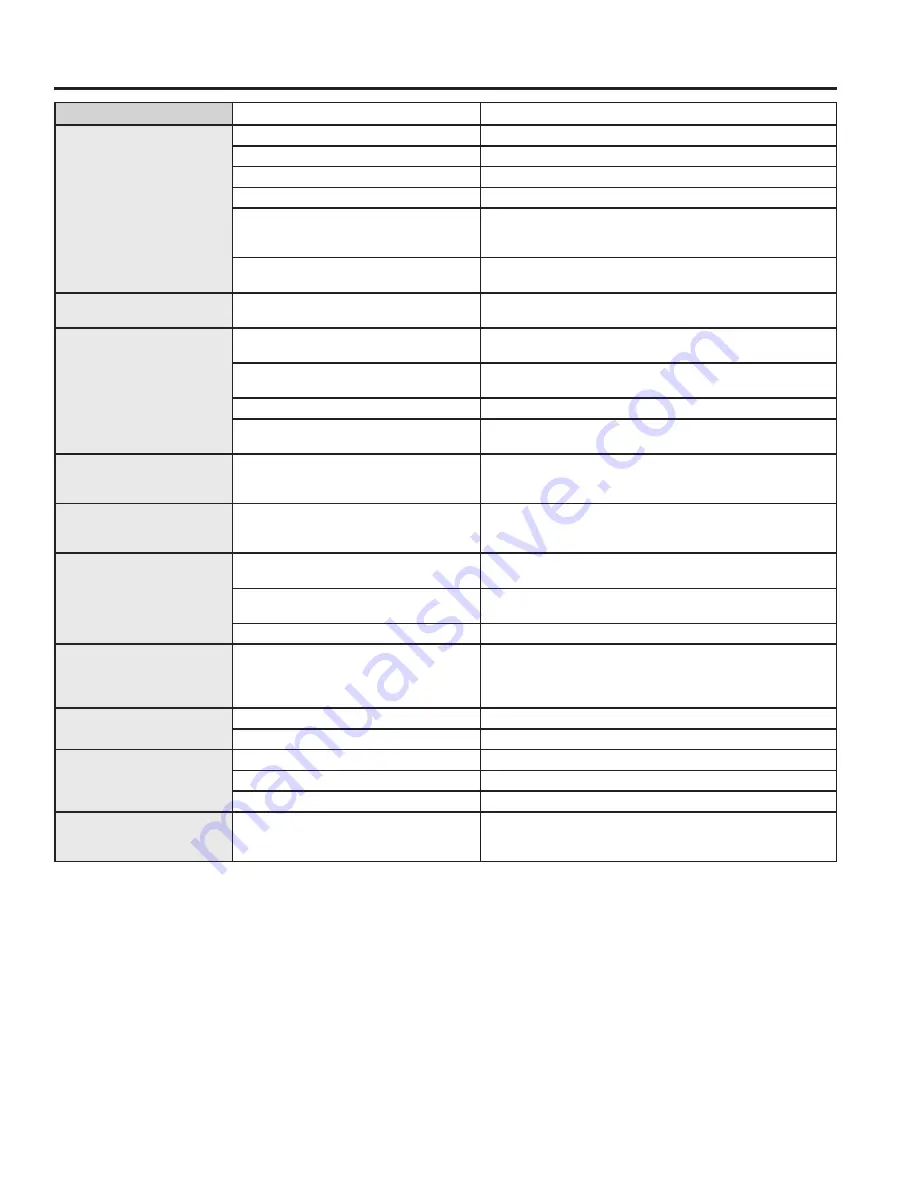
Food does not broil properly Oven controls improperly set.

Make sure you select the appropriate broil mode. 

Improper rack position being used.

See Cooking Guide for rack location suggestions.

Food being cooked in a hot pan.

Make sure cookware is cool.

Cookware not suited for broiling.

Use a pan specifically designed for broiling.

Aluminum foil used on the broiling pan 

and grid has not been fitted properly and 

slit as recommended.

If using aluminum foil conform to pan slits. 

In some areas the power (voltage) may 

be low.

Preheat the broil element for 10 minutes.

Oven temperature too hot or 

too cold

Oven temperature needs adjustment.

See Settings section found on page 13.

Oven does not work or 

appears not to work

Plug on range is not completely inserted 

in the electrical outlet.

Make sure electrical plug is plugged into a live, properly 

grounded outlet.

A fuse in your home may be blown or 

the circuit breaker tripped.

Replace the fuse or reset the circuit breaker.

Oven controls improperly set.

See the Using the Range section.

Oven is in Sabbath Mode.

Verify, that the oven is not in Sabbath Mode. See Settings 

section found on page 13.

“Crackling” or “popping” 

sound

This is the sound of the metal heating 

and cooling during both the cooking and 

cleaning functions.

This is normal. 

Why is my range making a 

"clicking" noise when using 

my oven?

Your range cycles the heating elements 

by turning relays on and off to maintain 

the oven temperature.

This is normal.

Clock and timer do not work A fuse in your home may be blown or 

the circuit breaker tripped.

Replace the fuse or reset the circuit breaker.

Plug on range is not completely inserted 

in the electrical outlet.

Make sure electrical plug is plugged into a live, properly 

grounded outlet.

Oven controls improperly set.

See the Oven Control section.

Oven door is crooked

The door is out of position.

Because the oven door is removable, it sometimes gets out of 

position during installation. To straighten the door, re-install the 

door. See the "Lift-Off Oven Door" instructions in the "Care and 

Cleaning" section.

Oven light does not work

Light bulb is loose or defective.

Tighten or replace bulb.

Pad operating light is broken.

Call for service.

Oven will not steam clean.

Display flashes HOT.

Allow the oven to cool to room temperature and reset the controls.

Oven controls improperly set.

See the Using Steam Clean section.

Oven door is not closed.

Make sure you close the door to start steam clean cycle.

Excessive smoking during 

clean cycle

Excessive soil or grease.

Press the 

Cancel/Off

 pad. Open the windows to rid the room 

of smoke. Wait until the 

LOCKED

 light goes off. Wipe up the 

excess soil and reset the clean cycle.

Troubleshooting Tips ...

 Before you call for service

Summary of Contents for PSS93

Page 1: ...trademark license SAFETY INFORMATION 3 USING THE RANGE Surface Units 7 Cookware for Radiant Glass Cooktop 10 Oven Controls 11 Cooking Options 12 Settings 13 Sabbath Mode 14 Oven Racks 15 Aluminum Foil and Oven Liners 16 Cookware 16 Cooking Modes 16 Oven Probe 18 Cooking Guide 19 CARE AND CLEANING Cleaning the Range Exterior 20 Cleaning the Range Interior 21 Cleaning the Glass Cooktop 22 Oven Probe...

Page 2: ...es into every GE Appliances product and we think you will too Among other things registration of your appliance ensures that we can deliver important product information and warranty details when you need them Register your GE appliance now online Helpful websites and phone numbers are available in the Consumer Support section of this Owner s Manual You may also mail in the pre printed registratio...

Page 3: ...is appliance only for its intended purpose as described in this Owner s Manual Be sure your appliance is properly installed and grounded by a qualified installer in accordance with the provided installation instructions Do not attempt to repair or replace any part of your range unless it is specifically recommended in this manual All other servicing should be transferred to a qualified technician ...

Page 4: ...on fire Never leave oil unattended while frying If allowed to heat beyond its smoking point oil may ignite resulting in fire that may spread to surrounding cabinets Use a deep fat thermometer whenever possible to monitor oil temperature To avoid oil spillover and fire use a minimum amount of oil when shallow pan frying and avoid cooking frozen foods with excessive amounts of ice Only certain types...

Page 5: ... off may cause them to ignite also If power is lost to an electric cooktop while a surface unit is ON the surface unit will turn back on as soon as power is restored In the event of power loss failure to turn all surface unit knobs to the OFF position may result in ignition of items on or near the cooktop leading to serious injury or death WARNING OVEN SAFETY INSTRUCTIONS Stand away from the range...

Page 6: ...d and found to comply with the limits for a Class B digital device pursuant to part 15 of the FCC Rules These limits are designed to a provide reasonable protection against harmful interference in a residential installation This equipment generates uses and can radiate radio frequency energy and if not installed and used in accordance with the instructions may cause harmful interference to radio c...

Page 7: ...ach touch to any pad Power level can be selected in any of the following ways 1 Swipe the gray arc on the graphics to the desired power level There is no sensor on the LEDs or 2 Touch Anywhere along the gray arc or 3 Touch or pads to adjust power level or 4 Shortcut to Hi Immediately after turning unit on touch the pad or 5 Shortcut to Low Immediately after turning unit on touch the pad NOTE When ...

Page 8: ...ng pastries or breads the cover should be vented to allow moisture to escape The initial temperature type and amount of food type of pan and the time held will affect the quality of the food Always use pot holders or oven mitts when removing food from the WARMING ZONE since cookware and plates will be hot NOTE The surface warmer will not glow red How To Synchronize Left Elements Multi Ring Burner ...

Page 9: ...f new parts and insulating materials and will disappear in a short time NOTE On models with light colored glass cooktops it is normal for the cooking zones to change color when hot or cooling down This is temporary and will disappear as the glass cools to room temperature The surface unit will cycle on and off to maintain your selected control setting It is safe to place hot cookware on the glass ...

Page 10: ...he enamel can melt and bond to the ceramic cooktop Glass ceramic Poor performance Will scratch the surface Stoneware Poor performance May scratch the surface Cast Iron not recommended unless designed specifically for glass cooktops Poor conductivity and slow to absorb heat Will scratch the cooktop surface Check pans for flat bottoms by using a straight edge Pans with rounded curved ridged or warpe...

Page 11: ...the Warming Zone on the cooktop 7 Timer Works as a countdown timer Press the Timer pad and number pads to program the time in hours and minutes Press the Start pad The timer countdown is complete To turn the timer off press the Timer pad 8 Oven Light Turns the oven light on or off 9 Lock Controls Locks out the control so that pressing the pads does not activate the controls Press and hold the Lock...

Page 12: ...Bake and Convection Roast Settings The Cooking Options and Settings pads open up more detailed menus in the display that allow access to additional functions For each you select the function in the display using the associated number pad You can exit at any time by pressing the Cooking Options or Settings pad again WiFi Connect Remote Enable Your oven is designed to provide you with two way commun...

Page 13: ...enabled products like an over the range microwave oven or range hood To pair those products to the range Press the Settings pad and select Bluetooth Select Pair and follow the corresponding instructions included with the mating Chef Connect enabled product The range will cancel pairing mode after two minutes if no mating device is detected Select Remove to confirm product is paired or to un pair f...

Page 14: ...umber pads to select a different preset cooking temperature and press Start Enter Starting a Timed Bake 1 Press the Bake pad 2 If the desired temperature is 350F use the 6 through 0 number pads to select a cooking time If a cooking temperature other than 350F is desired use the 1 through 5 number pads to select a preset cooking temperature then select the cooking time Refer to the graphic on this ...

Page 15: ...several times to distribute the lubricant To order additional graphite lubricant read the Accessories section of the manual To Remove An Extension Rack 1 Make sure the rack is pushed all the way into the oven so that side paddles on the rack disengage from the oven support 2 Slide the rack toward you to the bump stop position on the rack support 3 Firmly grasp both sides of the rack frame and the ...

Page 16: ...ecessary and never entirely cover an oven rack with aluminum foil Keep foil at least 1 1 2 from oven walls to prevent poor heat circulation Aluminum Foil and Oven Liners Cooking Modes Your new oven has a variety of cooking modes to help you get the best results These modes are described below Refer to the Cooking Guide section for rack position and other recommendations for specific modes and food...

Page 17: ...de is designed for cooking cakes breads cookies and similar foods on a single rack This mode is designed to provide lighter top browning and better volume Some foods may require slightly longer cook times relative to when cooked in the traditional bake mode Press Options and select Baked Goods than follow any display prompts to access this mode Convection Bake The Convection Bake mode is intended ...

Page 18: ...e Convection Bake or Convection Roast pad and enter the desired cooking temperature with the number pads 2 Insert the probe into the food see Proper Probe Placement 3 Once the oven is preheated place the food in the oven and connect the probe to the probe outlet making sure it is fully inserted Use caution the oven walls and probe outlet are hot 4 When the probe is connected the display will promp...

Page 19: ...ch food closely when broiling For best performance when broiling center food below the broil heating element Boneless chicken breasts Broil Low Bake 3 If breaded or coated in sauce avoid Broil Hi modes Broil skin side down first Watch food closely when broiling For best performance when broiling center food below the broil heating element Whole turkey Bake Convection Roast 1 Use a low sided pan su...

Page 20: ... the finish including Black Stainless Steel Oven Exterior Do not use oven cleaners abrasive cleansers strong liquid cleansers steel wool plastic scouring pads or cleaning powders on the interior or exterior of the oven Clean with a mild soap and water or vinegar and water solution Rinse with clean water and dry with a soft cloth When cleaning surfaces make sure that they are at room temperature an...

Page 21: ... and other enameled surfaces use a gentle abrasive containing oxalic acid such as Bar Keepers Friend with a non scratch sponge Take care not to apply any abrasive cleaners or sponges to the door glass as it will scratch the reflective coating The oven interior and door glass may be cleaned using a soft cloth with a mild soap and water or vinegar and water solution After cleaning rinse with clean w...

Page 22: ...ceramic cooktops rub the residue area applying pressure as needed 4 If any residue remains repeat the steps listed above as needed 5 For additional protection after all residue has been removed polish the entire surface with ceramic cooktop cleaner and a paper towel Heavy Burned On Residue 1 Allow the cooktop to cool 2 Use a single edge razor blade scraper at approximately a 45 angle against the g...

Page 23: ...Special care should be taken when removing hot substances Be sure to use a new sharp razor scraper Do not use a dull or nicked blade 1 Turn off all surface units Remove hot pans 2 Wearing an oven mitt a Use a single edge razor blade scraper to move the spill to a cool area on the cooktop b Remove the spill with paper towels 3 Any remaining spillover should be left until the surface of the cooktop ...

Page 24: ...lace 1 Use a new 120 130 volt halogen bulb not to exceed 50 watts Replace the bulb with the same type of bulb that was removed Be sure the replacement bulb is rated 120 volts or 130 volts NOT 12 volts 2 Using gloves or a dry cloth remove the bulb from its packaging Do not touch the bulb with bare fingers Oil from skin will damage the bulb and shorten its life 3 Push the bulb straight into the rece...

Page 25: ...the hinge locks up against the front frame of the oven cavity to the locked position 5 Close the oven door Removal position Hinge lock Slot Pull hinge locks down to unlock Push hinge locks up to lock Hinge lock Hinge arm Indentation Bottom edge of slot Hinge arm Oven Door The storage drawer is a good place to store cookware and bakeware Do not store plastics or flammable material in the drawer The...

Page 26: ...ed before next use See the Cleaning the glass cooktop section Hot surface on a model with a light colored cooktop This is normal The surface may appear discolored when it is hot This is temporary and will disappear as the glass cools Plastic melted to the surface Hot cooktop came into contact with plastic placed on the hot cooktop See the Glass surface potential for permanent damage section in the...

Page 27: ...during both the cooking and cleaning functions This is normal Why is my range making a clicking noise when using my oven Your range cycles the heating elements by turning relays on and off to maintain the oven temperature This is normal Clock and timer do not work A fuse in your home may be blown or the circuit breaker tripped Replace the fuse or reset the circuit breaker Plug on range is not comp...

Page 28: ...the oven was in use you must reset it by pressing the Cancel Off pad setting the clock and resetting any cooking function Burning or oily odor emitting from the vent This is normal in a new oven and will disappear in time To speed the process set a self clean cycle for a minimum of 3 hours See the Cleaning the Oven section Strong odor An odor from the insulation around the inside of the oven is no...

Page 29: ... of the range section Drawer is over loaded or load is unbalanced Reduce weight Redistribute drawer contents Steam from the vent When using the ovens it is normal to see steam coming out of the oven vents As the number of racks or amount of food being cooked increases the amount of visible steam will increase This is normal Water remaining on oven floor after Steam Clean cycle This is normal Remov...

Page 30: ...dental or consequential damage caused by possible defects with this appliance Damage caused after delivery Product not accessible to provide required service Service to repair or replace light bulbs except for LED lamps EXCLUSION OF IMPLIED WARRANTIES Your sole and exclusive remedy is product repair as provided in this Limited Warranty Any implied warranties including the implied warranties of mer...

Page 31: ...er Pan 8 x 1 x 13 Large Broiler Pan 12 x 1 x 16 XL Broiler Pan 17 x 1 x 19 1 4 Parts Oven racks Oven elements Light bulbs Cleaning Supplies CitruShine Stainless Steel Wipes Stainless Steel Appliance Cleaner Cleaning Pads for Ceramic Cooktops Ceramic Cooktop Cleaner Ceramic Cooktop Scraper Kit Kit includes cream and cooktop scraper The large broiler pan does not fit in 20 24 ranges The XL broiler p...

Page 32: ...er your warranty expires In the US GEAppliances com extended warranty or call 800 626 2224 during normal business hours In Canada GEAppliances ca en support purchase extended warranty or call 800 290 9029 Remote Connectivity For assistance with wireless network connectivity for models with remote enable visit our website at GEAppliances com connect or call 800 220 6899 in the US In Canada GEApplia...

Page 33: ...SÉCURITÉ 3 UTILISATION DE LA CUISINIÈRE Éléments de surface 7 Ustensiles de cuisson pour surface de cuisson en verre à éléments radiants 10 Commandes du four 11 Options de cuisson 12 Réglages 13 Mode sabbat 14 Grilles de four 15 Papier d aluminium et protections pour four 16 Ustensiles de cuisson 16 Modes de cuisson 16 Sonde thermique 18 Guide de cuisson 19 ENTRETIEN ET NETTOYAGE Nettoyage de la c...

Page 34: ...s et nous pensons que vous le serez aussi À cet égard l enregistrement de votre appareil nous assure que nous pourrons vous fournir des informations importantes sur votre appareil et des détails sur sa garantie si vous en avez besoin Enregistrez votre électroménager GE en ligne dès maintenant Des sites Web et des numéros de téléphone utiles sont disponibles dans la section Service à la clientèle d...

Page 35: ... prévues et décrites dans ce manuel Assurez vous que votre appareil est correctement installé et mis à la terre par un technicien qualifié conformément aux instructions d installation fournies Ne tentez pas de réparer ou de remplacer une pièce de la cuisinière sauf si cela est spécifiquement recommandé dans ce manuel Toutes les autres réparations doivent être confiées à un technicien qualifié Avan...

Page 36: ...umée l huile peut s enflammer et causer un incendie qui se propagerait jusqu aux armoires environnantes Utilisez un thermomètre à friture lorsque cela est possible pour surveiller la température de l huile Pour éviter les projections d huile et les incendies utilisez une quantité minimale d huile lorsque vous faites frire des aliments dans une casserole peu profonde et évitez de cuire des aliments...

Page 37: ...ment lui faire prendre feu Si l alimentation d une surface de cuisson électrique est coupée alors qu un élément est en marche l élément sera de nouveau activé à la reprise de l alimentation Dans le cas d une panne de courant le fait de ne pas fermer les boutons de tous les éléments de surface pourrait entraîner la combustion d articles sur la surface de cuisson ou près de celle ci causant de grave...

Page 38: ...a été démontré qu il respectait les limites imposées aux appareils numériques de classe B en vertu de la partie 15 des règlements de la FCC Ces limites ont été mises en place pour a assurer une protection raisonnable contre les interférences en milieu résidentiel Cet appareil génère utilise et émet des fréquences radio S il n est pas installé et utilisé conformément aux instructions il peut génére...

Page 39: ...he Le niveau de puissance peut être sélectionné de l une des manières suivantes 1 Faites glisser votre doigt sur l arc gris sur les symboles au niveau de puissance souhaitée Il n y a aucun capteur sur les DEL ou 2 Touchez n importe où le long de l arc gris ou 3 Appuyez sur les touches ou pour ajuster le niveau de puissance ou 4 Raccourci vers le niveau Hi élevé Immédiatement après avoir allumé un ...

Page 40: ...ouverture pour permettre à l humidité de s échapper La température initiale le type et la quantité de nourriture le type de casserole et la durée du maintien au chaud auront une incidence sur la qualité de la nourriture Utilisez toujours des poignées ou des gants isolants lorsque vous retirez des aliments de la ZONE RÉCHAUD Les ustensiles de cuisson et les plats seront chauds REMARQUE Le réchaud d...

Page 41: ...t normal Les pièces nouvelles et matériaux d isolation produisent cette odeur lorsqu ils chauffent mais ce phénomène disparaît rapidement REMARQUE La surface de cuisson pâle de certains modèles change de couleur lorsqu elle se chauffe ou refroidit Il s agit d une situation temporaire qui disparaît lorsque le verre refroidit L élément chauffant s active et se désactive pour maintenir la température...

Page 42: ...cuisson vitrocéramique Vitrocéramique Mauvais rendement Rayera la surface Grès Mauvais rendement Peut rayer la surface Fonte Non recommandée à moins que l ustensile soit spécialement conçu pour les surfaces de cuisson en verre Mauvaise conductivité et lente absorption de la chaleur Rayera la surface de cuisson Vérifier que le fond des ustensiles est plat à l aide d une règle Les ustensiles dont le...

Page 43: ...a surface de cuisson 7 Timer minuterie Sert de minuterie Appuyez sur la touche Timer minuterie et sur les touches numériques pour programmer les heures et les minutes Appuyez sur la touche Start mise en marche Le décompte de la minuterie est terminé Pour arrêter la minuterie appuyez sur la touche Timer minuterie 8 Oven Light lampe du four Appuyez sur cette touche pour allumer ou éteindre la lampe ...

Page 44: ...oisissez le mode de cuisson puis réglez la température de la sonde Veuillez vous reporter à la section Modes de cuisson pour plus de détails La sonde peut uniquement être utilisée en mode de cuisson au four cuisson à convection ou rôtissage à convection Réglages Les touches Cooking Options options de cuisson et Settings réglages ouvrent des menus plus détaillés sur l afficheur qui permettent d acc...

Page 45: ...ou des hottes de cuisinière Pour jumeler ces produits appuyez sur la touche Settings réglages et sélectionnez BluetoothMD Sélectionnez Pair jumeler et suivez les instructions accompagnant le produit Chef Connect à jumeler La cuisinière annulera le mode de jumelage après deux minutes si aucun dispositif à associer n est détecté Sélectionnez Remove supprimer pour confirmer que le produit est jumelé ...

Page 46: ...n préréglée différente puis appuyez sur Start Enter mise en marche entrer Démarrer une cuisson minutée 1 Appuyez sur la touche Bake cuisson au four 2 Si vous désirez utiliser une température de cuisson de 350 F 177 C appuyez sur les touches numériques de 6 à 0 pour sélectionner une durée de cuisson Si vous désirez utiliser une température de cuisson autre que 350 F 177 C appuyez sur les touches nu...

Page 47: ...le plusieurs fois pour étendre le lubrifiant Pour commander un lubrifiant à base de graphite reportez vous la section Accessoires du manuel Pour retirer une grille coulissante 1 Assurez vous que la grille est complètement enfoncée dans le four de façon à ce que les leviers latéraux du cadre de la grille puissent se désenclencher du support du four 2 Tirez la grille jusqu à la butée d arrêt du supp...

Page 48: ...nium à au moins 1 1 2 po 3 8 cm des parois du four afin d éviter une mauvaise circulation de la chaleur Papier d aluminium et protections pour four Modes de cuisson Votre nouveau four offre de nombreux modes de cuisson pour vous aider à obtenir de meilleurs résultats Ces modes de cuisson sont décrits ci dessous Reportez vous à la section Guide de cuisson pour des conseils sur la position des grill...

Page 49: ...cuisson Produits de boulangerie et pâtisseries Le mode Baked Goods produits de boulangerie et pâtisseries est conçu pour la cuisson des gâteaux du pain des biscuits et d autres aliments similaires sur une seule grille Ce mode de cuisson permet d obtenir un léger brunissement des aliments et un meilleur volume Certains aliments peuvent nécessiter des temps de cuisson légèrement plus longs que lorsq...

Page 50: ...iment reportez vous à la section Positionnement de la sonde thermique 3 Une fois que le four est préchauffé placez l aliment dans le four et branchez la sonde dans sa prise en vous assurant qu elle est complètement insérée Faites attention car les parois du four et la prise de sonde sont chaudes 4 Lorsque la sonde est connectée l afficheur vous invite à entrer la température souhaitée pour les ali...

Page 51: ...es aliments lorsque vous utilisez la cuisson au gril Pour de meilleures performances lors de la cuisson au gril centrez les aliments sous l élément chauffant du gril Poitrines de poulet désossées Cuisson au gril à basse température Cuisson au four 3 Pour les aliments panés ou couverts de sauce évitez le mode de cuisson au gril à température élevée Grillez d abord avec la peau vers le bas Vérifiez ...

Page 52: ...e noir Surfaces extérieures du four N utilisez pas de nettoyant pour four de nettoyant abrasif de nettoyant liquide fort de laine d acier de tampon à récurer en plastique ou de poudre à récurer pour nettoyer l extérieur ou l intérieur du four Utilisez un savon doux et de l eau ou une solution de vinaigre et d eau Rincez à l eau claire et asséchez avec un chiffon doux et propre Lors du nettoyage de...

Page 53: ... sole du four et les autres surfaces émaillées utilisez un abrasif doux contenant de l acide oxalique comme du Bar Keepers FriendMD avec une éponge anti égratignures Pour ne pas égratigner le revêtement réfléchissant de la porte prenez soin de ne pas utiliser de nettoyants ou d éponges abrasives sur la vitre de la porte L intérieur du four et la vitre de la porte peuvent être nettoyés à l aide d u...

Page 54: ...ttez la zone de résidus en appliquant une pression au besoin 4 Si des résidus subsistent répétez les étapes décrites ci dessus si besoin est 5 Pour une protection supplémentaire une fois tous les résidus éliminés polissez toute la surface avec un nettoyant pour surface de cuisson en vitrocéramique à l aide de papier essuie tout Résidus tenaces brûlés 1 Laissez la surface de cuisson refroidir compl...

Page 55: ...te par la garantie à moins qu ils ne soient éliminés lorsqu ils sont encore chauds Faites particulièrement attention lorsque vous retirez des substances chaudes Veillez à utiliser un grattoir à lame de rasoir neuve et tranchante N utilisez pas de lame émoussée ou entaillée 1 Arrêtez tous les éléments de surface Retirez les casseroles chaudes 2 À l aide d un gant isolant a Utilisez un grattoir à la...

Page 56: ...dessus Pour remplacer une ampoule 1 Utilisez une ampoule halogène de 120 130 V qui ne dépasse pas 50 W Remplacez l ampoule par une ampoule du même type que celle qui a été retirée Vérifiez que l ampoule de rechange a une tension nominale de 120 ou 130 V et NON 12 V 2 À l aide de gants ou d un chiffon sec retirez l ampoule de son emballage Ne touchez pas l ampoule à main nue Le sébum de la peau end...

Page 57: ...ur Position de retrait Dispositif de verrouillage de charnière Encoche de charnière Tirez les dispositifs de verrouillage de charnière vers le bas pour les déverrouiller Poussez les dispositifs de verrouillage de charnière vers le haut pour les verrouiller Dispositif de verrouillage de charnière Bras de charnière Encoche du bras de charnière Fond de l encoche Bras de charnière Porte du four Le tir...

Page 58: ...s avant réutilisation Consultez la section Nettoyage de la surface de cuisson en verre Surface chaude sur un modèle à verre de couleur claire Cela est normal Une décoloration peut apparaître lorsque la surface est chaude Ceci est temporaire et disparaît lorsque le verre refroidit Plastique fondu sur la surface de cuisson La surface de cuisson est entrée en contact avec du plastique lorsqu elle éta...

Page 59: ...les fonctions de cuisson et d autonettoyage Cela est normal Pourquoi ma cuisinière émet elle un cliquetis lorsque j utilise le four Votre cuisinière fait alterner les éléments chauffants en activant et désactivant les relais pour maintenir la température du four Cela est normal L horloge et la minuterie ne fonctionnent pas Un fusible de votre domicile peut être grillé ou le disjoncteur s est décle...

Page 60: ...us devez le reprogrammer en appuyant sur la touche Cancel Off annuler arrêt en remettant l horloge à l heure et en reprogrammant la fonction de cuisson choisie Odeur de brûlé ou d huile provenant de l évent Cela est normal pour un nouveau four et disparaît avec le temps Pour accélérer ce processus programmez un autonettoyage d au moins 3 heures Reportez vous à la section sur le nettoyage du four F...

Page 61: ...charge est mal répartie Diminuez le poids du tiroir Répartissez le contenu du tiroir De la vapeur s échappe de l évent Lorsque vous utilisez les fours il est normal de voir de la vapeur s échapper des évents de four Plus le nombre de grilles ou la quantité d aliments augmentent plus la vapeur dégagée est importante Cela est normal Il reste de l eau sur la sole du four après le cycle de nettoyage l...

Page 62: ... ou indirect causé par des défaillances possibles de l appareil Tout dommage causé après la livraison Tout produit auquel il n est pas possible d accéder pour effectuer les réparations nécessaires La réparation ou le remplacement d ampoules à l exception de DEL EXCLUSIONS DES GARANTIES IMPLICITES Votre seul et unique recours est de faire réparer le produit dans le cadre de cette garantie limitée T...

Page 63: ...po 43 2 x 3 2 x 48 9 cm Pièces Grilles de four Éléments de four Ampoules Fournitures de nettoyage Lingettes CitruShineMC pour acier inoxydable Nettoyant pour appareil en acier inoxydable Tampons pour surface de cuisson en vitrocéramique Nettoyant pour surface de cuisson en vitrocéramique Grattoir pour surface de cuisson en vitrocéramique Ensemble l ensemble comprend la crème de nettoyage et le gra...

Page 64: ... garantie Aux États Unis GEAppliances com extended warranty ou appelez au 1 800 626 2224 pendant les heures normales d ouverture Au Canada electromenagersge ca fr soutien achat d une garantie prolongee ou appelez au 1 800 290 9029 Connectivité à distance Pour de l assistance concernant la connectivité réseau sans fil pour les modèles avec activation à distance visitez notre site Web à GEAppliances...

Reviews: