background image

49-2000781  Rev. 2

* Compatible Apple or Android devices and home WiFi network required.

Cooking Options

USING THE RANGE:

&RRNLQJ

2SWLRQV6HWWLQJV

The Cooking Options pad opens up a menu of more cooking modes when the oven is off. It opens a menu with 
additional features if a cooking mode is already in process. You can exit the menu at any time by pressing the 

Cooking 

Options

 pad again.

You must first select a mode (bake, convection bake, convection roast) and then select Cooking Options to 
get to the following functions.

Cook Time

Counts down cooking time and turns off the oven when 
the cooking time is complete. Select a desired cooking 

PRGH8VHWKHQXPEHUSDGVWRSURJUDPDEDNLQJ
WHPSHUDWXUH3UHVVWKH

Cooking Options

 pad and select 

Cook Time

8VHWKHQXPEHUSDGWRSURJUDPFRRNWLPH

in hours and minutes. Then press 

Start/Enter

. This can 

only be used with Bake, Convection Bake, Convection 
Roast and Air Fry.

Delay Time

'HOD\VZKHQWKHRYHQZLOOWXUQRQ8VHWKLVWRVHWD

time when you want the oven to start. Select a desired 

FRRNLQJPRGH8VHWKHQXPEHUSDGWRSURJUDPDEDNLQJ
WHPSHUDWXUH3UHVVWKH

Cooking Options

 pad and select 

Delay Time

8VHWKHQXPEHUSDGVWRSURJUDPWKHWLPHRI

day for the oven to turn on, and then press 

Start/Enter

Delay Time is not available with all modes.

NOTE:

 When using the Delay Time feature, foods that 

spoil easily – such as milk, eggs, fish, stuffing, poultry, 
and pork – should not be allowed to sit for more than 

KRXUEHIRUHRUDIWHUFRRNLQJ5RRPWHPSHUDWXUH

promotes the growth of harmful bacteria. Be sure that the 
oven light is off because heat from the bulb will speed 
harmful bacteria growth.

Settings

The Cooking Options and Settings pads open up more detailed menus in the display that allow access to 
additional functions. For each you select the function in the display using the associated number pad. You 
can exit at any time by pressing the Cooking Options or Settings pad again.

WiFi Connect and Remote Enable

Your oven is designed to provide you with two-way 
communication between your appliance and smart 
device. By using the WiFi Connect features, you will 
be able to control essential oven operations such as 
temperature settings, timers and cooking modes using 
your smartphone or tablet.*

Select 

Settings 

then

 Wifi

 - follow the instructions on your 

oven display and phone app. It is necessary to turn on 
WiFi before using Remote Enable on your oven.

Connecting your WiFi Connect Enabled Oven

What you will need

Your GE Appliances oven uses your existing home WiFi 
network to communicate between the appliance and 
your smart device. In order to setup your GE Appliances 
oven, you will need to gather some information:

 (DFK*($SSOLDQFHVRYHQKDVDFRQQHFWHGDSSOLDQFH

information label that includes an Appliance Network 

1DPHDQG3DVVZRUG7KHVHDUHWKHWZRLPSRUWDQW

details that you will need to connect to the appliance. 
The label is typically located inside the door of the 
oven or drawer.

2.  Have your smart phone or tablet ready with the ability 

to access the internet and download apps.

3.  You will need to know the password of your home 

WiFi router. Have this password ready while you are 
setting up your GE Appliances oven.

Connect your GE Appliances oven

 2Q\RXUVPDUWSKRQHRUWDEOHWYLVLW


GEAppliances.com/connect

 to learn more about 

connected appliance features and to download the 
appropriate app.

2.  Follow the app onscreen instructions to connect your 

GE Appliances oven.

3.  Once the process is complete, the connection light 

located on your GE Appliances oven display will stay 
on solid and the app will confirm you are connected.

FCC:  ZKJ-WCATA001

Network: GE_XXXXXX_XXXX
Password: XXXXXXXX

PT. NO.  229C6272G001-0

IC: 10229A-WCATA001

MAC ID: XX - XX - XX - XX - XX - XX

Connected Appliance Information

Sample Label

Summary of Contents for PGS930

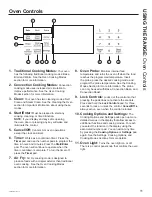
Page 1: ... THE RANGE In Case of a Power Failure 8 Surface Burners 8 Griddle 10 Oven Controls 11 Cooking Options 12 Settings 12 Sabbath Mode 14 Oven Racks 15 Aluminum Foil and Oven Liners 15 Oven Cooking Modes 16 Oven Air Vents 17 Oven Probe 17 Oven Cooking Guide 18 Air Fry Cooking Guide 20 CARE AND CLEANING Range Exterior 21 Range Interior 22 Cooktop 23 Door and Drawer 25 Oven Probe 25 Oven Light 26 Oven Do...

Page 2: ...es into every GE Appliances product and we think you will too Among other things registration of your appliance ensures that we can deliver important product information and warranty details when you need them Register your GE appliance now online Helpful websites and phone numbers are available in the Consumer Support section of this Owner s Manual You may also mail in the pre printed registratio...

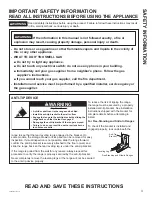
Page 3: ...e secured to the anti tip device properly WARNING If the information in this manual is not followed exactly a fire or explosion may result causing property damage personal injury or death Do not store or use gasoline or other flammable vapors and liquids in the vicinity of this or any other appliance WHAT TO DO IF YOU SMELL GAS Ŷ R QRW WU WR OLJKW DQ DSSOLDQFH Ŷ R QRW WRXFK DQ HOHFWULFDO VZLWFK GR...

Page 4: ...LG VFUDWFKLQJ RU LPSDFWLQJ JODVV GRRUV cooktops or control panels Doing so may lead to glass breakage Do not cook on a product with broken glass Shock fire or cuts may occur Ŷ R QRW OHDYH FKLOGUHQ DORQH RU XQDWWHQGHG LQ DQ area where an appliance is in use They should never be allowed to climb sit or stand on any part of the appliance Ŷ CAUTION Do not store items of interest to children in cabinet...

Page 5: ...ould spread to surrounding cabinets Ŷ 1HYHU OHDYH RLO XQDWWHQGHG ZKLOH IU LQJ I DOORZHG to heat beyond its smoking point oil may ignite resulting in fire that may spread to surrounding FDELQHWV 8VH D GHHS IDW WKHUPRPHWHU ZKHQHYHU possible to monitor oil temperature Ŷ 7R DYRLG RLO VSLOORYHU DQG ILUH XVH WKH PLQLPXP amount of oil when using a shallow pan frying and avoid cooking frozen foods with ex...

Page 6: ...s given off during the self cleaning cycle of any range Move birds to another well ventilated room SAFETY INFORMATION IMPORTANT SAFETY INFORMATION READ ALL INSTRUCTIONS BEFORE USING THE APPLIANCE READ AND SAVE THESE INSTRUCTIONS WARNING OVEN SAFETY INSTRUCTIONS WARNING NEVER cover any slots holes or passages in the oven bottom or cover an entire rack with materials such as aluminum foil or oven li...

Page 7: ...uipment off and on the user is encouraged to try to correct the interference by one or more of the following measures Ŷ 5HRULHQW RU UHORFDWH WKH UHFHLYLQJ DQWHQQD Ŷ QFUHDVH WKH VHSDUDWLRQ EHWZHHQ WKH HTXLSPHQW DQG receiver Ŷ RQQHFW WKH HTXLSPHQW LQWR DQ RXWOHW RQ D FLUFXLW different from that to which the receiver is connected Ŷ RQVXOW WKH GHDOHU RU DQ H SHULHQFHG UDGLR 79 technician for help b ac...

Page 8: ...of the electric spark igniting the burner When one burner is turned to LITE all burners will spark Sparking will continue as long as the knob remains at LITE Once gas is ignited turn the knob to adjust the flame size Using the Surface Burners NOTES Ŷ R QRW RSHUDWH WKH EXUQHU IRU DQ H WHQGHG SHULRG RI time without cookware on the grate The finish on the grate may discolor or chip without cookware t...

Page 9: ... monoxide levels above allowable standards This could be hazardous to your health 8VH D IODW ERWWRPHG ZRN Do not use stove top grills Top of Range Cookware Aluminum Medium weight cookware is recommended because it heats quickly and evenly Most foods brown HYHQO LQ DQ DOXPLQXP VNLOOHW 8VH VDXFHSDQV ZLWK WLJKW fitting lids when cooking with minimum amounts of water Stainless Steel This metal alone h...

Page 10: ...GGOH UHPRYH WKH FHQWHU JUDWH LI SUHVHQW DQG UHSODFH LW ZLWK WKH JULGGOH R QRW WXUQ RQ WKH FHQWHU EXUQHU V XQWLO RX DUH FHUWDLQ WKH griddle has been positioned correctly Preheating Your Griddle LWK D UHYHUVLEOH JULGGOH SUHKHDW RXU JULGGOH E VHWWLQJ RXU FHQWHU EXUQHU WR L IRU PLQXWHV EHIRUH SODFLQJ IRRG RQ WKH JULGGOH 2QFH WKH JULGGOH LV SUHKHDWHG WXUQ WKH NQRE RQ WKH EXUQHU V WR WKH FRRN VHWWLQJ RX...

Page 11: ... Fry cooking mode is designed to produce foods with a crispier exterior than traditional oven cooking See the Oven Cooking Modes section for more information 8 Oven Probe Monitors internal food temperature and turns the oven off when the food reaches the programmed temperature Insert the probe press the desired cooking mode and program the probe temperature See the Cooking Modes Section for more i...

Page 12: ...u select the function in the display using the associated number pad You can exit at any time by pressing the Cooking Options or Settings pad again WiFi Connect and Remote Enable Your oven is designed to provide you with two way communication between your appliance and smart device By using the WiFi Connect features you will be able to control essential oven operations such as temperature settings...

Page 13: ...elect Bluetooth Select Pair and follow the corresponding instructions included with the mating Chef Connect enabled product The range will cancel pairing mode after two minutes if no mating device is detected Select Remove to confirm product is paired or to un pair from UDQJH 7KH 3UHFLVLRQ RRNLQJ 3UREH FDQ DOVR EH SDLUHG using the Bluetooth feature Auto Conv Auto Conversion When using Convection B...

Page 14: ... LQ D GRXEOH RYHQ XQLW XVH WKH 1 through 5 number pads to select a different preset cooking temperature and press Start Enter 2 Since no feedback is given during temperature change an oven thermometer can be used to confirm temperature changes Starting a Timed Bake 3UHVV WKH Bake pad I WKH GHVLUHG WHPSHUDWXUH LV XVH WKH 6 through 0 number pads to select a cooking time If a cooking WHPSHUDWXUH RWKH...

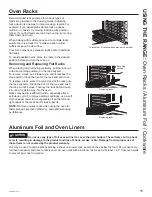
Page 15: ...t up the front of the rack and push the rack in until it stops Then lay the rack flat and push it in until it is all the way into the oven Racks may become difficult to slide especially after a self clean cycle To improve sliding conditions use a soft cloth or paper towel to rub vegetable oil on the left and ULJKW HGJHV RI WKH UDFNV DQG RU UDFN VXSSRUWV NOTE Remove unused racks when using the oven...

Page 16: ... to vary the intensity RI WKH KHDW WR WKH IRRG 3ODFH IRRGV FORVHU WR WKH EURLO element when a seared surface and rare interior are desired For best performance center the food below the broil heating element 3UHVV WKH Broil pad twice for High or once for Low depending on the amount of searing and the internal temperature that is preferred The High setting is best for WKLQQHU FXWV RI PHDW DQG RU IR...

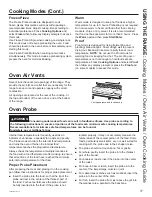
Page 17: ...nd select Proof then follow any display prompts or press the Proof pad RQ VRPH PRGHOV WR DFFHVV WKLV PRGH Oven Probe Internal food temperature is frequently used as an indicator of doneness especially for roasts and poultry 7KH 3UREH PRGH PRQLWRUV WKH LQWHUQDO IRRG WHPSHUDWXUH and turns the oven off when the internal food temperature reaches the programmed temperature Always check the temperature ...

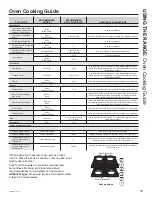
Page 18: ...let Ŷ 7R DYRLG GDPDJLQJ RXU SUREH GR QRW XVH WRQJV WR pull on the cable when removing it Ŷ 7R DYRLG EUHDNLQJ WKH SUREH PDNH VXUH IRRG LV completely defrosted before inserting the probe Ŷ 7R SUHYHQW SRVVLEOH EXUQV GR QRW XQSOXJ WKH SUREH from the outlet until the oven has cooled Ŷ 1HYHU OHDYH WKH SUREH LQVLGH WKH RYHQ GXULQJ D VHOI RU steam clean cycle Ŷ R QRW VWRUH WKH SUREH LQ WKH RYHQ Oven Cooki...

Page 19: ...wn first Watch food closely when broiling For best performance when broiling center food below the broil heater Boneless chicken breasts Broil Low Bake 3 0RYH IRRG GRZQ IRU PRUH GRQHQHVV OHVV VHDULQJ DQG XS IRU JUHDWHU VHDULQJ EURZQLQJ ZKHQ EURLOLQJ RU EHVW SHUIRUPDQFH ZKHQ EURLOLQJ center food below the broil element or burner Whole turkey Bake Convection Roast 8VH D ORZ VLGHG SDQ VXFK DV D EURLO...

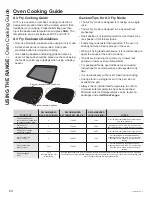
Page 20: ...ring cooking Arrange food in a single layer on the pan do not overload the pan Always check internal food temperature to confirm minimum safe temperatures have been reached Minimum safe food temperatures can be found on packages and at IsItDoneYet gov FOOD TYPE RECOMMENDED RACK POSITION S RECOMMENDED SET TEMPERATURES F RECOMMENDED COOK TIME MIN NOTES Fresh boneless fish or poultry pieces breaded s...

Page 21: ...clean water and dry with a soft cloth When cleaning surfaces make sure that they are at room temperature and not in direct sunlight If stain on the door vent trim is persistent use a mild abrasive cleaner and a sponge scrubber for best results Spillage of marinades fruit juices tomato sauces and basting liquids containing acids may cause discoloration and should be wiped up immediately Let hot sur...

Page 22: ... Self Clean Mode Self Clean uses very high temperatures to clean the oven interior For a moderately soiled oven run a 3 hour self clean cycle For a heavily soiled oven run D KRXU VHOI FOHDQ F FOH 2QO VHOI FOHDQ EODFN UDFNV and grates may remain in the oven during the self clean F FOH OO RWKHU LWHPV LQFOXGLQJ QLFNHO SODWHG VLOYHU UDFNV VKRXOG EH UHPRYHG I QLFNHO SODWHG VLOYHU UDFNV DUH OHIW in the ...

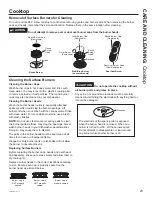
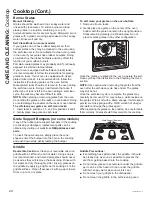
Page 23: ...spillovers which could clog the burner openings Lift burners off when cool Wash with hot soapy water Rinse with clean water For more stubborn stains use a brush with plastic bristles NOTE Do not use steel wool or scouring pads to clean the burner parts as these may clog the openings Never wash burner heads in your dishwasher as dishwasher Doing so may cause them to discolor The ports in the burner...

Page 24: ... grates in the oven if your grates have rubber bumpers Doing so will destroy the rubber bumpers and may affect the function of your surface burners 3RUFHODLQ FRDWHG JUDWHV PD JUDGXDOO GXOO LI FRQWLQXDOO exposed to self clean temperatures I RXU RYHQ LV HTXLSSHG ZLWK VHOI FOHDQ EODFN UDFNV it is recommended to follow the instructions for placing grates on racks If your oven is equipped with nickel S...

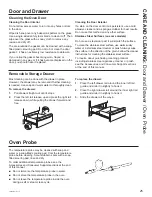
Page 25: ...on If you notice the gasket becoming worn frayed or damaged in any way or if it has become displaced on the door you should have it replaced Cleaning the Door Exterior If a stain on the door vent trim is persistent use a mild abrasive cleaner and a sponge scrubber for best results Do not use this method on any other surface Stainless Steel Surfaces on some models Do not use a steel wool pad it wil...

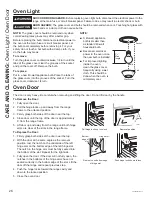
Page 26: ...position 3 Firmly grasp both sides of the door near the top 4 Close door until the top of the door is approximately 6 from the range frame 5 Lift door up and away from the range until both hinge arms are clear of the slots in the range frame To Replace the Door LUPO JUDVS ERWK VLGHV RI WKH GRRU QHDU WKH WRS 2 With the door at the same angle as the removal position rest the notch on the underside o...

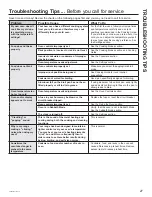
Page 27: ...luminum foil on broil pan wrap tightly and add slits conforming to those in the pan to allow grease to drain Oven temperature too hot or too cold Oven temperature needs adjustment See the Oven Controls section Oven and or display appears not to work A fuse in your home may be blown or the circuit breaker tripped Replace the fuse or reset the circuit breaker Oven controls improperly set 6HH WKH 8VL...

Page 28: ...low the locking temperature LOCK DOOR flashes in the display The self clean cycle has been selected but the door is not closed Close the oven door F and a number or letter flash in the display You have a function error code 3UHVV WKH Cancel Off pad Allow the oven to cool for one KRXU 3XW WKH RYHQ EDFN LQWR RSHUDWLRQ I WKH IXQFWLRQ FRGH UHSHDWV GLVFRQQHFW DOO SRZHU WR WKH RYHQ IRU DW OHDVW seconds ...

Page 29: ... and broil burners do not Gas to the oven burners may have been shut off The oven gas shut off is located on the gas regulator near the gas line attachment to your range Locate it and flip the lever My oven door glass appears to be tinted or have a rainbow color The inner oven glass is coated with a heat barrier to reflect the heat back into the oven to prevent heat loss and keep the outer door co...

Page 30: ...nty Any implied warranties including the implied warranties of merchantability or fitness for a particular purpose are limited to one year or the shortest period allowed by law This limited warranty is extended to the original purchaser and any succeeding owner for products purchased for home XVH ZLWKLQ WKH 86 I WKH SURGXFW LV ORFDWHG LQ DQ DUHD ZKHUH VHUYLFH E D SSOLDQFHV XWKRUL HG 6HUYLFHU LV QR...

Page 31: ...e information The following products and more are available Accessories Accessories Nickel Flat Rack Reinforced Nickel Flat Rack Self Clean Flat Rack Nickel Extension Rack Self Clean Extension Rack URLOHU 3DQ ô ó ò Roasting Rack Accessory Cooktop Center Grate Nonstick Aluminum Griddle Reversible Cast Iron Griddle Cleaning Supplies LWUX6KLQH 6WDLQOHVV 6WHHO LSHV 6WDLQOHVV 6WHHO 3ROLVKLQJ ORWK Burnt...

Page 32: ...HFLDO GLVFRXQWV WKDW DUH DYDLODEOH ZKLOH RXU warranty is still in effect You can purchase it on line anytime GE Appliances Services will still be there after your ZDUUDQW H SLUHV Q WKH 86 GEAppliances com extended warranty RU FDOO GXULQJ QRUPDO EXVLQHVV KRXUV Remote Connectivity RU DVVLVWDQFH ZLWK ZLUHOHVV QHWZRUN FRQQHFWLYLW IRU PRGHOV ZLWK UHPRWH HQDEOH visit our website at GEAppliances com conn...

Page 33: ...orte de Corriente 8 Quemadores 8 Plancha 10 Controles del Horno 11 Opciones de Cocción 12 Settings Configuraciones 12 Modo Sabático 14 Estantes del Horno 15 Papel de Aluminio y Cobertores del Horno 15 Modos de Cocción al Horno 16 Ventilaciones de Aire del Horno 17 Sonda del Horno 17 Guía de Cocción del Horno 18 Modo de Cocción para Freír con Aire 20 CUIDADO Y LIMPIEZA Cocina Exterior 21 Cocina Int...

Page 34: ...s y creemos que usted también Entre otras cosas el registro de su electrodoméstico asegura que podamos entregarle información importante del producto y detalles de la garantía cuando los necesite Registre su electrodoméstico GE ahora a través de Internet Sitios Web y números telefónicos útiles están disponibles en la sección de Soporte para el Consumidor de este Manual del Propietario También pued...

Page 35: ... todas las instrucciones de seguridad antes de utilizar este producto No seguir estas instrucciones puede generar un incendio una descarga eléctrica lesiones corporales o la muerte LEA Y GUARDE ESTAS INSTRUCCIONES INFORMACIÓN IMPORTANTE DE SEGURIDAD LEA TODAS LAS INSTRUCCIONES ANTES DE USAR ESTE ELECTRODOMÉSTICO INFORMACIÓN DE SEGURIDAD ADVERTENCIA Si la información de este manual no se sigue exac...

Page 36: ...o con un vidrio roto Es posible que se produzcan descargas incendio o cortes Ŷ 1R GHMH D ORV QLxRV VRORV R IXHUD GH VX UDGLR GH DWHQFLyQ en el área donde el electrodoméstico se encuentre en uso Nunca se les deberá permitir trepar sentarse o pararse sobre ninguna parte del electrodoméstico Ŷ ADVERTENCIA No coloque artículos de interés para los niños sobre los gabinetes que están sobre un horno si l...

Page 37: ...go de incendio Ŷ O LQKDELOLWDU HO ORTXHR GHO RQWURO GH DV HQ DOJXQRV PRGHORV DVHJ UHVH GH TXH ORV FRQWUROHV GH VXSHUILFLH VH HQFXHQWUHQ HQ OD SRVLFLyQ 2 SDJDGR VWR evitará que haya un flujo de gas no intencional desde los quemadores Ŷ 1R XVH SDSHO GH DOXPLQLR SDUD FXEULU UHMLOODV FXDOTXLHU parte de la cocina Si se hace esto se podrá producir envenenamiento con monóxido de carbono sobrecalentamient...

Page 38: ...frotar dañar ni mover la junta Ŷ IMPORTANTE La salud de algunas aves es extremadamente sensible a los humos emitidos durante el ciclo de limpieza automática de cualquier cocina Coloque las aves en otra habitación bien ventilada ADVERTENCIA INSTRUCCIONES DE SEGURIDAD ADVERTENCIA NUNCA cubra ninguna ranura agujeros o pasajes en el fondo del horno ni cubra un estante entero con materiales tales como ...

Page 39: ...e aconseja al usuario que intente corregir la interferencia con una de las siguientes medidas Ŷ 5HRULHQWH R UHXELTXH OD DQWHQD UHFHSWRUD Ŷ XPHQWH OD VHSDUDFLyQ HQWUH HO HTXLSR HO UHFHSWRU Ŷ RQHFWH HO HTXLSR D XQ WRPDFRUULHQWH GH XQ FLUFXLWR GLIHUHQWH del tomacorriente al que se encuentra conectado el receptor Ŷ 3DUD VROLFLWDU D XGD FRQVXOWH FRQ HO SURYHHGRU PLQRULVWD R D XQ WpFQLFR H SHULPHQWDGR G...

Page 40: ...rajar si no hay un utensilio de cocina que absorba el calor Ŷ No intente desensamblar un quemador mientras otro quemador está encendido Es posible que se produzca una descarga eléctrica lo cual podría hacer que vuelque un utensilio de cocina caliente Ŷ Asegúrese de que los quemadores y las parrillas estén fríos antes de colocar la mano tomar el mango de una olla trapos de limpieza u otros material...

Page 41: ...silios de esmalte DMR FLHUWDV FRQGLFLRQHV HO HVPDOWH de algunos utensilios de cocina se pueden derretir Siga las recomendaciones sobre métodos de cocción del fabricante de utensilios de cocina Vidrio Existen dos tipos de utensilios de cocina de vidrio aquellos para uso con el horno únicamente y aquellos para OD FRFFLyQ HQ OD SDUWH VXSHULRU GH OD FRFLQD FDFHURODV FDIp WHWHUDV RV FRQGXFWRUHV GH YLGU...

Page 42: ...FHQWUDO GH HVWDU SUHVHQWH UHHPSODFH OD PLVPD SRU OD SODQFKD 1R JLUH HO TXHPDGRU HV central hasta que esté seguro de que la plancha se posicionó correctamente Precalentamiento de la Plancha RQ SODQFKD UHYHUVLEOH SUHFDOLHQWH HVWD OWLPD FRQILJXUDQGR DPERV TXHPDGRUHV FHQWUDOHV HQ L OWR GXUDQWH HQWUH PLQXWRV DQWHV GH FRORFDU FRPLGD VREUH OD SODQFKD 8QD YH SUHFDOHQWDGD OD SODQFKD JLUH OD SHULOOD GHO TXH...

Page 43: ...eír con Aire O PRGR LU U UHtU FRQ LUH fue diseñado para producir comidas con un exterior más crocante que en la cocción de horno tradicional Para más información consulte la sección de Modos de Cocción en el Horno 8 Sonda del Horno Monitorea la temperatura interna de la comida y apaga el horno cuando la comida alcanza la temperatura programada Inserte la sonda presione el modo de cocción deseado y...

Page 44: ...cción 6HWWLQJV RQILJXUDFLRQHV DEUHQ PHQ V PiV GHWDOODGRV HQ OD pantalla los cuales permiten acceso a funciones adicionales Para cada uno seleccione la función en la pantalla a través de la tecla numérica asociada Puede salir en cualquier momento presionando la tecla Cooking Options Opciones de Cocción o Settings Configuraciones nuevamente Conexión WiFi y Acceso Remoto Su horno de está diseñado par...

Page 45: ...con el producto de emparejamiento permitido por Chef Connect La cocina cancelará el modo de emparejamiento luego de dos minutos si no es detectado ningún dispositivo para emparejar Seleccione Remove Retirar para confirmar que el producto está emparejado o para desemparejar el mismo de su cocina La Sonda de Cocción de Precisión WDPELpQ SXHGH VHU HPSDUHMDGD XVDQGR OD IXQFLyQ OXHWRRWK Auto Conv Conve...

Page 46: ...FODV QXPpULFDV GH 1 a 5 para seleccionar una temperatura de cocción actual diferente y presione Start Enter Iniciar Ingresar 2 Debido a que no hay ninguna indicación durante el cambio de temperatura se puede usar un termómetro para horno para confirmar los cambios de temperatura Inicie un Horneado por Tiempo 1 Presione la tecla Bake Hornear 2 Si la temperatura deseada es de 350ºF use las teclas nu...

Page 47: ...l frente del estante hacia arriba y empuje el mismo hasta que se detenga Luego apoye el estante y empuje el mismo hasta que entre completamente en el horno Es posible que resulte difícil deslizar los estantes especialmente luego de un ciclo de limpieza automática Para mejorar las condiciones de deslizamiento use una tela suave o una toalla de papel para frotar aceite vegetal sobre los H WUHPRV L T...

Page 48: ...ás cerca del elemento para asar cuando se desee una superficie más soasada y un interior poco cocido Para un mejor rendimiento centre la comida debajo del elemento que emite calor para asar 3UHVLRQH OD WHFOD URLO VDU GRV YHFHV SDUD FRQILJXUDU LJK OWD XQD YH SDUD RZ DMD GHSHQGLHQGR GH OD FDQWLGDG de dorado y de la temperatura interior que se prefieran La FRQILJXUDFLyQ LJK OWD HV PHMRU SDUD FRUWHV P...

Page 49: ...rno al leudar no está lo suficientemente caliente como para mantener las comidas a temperaturas seguras Presione la tecla Opciones de Cocción y seleccione Proof Leudar y luego siga las instrucciones en pantalla o presione la tecla Proof Leudar HQ DOJXQRV PRGHORV SDUD DFFHGHU D HVWH PRGR Sonda del Horno en algunos modelos ADVERTENCIA El consumo de comida semicruda puede hacer que se contraigan enfe...

Page 50: ...YLWDU GDxRV VREUH OD VRQGD QR XVH DJDUUDGHUDV SDUD empujar el cable al retirarlo Ŷ 3DUD HYLWDU URPSHU OD VRQGD DVHJ UHVH GH TXH OD comida haya sido completamente descongelada antes de insertarla Ŷ 3DUD HYLWDU SRVLEOHV TXHPDGXUDV QR GHVHQFKXIH OD VRQGD del tomacorriente del horno hasta que este último se haya enfriado Ŷ 1XQFD GHMH OD VRQGD GHQWUR GHO KRUQR GXUDQWH XQ FLFOR GH limpieza automática o ...

Page 51: ...VH del lado de la piel hacia abajo primero Para un mejor rendimiento al asar centre la comida debajo del elemento que emite calor para asar Pechugas de pollo deshuesadas VDGR DMR Hornear 3 Mueva la comida más abajo para que quede más preparada y menos VRDVDGD PiV DUULED SDUD VRDVDU GRUDU DO DVDU 3DUD XQ PHMRU UHQGLPLHQWR al asar centre la comida debajo del elemento que emite calor para asar Pavo e...

Page 52: ...necesario voltear o revolver la comida durante la cocción 8ELTXH OD FRPLGD HQ XQD VROD FDSD VREUH OD EDQGHMD VLQ sobrecargar la misma Siempre controle la temperatura interior de la comida a fin de confirmar que se hayan alcanzado las temperaturas mínimas seguras Las temperaturas mínimas seguras de la comida se podrán encontrar en los paquetes y en IsItDoneYet gov 8WHQVLOLR SULQFLSDO UHFRPHQGDGR Op...

Page 53: ...piar supeficies asegúrese de que estén a temperatura ambiente y fuera del contacto con la luz solar Si las manchas en el borde de la ventana de la puerta son persistentes use un limpiador abrasivo suave o una esponja con estropajo para obtener un mejor resultado El derrame de adobo jugos de fruta salsas de tomate y líquidos para humedecer que contengan ácidos pueden ocasionar descoloración y se de...

Page 54: ...r el interior del horno Para un horno moderadamente sucio use un ciclo de limpieza automática de 3 horas Sólo los estantes del horno de limpieza DXWRPiWLFD QHJURV ODV UHMLOODV SRGUiQ SHUPDQHFHU HQ HO horno durante el ciclo de limpieza automática Todos los GHPiV tWHPV LQFOX HQGR ORV HVWDQWHV QLTXHODGRV SODWHDGRV GHEHUiQ VHU UHWLUDGRV 6L ORV HVWDQWHV QLTXHODGRV SODWHDGRV se dejan dentro del horno du...

Page 55: ...a Para eliminar las manchas más rebeldes use un cepillo con cerda plástica NOTA No use lana de acero ni estropajos para limpiar las partes del quemador ya que podrán bloquear las aberturas Nunca lave las cabezas de los quemadores en el lavavajillas Esto podrá hacer que se descoloren Las hendiduras de las cabezas de los quemadores se deben mantener limpias en todo momento para obtener una llama par...

Page 56: ... gradualmente ásperas si son expuestas de forma continua a las temperaturas de limpieza automática Si su horno está equipado con estantes de limpieza automática QHJURV VH UHFRPLHQGD VHJXLU ODV LQVWUXFFLRQHV SDUD OD colocación de parrillas en los estantes Si su horno está equipado con estantes niquelados se recomienda seguir las instrucciones para la colocación de rejillas en el fondo GHO KRUQR RV ...

Page 57: ...eza a gastar se deshilacha o daña de cualquier forma y si quedó fuera de la puerta deberá reemplazar la misma Limpieza del Exterior de la Puerta Si las manchas en el borde de la ventana de la puerta son persistentes use un limpiador abrasivo suave o una esponja con estropajo para obtener un mejor resultado No use este método sobre ninguna otra superficie Superficies de Acero Inoxidable en algunos ...

Page 58: ...cina 5 Levante la puerta hacia arriba y afuera de la cocina hasta que ambos brazos de las bisagras estén fuera de las ranuras de la estructura de la cocina Para reemplazar la puerta 1 Firmemente tome ambos lados de la puerta por la parte superior 2 Con la puerta en el mismo ángulo que en la posición de retiro apoye la abertura sobre el fondo del brazo de la bisagra izquierda en el extremo inferior...

Page 59: ...los en la olla para permitir que la grasa sea drenada La temperatura del horno es demasiado caliente o demasiado fría La temperatura del horno debe ser ajustada Consulte la sección Controles del Horno El horno y o la pantalla parecen no estar funcionando Es posible que un fusible de su hogar se haya quemado o que el disyuntor se haya desconectado Reemplace el fusible o reinicie el disyuntor Contro...

Page 60: ...orno se enfríe por debajo de la temperatura de bloqueo TRABA DE LA PUERTA titila en la pantalla El ciclo de limpieza automática fue seleccionado pero la puerta no está cerrada Cierre la puerta del horno XQ Q PHUR o letra titila en la pantalla Tiene un código de error de función Presione la tecla Cancel Off Cancelar Apagar Permita que el horno se enfríe durante una hora Vuelva a poner el horno en f...

Page 61: ...adores de gas del horno hayan sido apagados El apagado del gas del horno está ubicado en el regulador de gas cerca GH OD DGKHUHQFLD GH OD WXEHUtD GH JDV D OD FRFLQD 8ELTXH OD PLVPD Gp vuelta la palanca La puerta de vidrio del horno parece estar teñida o tener un color arcoíris El vidrio del horno interno está cubierto con una barrera de calor que refleja este último nuevamente hacia el horno a fin...

Page 62: ...DU R UHHPSOD DU ODV lámparas excepto las lámparas LED GARANTÍA LIMITADA Garantía Limitada de la Cocina a Gas EXCLUSIÓN DE GARANTÍAS IMPLÍCITAS Su única y exclusiva alternativa es la reparación del producto como se indica en la Garantía Limitada Las garantías implícitas incluyendo garantías implícitas de comerciabilidad o conveniencia sobre un propósito particular se limitan a un año o al período m...

Page 63: ...isponibles Accesorios Accesorios Estante Plano de Níquel Estante Plano Reforzado de Níquel Estante Plano con Limpieza Automática Estante Extensible de Níquel Estante Extensible con Limpieza Automática 2OOD SDUD VDU ô ó ò Accesorio del Estante para Dorar Rejilla Central de la Superficie de Cocción Plancha de Aluminio No Adherente Plancha de Hierro Forjado Reversible Suministros de Limpieza Limpiado...

Page 64: ...arantía aún está vigente La puede adquirir en cualquier momento a través de Internet Los servicios de GE Appliances aún estarán allí cuando su garantía caduque Q 88 GEAppliances com extended warranty o comuníquese al 800 626 2224 durante el horario de atención comercial Conectividad Remota 3DUD VROLFLWDU DVLVWHQFLD SDUD OD FRQHFWLYLGDG GH UHG LQDOiPEULFD SDUD PRGHORV FRQ DFFHVR UHPRWR visite nuest...

Reviews: