26
49-85223
CARE AND CLE
ANING:
Cleaning The Cook
top
Cleaning the Cooktop (Cont.)
Griddles (on some models)
Nonstick Aluminum Griddle:
Avoid scraping the
griddle surface with metal utensils. Wash your griddle
with dish soap and hot water. If necessary, scrub with a
non-abrasive plastic pad.
Reversible Cast-Iron:
Clean your reversible cast-iron
griddle with a stiff brush and hot water. Using soap is
not recommended, and harsh detergents should never
EHXVHGDVWKH\ZLOOUHPRYHWKHVHDVRQLQJ5LQVHZLWK
hot water and dry thoroughly. After rinsing, preseason
the griddle by applying a light coat of cooking oil to the
griddle surface. Wipe off excess oil with a paper towel.
Store in a cool, dry place.
Griddle Precautions:
Ŷ
If something has spilled under the griddle, it should
be cleaned up as soon as possible to prevent the
spill from getting baked onto the cooktop.
Ŷ
Do not allow grease to accumulate under the griddle
as it can be a fire hazard. Clean under the griddle
with hot, soapy water as soon as it is cool.
Ŷ
Do not wash your griddle in the dishwasher.
Ŷ 'RQRWFOHDQWKHJULGGOHLQWKHVHOIFOHDQLQJRYHQ
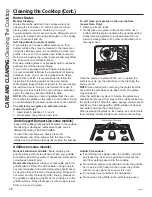
Grate Support Bumpers (on some models)
If any of the rubber grate support bumpers in the cooktop
are missing or damaged, replacement parts can be
REWDLQHGE\FDOOLQJ*(&$5(6
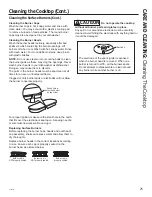
To insert the new bumpers, simply place the
cone-shaped end of the bumper into the hole in the
cooktop and push down while gently twisting the bumper.
Grate Support Bumpers
Burner Grates
Manual Cleaning
Grates should be washed in hot, soapy water and
rinsed with clean water. To soften burned-on food,
place grates in a solution containing ¼-cup of
household ammonia for several hours. Afterward, scrub
grates with a plastic scouring pad soaked in hot, soapy
ZDWHU5LQVHZHOODQGGU\
Self Clean Mode (on some models)
If your grates do not have rubber bumpers on their
bottom surface, they may be cleaned in the lower oven
using the self-clean cycle. Do not attempt to clean your
grates in the oven if your grates have rubber bumpers.
Doing so will destroy the rubber bumpers and may affect
the function of your surface burners.
Porcelain-coated grates may gradually dull if continually
exposed to self-clean temperatures.
If your oven is equipped with self-clean (black) racks,
it is recommended to follow the instructions for placing
grates on racks. If your oven is equipped with nickel-
plated (silver) racks, it is recommended to follow the
instructions for placing grates on the oven bottom.
Nickel-plated racks should not remain in the oven during
the self clean cycle. Doing so will tarnish the racks. If
either type of rack is left in the oven during a self-clean
cycle, the rack may become difficult to slide.
NOTE:
When placing or removing grates from the oven,
do not slide the grates on the racks or oven bottom. Doing
so could damage the enamel on the racks or oven bottom.
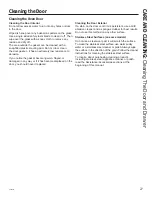
To self-clean your grates on self-clean racks
(Lower Oven Only):
,QVHUWUDFNVLQSRVLWLRQVDQG
2. Gently place one grate on each rack.
To self clean your grates on the oven bottom
(Lower Oven Only):
5HPRYHDOORYHQUDFNV
2. Gently place one grate on the center of the oven
bottom with the grate oriented in the upright position.
Stack remaining grate(s) as shown below. Do not
place or stack grates in any other configuration or in
the upper oven.
Once the grates are placed in the oven, operate the
self-clean cycle per the instruction in the Cleaning the
Oven section.
NOTE:
Use caution when removing the grates from the
oven after the self-clean cycle has ended. The grates
may still be hot.
Once the self-clean cycle is complete, the grates may
carefully be removed. You may notice a white residue on
the grates. Wipe it off with a damp sponge. If white spots
SHUVLVWZHWWKHVSRQJHZLWKDVROXWLRQRIYLQHJDU
and water and wipe the grates again.
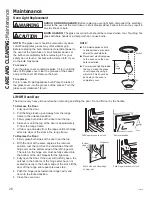
When replacing the grates on the cooktop, be sure to locate
them correctly. Grates should fit securely into the cooktop.

