background image


Care and cleaning of the microwave oven.


GEAppliances.com

Helpful Hints

An  occasional thorough wiping with a solution of baking soda and water keeps the  

inside fresh.

Unplug the cord before cleaning any part of this oven.

How to Clean the Inside

Walls, Floor, Inside Window, Metal and Plastic Parts on the Door

Some spatters can be removed with a paper towel; others may require a damp cloth. Remove 

greasy spatters with a sudsy cloth, then rinse with a damp cloth. Do not use  

abrasive cleaners or sharp utensils on oven walls. 

To clean the surface of the door and the surface of the oven that come together upon 

closing, use only mild, nonabrasive soaps or detergents using a sponge or soft cloth. Rinse 

with a damp cloth and dry.
Never use a commercial oven cleaner on any part of your microwave.

Removable Turntable and Turntable Support 

7RSUHYHQWEUHDNDJHGRQRWSODFHWKHWXUQWDEOHLQWRZDWHUMXVWDIWHUFRRNLQJ:DVKLWFDUHIXOO\

in warm, sudsy water or in the dishwasher. The turntable and support can be broken if dropped. 

Remember, do not operate the oven without the turntable and  

support in place.

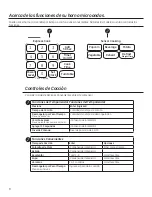
1

2

3

4

5

6

7

8

9

Power

0

Level

Set

Clock

Turntable

Cook

Time

Timer

On/Off

Add

30 Sec

Express Cook

Sensor Cooking

Defrost

Reheat

Vegetable

Potato

Beverage

Popcorn

Weight/Time

Cancel

Off

Start
Pause

How to Clean the Outside

Do not use cleaners containing ammonia or alcohol on the microwave oven. Ammonia or 

alcohol can damage the appearance of the microwave.

Case

Clean the outside of the microwave with a sudsy cloth. Rinse with a damp cloth and then dry. Wipe 

the window clean with a damp cloth. 

Control Panel and Door

Wipe with a damp cloth. Dry thoroughly. Do not use cleaning sprays, large amounts of soap and 

ZDWHUDEUDVLYHVRUVKDUSREMHFWVRQWKHSDQHO³WKH\FDQGDPDJHLW6RPHSDSHUWRZHOVFDQDOVR

scratch the control panel.

Door Surface

It is important to keep the area clean where the door seals against the microwave. Use only mild, 

non-abrasive detergents applied with a clean sponge or soft cloth. Rinse well.

Power Cord

If the cord becomes soiled, unplug and wash with a damp cloth. For stubborn spots, sudsy water 

may be used, but be certain to rinse with a damp cloth and dry thoroughly before plugging cord 

into outlet.

Stainless Steel

 (on some models)

Do not use a steel-wood pad; it will scratch the surface.

To clean the stainless steel surface, use a hot, damp cloth with a mild detergent suitable  

for stainless steel surfaces. Use a clean, hot, damp cloth to remove soap. Dry with a dry, clean cloth. 

Always scrub lightly in the direction of the grain.

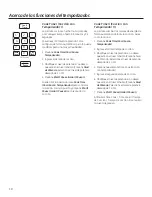
1

2

3

4

5

6

7

8

9

Power

0

Level

Set

Clock

Turntable

Cook

Time

Timer

On/Off

Add

30 Sec

Clock Display

Express Cook

Sensor Cooking

Defrost

Reheat

Vegetable

Potato

Beverage

Popcorn

Weight/Time

Cancel

Off

Start
Pause

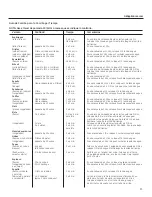
25

Summary of Contents for PEM31SFSS

Page 1: ...ng 25 Troubleshooting Tips 26 Things that are Normal 26 Consumer Support Consumer Support Back Cover Warranty 27 Write the model and serial numbers here Model __________________ Serial _______________...

Page 2: ...or other combustible materials are placed inside the oven while cooking 5HPRYH ZLUH WZLVW WLHV DQG PHWDO KDQGOHV IURP SDSHU RU plastic containers before placing them in the oven R QRW XVH WKH RYHQ IRU...

Page 3: ...HO H WUHPR GH OD mesada Para reducir el riesgo de incendio en la apertura del horno 1R FRFLQH GHPDVLDGR OD FRPLGD 3UHVWH DWHQFLyQ FXLGDGRVD al electrodom stico cuando se coloca papel pl stico u otro...

Page 4: ...ribute the heat evenly Be careful to prevent scalding when warming formula The container may feel cooler than the formula really is Always test the formula before feeding the baby Don t defrost frozen...

Page 5: ...HQHGRU H SORWH OR FXDO SRGUtD SURGXFLU GDxRV personales AGUA SOBRECALENTADA L quidos tales como agua caf o t se podr an sobrecalentar m s all del punto de ebullici n sin parecer que est n hirviendo No...

Page 6: ...D HG SDSHU DQG SODVWLF ZUDS FDQ EH used to cover dishes in order to retain moisture and prevent spattering Be sure to vent plastic wrap so steam can escape Cookware may become hot because of heat tran...

Page 7: ...uete OJXQDV EDQGHMDV GH SOiVWLFR FRPR HQ ODV TXH VH empaqueta la carne tienen una cinta fina de metal incrustada en el plato Al ponerse en el microondas el metal puede quemar el suelo del horno o ince...

Page 8: ...r ground terminal You should have the 2 prong wall receptacle replaced with a 3 prong grounding receptacle by a qualified electrician before using the appliance ADAPTER PLUGS GROUNDING INSTRUCTIONS Th...

Page 9: ...QWD XQ HVIXHU R H FHVLYR VREUH HO DGDSWDGRU FRQGXFH ILQDOPHQWH D XQD IDOOD GH OD WHUPLQDO GHO DGDSWDGRU FRQ FRQH LyQ D WLHUUD HEHUi VROLFLWDU D XQ HOHFWULFLVWD FDOLILFDGR HO UHHPSOD R GHO WRPDFRUULHQW...

Page 10: ...SAVE THESE INSTRUCTIONS WARNING ADVERTENCIA FAVOR DE LEER Y SEGUIR CUIDADOSAMENTE ESTA INFORMACI N DE SEGURIDAD GUARDE ESTAS INSTRUCCIONES IMPORTANT SAFETY INFORMATION READ ALL INSTRUCTIONS BEFORE US...

Page 11: ...lease to open door Removable Turntable Turntable and support must be in place when using the oven The turntable may be removed for cleaning Removable Turntable Support The turntable support must be in...

Page 12: ...etable Potato Beverage Popcorn Weight Time Time Features Press Enter Cook Time Amount of cooking time Defrost Weight Time Press twice Amount of defrosting time Express Cook Press number pads 1 6 Start...

Page 13: ...wer setting will cook more evenly and need less stirring or rotating of the food 6RPH IRRGV PD KDYH EHWWHU IODYRU WH WXUH RU appearance if one of the lower settings is used Use a lower power level whe...

Page 14: ...Close the door and press Start Pause to resume cooking Cook Time II Lets you change power levels automatically during cooking Here s how to do it 1 Press Cook Time 2 Enter the first cook time 3 Chang...

Page 15: ...hole 1 medium head 7 to 14 min In 2 qt casserole place 1 2 cup water frozen 10 oz package 3 to 7 min In 1 qt casserole place 2 tablespoons water Corn frozen kernel 10 oz package 2 to 6 min In 1 qt cas...

Page 16: ...frequent attention than usual A dull thumping noise may be heard during defrosting This is normal when oven is not operating at High power Defrosting Tips RRGV IUR HQ LQ SDSHU RU SODVWLF FDQ EH defros...

Page 17: ...areas with foil After second half of time separate pieces with table knife Let stand to complete defrosting Poultry Chicken broiler fryer cut up 14 to 19 min Place wrapped chicken in dish Unwrap and...

Page 18: ...k way to set 30 seconds of cooking time Express Cook This is a quick way to set cooking time for 1 6 minutes Press one of the Express Cook pads from 1 to 6 for 1 to 6 minutes of cooking at power level...

Page 19: ...crowave safe dish KHQ WKH RYHQ VLJQDOV WXUQ WKH IRRG over Remove defrosted meat or shield warm areas with small pieces of foil IWHU GHIURVWLQJ PRVW PHDWV QHHG WR stand 5 minutes to complete defrosting...

Page 20: ...ss POPCORN The oven starts immediately Your popcorn bag may get stuck and stop rotating but this will not effect to the cooking performance Do not open the door even if the bag is not rotating If you...

Page 21: ...o reheat for more time Reheated foods may have wide variations in temperature Some areas may be extremely hot It is best to use Cook Time for these foods UHDG SURGXFWV RRGV WKDW PXVW EH UHKHDWHG XQFRY...

Page 22: ...ose it and press Start Pause immediately If food is undercooked after the countdown use Cook Time for additional cooking time Vegetable Potato 1 9 less time more time NOTE Do not use this feature twic...

Page 23: ...ime is up the oven will signal To turn off the timer signal press TIMER ON OFF NOTE The timer indicator will be lit while the timer is operating Start Pause 1 2 3 4 5 6 7 8 9 0 Set Clock Clock Display...

Page 24: ...ows excess steam to escape Shielding In a regular oven you shield chicken breasts or baked foods to prevent over browning When microwaving you use small strips of foil to shield thin parts such as the...

Page 25: ...Start Pause How to Clean the Outside Do not use cleaners containing ammonia or alcohol on the microwave oven Ammonia or alcohol can damage the appearance of the microwave Case Clean the outside of the...

Page 26: ...tacle CONTROL PANEL RRU QRW VHFXUHO FORVHG LIGHTED YET OVEN Start Pause must be pressed after entering cooking selection WILL NOT START QRWKHU VHOHFWLRQ HQWHUHG DOUHDG LQ RYHQ DQG Cancel Off not press...

Page 27: ...ay also have other rights which vary from state to state To know what your legal rights are consult your local or state consumer affairs office or your state s Attorney General Warrantor General Elect...

Page 28: ...call 800 TDD GEAC 800 833 4322 Parts and Accessories GEApplianceparts com Individuals qualified to service their own appliances can have parts or accessories sent directly to their homes VISA MasterCa...

Page 29: ...iones del Horno 11 13 Otras Funciones 23 Niveles de Potencia 13 Funciones del Temporizador 16 18 Cuidado y Limpieza 25 Consejos para Solucionar Problemas 26 Cosas que son Normales 26 Soporte al Client...

Page 30: ...mo de la mesada Para reducir el riesgo de incendio en la apertura del horno 1R FRFLQH GHPDVLDGR OD FRPLGD 3UHVWH DWHQFLyQ FXLGDGRVD al electrodom stico cuando se coloca papel pl stico u otro material...

Page 31: ...nedor explote lo cual podr a producir da os personales AGUA SOBRECALENTADA L quidos tales como agua caf o t se podr an sobrecalentar m s all del punto de ebullici n sin parecer que est n hirviendo No...

Page 32: ...nas bandejas de pl stico como en las que se empaqueta la carne tienen una cinta fina de metal incrustada en el plato Al ponerse en el microondas el metal puede quemar el suelo del horno o incendiar un...

Page 33: ...ta un esfuerzo excesivo sobre el adaptador y conduce finalmente a una falla de la terminal del adaptador con conexi n a tierra Deber solicitar a un electricista calificado el reemplazo del tomacorrien...

Page 34: ...U 1 La graduaci n el ctrica del prolongador deber a ser por lo menos tan amplia como la graduaci n el ctrica del electrodom stico 2 El prolongador deber contar con 3 cables con conexi n a tierra y est...

Page 35: ...B JX830DFBB PEM31DFWW JX827DFWW JX830DFWW PEM31SFSS JX827SFSS JX830SFSS PEM31RFSS JX827SFSS JX830SFSS Pestillos de la Puerta Ventana con Protector Met lico La pantalla permite que la cocci n pueda ser...

Page 36: ...ciones del Temporizador Presione Enter Ingresar Tiempo de Cocci n Cantidad de tiempo de cocci n Descongelar por Peso Tiempo Presione dos veces Cantidad de tiempo de descongelaci n Cocci n Express Pres...

Page 37: ...s r pido pero ser necesario revolver rotar o dar vuelta la comida con mayor frecuencia Una configuraci n inferior har la cocci n m s pareja y se necesitar revolver y rotar menos la comida Algunas comi...

Page 38: ...se Iniciar Pausar para reanudar la cocci n Cook Time II Cocci n con Temporizador II Le permite cambiar los niveles de energ a de forma autom tica durante la cocci n As es como funciona 1 Presione Cook...

Page 39: ...cazuela de 2 litros coloque 1 2 taza de agua congeladas paquete de 10 onzas 3 a 7 min En una cazuela de 1 litro coloque 2 cucharas soperas de agua Ma z granos congelados paquete de 10 onzas 2 a 6 min...

Page 40: ...r mayor atenci n a la comida que lo usual Es posible que se escuchen ruidos de golpes secos durante la descongelaci n Esto es normal cuando el horno no est funcionando en el nivel de potencia High Alt...

Page 41: ...los trozos con un cuchillo de mesa Espere hasta que se complete la descongelaci n Ave Pollo hervir fre r cortaar 2 a 3 lbs 14 a 19 min Coloque el pollo envuelto en el plato Desenvuelva y d vuelta lueg...

Page 42: ...s una forma r pida de configurar el tiempo de cocci n entre 1 y 6 minutos Presione una de las teclas de Express Cook Cocci n Express de 1 a 6 para una cocci n entre 1 y 6 minutos en power level 10 niv...

Page 43: ...FDUQH GHO SDTXHWH FRORTXH OD misma en el plato de cocci n segura en el microondas XDQGR HO KRUQR Gp OD VHxDO Gp YXHOWD la comida Retire la carne descongelada o cubra las partes calientes con trozos pe...

Page 44: ...mitas de ma z podr quedar atascada y dejar de girar pero esto no afectar el rendimiento de la cocci n No abra la puerta incluso aunque la bolsa no est girando Si abre la puerta miembras se visualiza P...

Page 45: ...use Cook Time Tiempo de Cocci n para recalentar durante m s tiempo Las comidas recalentadas podr n tener amplias variaciones de temperatura Algunas partes de la comida podr n estar extremadamente cal...

Page 46: ...use Iniciar Pausar de inmediato Si la comida no termin de cocinarse luego de la cuenta regresiva use Cook Time Tiempo de Cocci n para adicionar tiempo de cocci n Vegetable Potato 1 9 less time more ti...

Page 47: ...endido Apagado para comenzar Cuando el tiempo concluya el temporizador emitir una se al Para apagar la se al del temporizador presione Timer On Off Tem porizador Encendido Apagado Nota El indicador de...

Page 48: ...o o tapas con papel para alimentos permite la salida de vapor excesivo Cubrir En un horno normal usted cubre las pechugas de pollo o comidas asadas para evitar que se doren en exceso Al cocinar en el...

Page 49: ...a tibia y jab n o en el lavavajillas El plato giratorio y el soporte se pueden romper en caso de ca da Recuerde que no se debe usar el horno si el plato giratorio y el soporte no se encuentran en su l...

Page 50: ...the door was opened or Start Pause was pressed before steam could be detected SENSOR ERROR will scroll until Cancel Off is pressed No se detect vapor en una cantidad de tiempo m xima Use Cook Time Ti...

Page 51: ...uier parte del Horno Microondas que falle debido a un defecto en los materiales o mano Desde la fecha de de obra Durante esta garant a limitada de un GE tambi n proveer gratis toda la mano compra orig...

Page 52: ...uese al 800 TDD GEAC 800 833 4322 Piezas y Accesorios GEApplianceparts com Individuos calificados para realizar el servicio t cnico de sus propios electrodom sticos podr n solicitar el env o de piezas...

Reviews: