background image

11

31-7000215   Rev. 0

Sensor Cook

To use the

 Sensor Cook 

feature:

1.  Press the

 SENSOR COOK

 button to select Food 

code.

2.  Press 

START

.

USING THE MICROW

A

VE: 

Microwave Cooking Features

Microwave Cooking Features

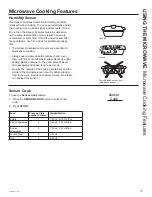
Humidity Sensor 

The Sensor Features detect the increasing humidity 
released during cooking. The oven automatically adjusts 
the cooking time to various types and amounts of food.

Do not use the Sensor Features twice in succession 
on the same food portion—it may result in severely 
overcooked or burnt food. If food is undercooked after 
the countdown, use Time Cook for additional cooking 
time.

Ŷ


The proper containers and covers are essential for 
best sensor cooking.

Ŷ


Always use microwave-safe containers and cover 
them with lids or vented plastic wrap. Never use tight 
sealing plastic containers—they can prevent steam 
from escaping and cause food to overcook.

Ŷ


Be sure the outside of the cooking containers and the 
inside of the microwave oven are dry before placing 
food in the oven. Beads of moisture turning into steam 
can mislead the sensor.

Dry off dishes so they don’t 
mislead the sensor.

Vented

Covered

Sensor

Cook

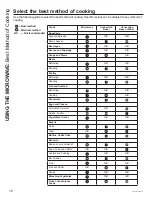
Food

Press pad this 
number of times

Weight/Portion

Potato

1

1-4 Pcs,  8-10 Oz./Pcs

Fresh Vegetables

2

1-4 Cup,  250 ml/Cup

Frozen 
Vegetables

3

1-4 Cup,  240 ml/Cup

Ground Meat

4

4-32 Oz

Fish

5

4-24 Oz.

Summary of Contents for PEB9159SJSSGE

Page 1: ...l de este manual de instrucciones visite nuestro sitio de internet GEAppliances com OWNER S MANUAL MICROWAVE OVEN 31 7000215 Rev 0 10 23 PEB9159 CEB1599 SAFETY INFORMATION 3 5 USING THE MICROWAVE Feat...

Page 2: ...s into every GE Appliances product and we think you will too Among other things registration of your appliance ensures that we can deliver important product information and warranty details when you n...

Page 3: ...e over a sink The kit and microwave are approved for installation alone or above any single electric wall oven Do not mount adjacent within 2 feet to any range cooktop gas oven or other microwave TO R...

Page 4: ...h before and halfway through heating it Do not use straight sided containers with narrow necks After heating allow the container to stand in the microwave oven for a short time before removing the con...

Page 5: ...o accumulate on sealing surfaces c Do Not Operate the oven if it is damaged It is particularly important that the oven door close properly and that there is no damage to the 1 door bent 2 hinges and l...

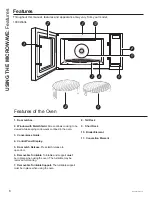
Page 6: ...viewed while keeping microwaves confined in the oven 3 Convenience Guide 4 Control Panel Display 5 Door Latch Release Press latch release to open door 6 Removable Turntable Turntable and support must...

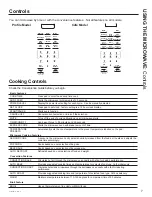
Page 7: ...s current selection or turns off the selection MUTE Turns off the end of cycle notification and all microwave alerts TIMER ON OFF Can be set for up to 99 minutes and 99 seconds EXPRESS COOK Starts the...

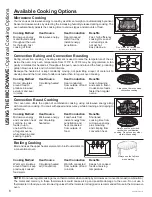
Page 8: ...ns while browning and sealing in juices Heat Source Microwave energy and circulating heated air Heat Conduction Food heats from instant energy from penetration and heat conducted from outside of food...

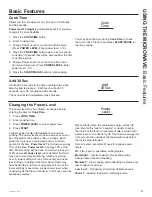
Page 9: ...ower level 7 is microwave energy 70 of the time Power level 3 is energy 30 of the time Most cooking will be done on HI which gives you 100 power HI power level will cook faster but food may need more...

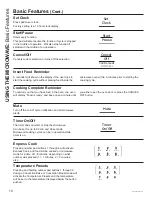
Page 10: ...you either open the oven door or press the CANCEL OFF button Mute Turn off the end of cycle notification and all microwave alerts Timer On Off The timer does not start or stop the microwave Can be se...

Page 11: ...Time Cook for additional cooking time The proper containers and covers are essential for best sensor cooking Always use microwave safe containers and cover them with lids or vented plastic wrap Never...

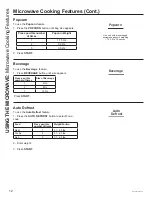
Page 12: ...the Beverage feature 1 Press BEVERAGE button until size appears Press pad this number of times Size of Beverage 1 4 Oz 2 8 Oz 3 12 Oz Press START Auto Defrost To use the Auto Defrost feature 1 Press t...

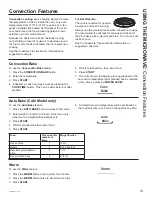
Page 13: ...ection Bake To use the Convecation Bake feature 1 Press the CONVECTION BAKE button 2 Enter the temperature 3 Press START 4 If desired a cook time may be set by pressing the COOK TIME button This can b...

Page 14: ...ter the temperature 3 Press START 4 If desired a cook time may be set by pressing the COOK TIME button This can be done before or after preheat 5 Wait for preheat tone then insert food 6 Press START 7...

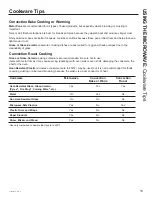
Page 15: ...k or dull finish metal pans are best for breads and pies because they absorb heat and produce crisper crust Shiny aluminum pans are better for cakes cookies or muffins because these pans reflect heat...

Page 16: ...N R Sauces and Toppings 1 N R N R Soups and Stews 1 2 N R Meats Defrosting 1 N R N R Roasting 2 1 2 Poultry Defrosting 1 N R N R Roasting 2 1 2 Fish and Seafood Defrosting 1 N R N R Cooking 1 2 N R C...

Page 17: ...even heating and reduce cooking time Venting plastic wrap or covering with wax paper allows excess steam to escape Shielding In a regular oven you shield chicken breasts or baked foods to prevent over...

Page 18: ...cloth Do not use abrasive cleaners or sharp utensils on oven walls To clean the surface of the door and the surface of the oven that come together upon closing use only mild non abrasive soaps or dete...

Page 19: ...s soiled unplug and wash with a damp cloth For stubborn spots sudsy water may be used but be certain to rinse with a damp cloth and dry thoroughly before plugging cord into outlet Stainless Steel Do n...

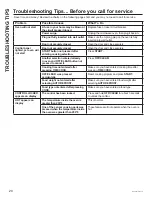
Page 20: ...after entering cooking selection Press START Another selection entered already in oven and OFF CLEAR button not pressed to cancel it Press OFF CLEAR Cooking time not entered after pressing TIME COOK M...

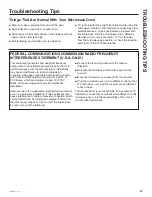
Page 21: ...th the manufacturer s instructions may cause interference to radio and television reception It has been type tested and found to comply with limits for ISM Equipment pursuant to part 18 of FCC Rules w...

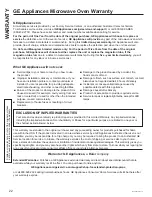
Page 22: ...used commercially Replacement of house fuses or resetting of circuit breakers Damage to the product caused by accident fire floods or acts of God Damage to finish such as surface rust tarnish or smal...

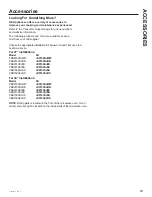
Page 23: ...iate Installation Kit below to convert this oven to a built in wall oven RU LQVWDOODWLRQV Model Kit PEB9159DJWW JX9152DJWW PEB9159DJBB JX9152DJBB PEB9159EJES JX9152EJES PEB9159SJSS JX9152SJSS CEB1599S...

Page 24: ...r warranty is still in effect You can purchase it on line anytime GE Appliances Services will still be there after your warranty expires In the US GEAppliances com ge service and support shop for exte...

Page 25: ...rada de General Electric Company Fabricado bajo licencia de marca INFORMACI N DE SEGURIDAD 3 5 USING THE OVEN Caracter sticas 6 Controles 7 Opciones de cocci n disponibles 8 Funciones b sicas 9 10 Fun...

Page 26: ...y creemos que usted tambi n Entre otras cosas el registro de su electrodom stico asegura que podamos entregarle informaci n importante del producto y detalles de la garant a cuando los necesite Regis...

Page 27: ...tro de los 2 pies a cualquier cocina superficie de cocci n horno a gas u otro microondas PARA REDUCIR EL RIESGO DE INCENDIO EN LA APERTURA DEL HORNO No cocine demasiado la comida Preste atenci n cuida...

Page 28: ...una cuchara u otro utensilio en el envase USO DEL ACCESORIO DEL ESTANTE PARA MICROONDAS Retire el estante para microondas del horno cuando no est en uso Use las asas de las ollas al manipular el esta...

Page 29: ...ado c No haga funcionar el horno si se encuentra da ado Es particularmente importante cerrar bien la compuerta 1 la compuerta doblada o curvada 2 las bisagras y pestillos rotos o flojos 3 sellos de la...

Page 30: ...rno 3 Gu a de conveniencia 4 Panel de control de toque y pantalla 5 Bot n de liberaci n de los enganches de la puerta Presione el bot n de liberaci n de los enganches para abrir la puerta 6 Plato gira...

Page 31: ...te Popcorn Palomitas De Ma z Cocina en base a la selecci n del usuario del tama o de la bolsa Beverage Bebida Cocina en base a la selecci n del usuario del tama o de la bebida Auto Defrost Descongelac...

Page 32: ...inar con microondas o al asar por convecci n combinaci n El metal y el mercurio de estos term mentos pueden ocasionar arcos el ctricos y posibles da os sobre el horno No use un term metro en la comida...

Page 33: ...e potencia 7 es energ a de microondas 70 del tiempo Power level 3 nivel de potencia 3 es energ a demicroondas 30 del tiempo La mayor a de las cocciones se har n en el nivel de potencia High nivel de p...

Page 34: ...NCEL OFF Cancelar Apagar Mute Mudo Apaga la notificaci n del fin del ciclo y todas las alertas del microondas Timer On Off Temporizador Encendido Apagado El temporizador no inicia ni detiene el microo...

Page 35: ...se Time Cook Cocci n con Temporizador para adicionar tiempo Es esencial contar con envases y cobertores para una mejor cocci n con sensor Siempre use envases para uso seguro en el horno microondas y c...

Page 36: ...rage Bebida hasta que aparezca el tama o Presione la tecla este n mero de veces Aparezca el tama o 1 4 Oz 2 8 Oz 3 12 Oz 2 Presione Start Iniciar Auto Defrost Descongelaci n Autom tica Para usar la fu...

Page 37: ...cci n 2 Ingrese la temperatura 3 Presione Start Iniciar 4 Si as lo desea un tiempo de cocci n puede ser configurado presionando el bot n COOK TIME Tiempo de Cocci n Esto puede ser realizado antes o de...

Page 38: ...er configurado presionando el bot n Cook Time Tiempo de Cocci n Esto puede ser realizado antes o despu s del precalentamiento 5 Espere el tono de precalentamiento y luego inserte la comida 6 Presione...

Page 39: ...Se recomienda el uso de envases para horneado de Vidrio o Vidrio Cer mico Aseg rese de no usar art culos con bordes met licos ya que pueden ocasionar arcos el ctricos chispas sobre la pared o el esta...

Page 40: ...N R N R Salsas y Coberturas 1 N R N R Sopas y Guisados 1 2 N R Carnes Descongelar 1 N R N R Dorar 2 1 2 Ave Descongelar 1 N R N R Dorar 2 1 2 Pescado y Mariscos Descongelar 1 N R N R Cocci n 1 2 N R C...

Page 41: ...n el tiempo de cocci n Ventilar los envoltorios de pl stico o tapas con papel para alimentos permite la salida de vapor excesivo Cubrir En un horno normal usted cubre las pechugas de pollo o comidas a...

Page 42: ...utensilios afilados en las paredes del horno Cuando limpie las superficies de la puerta y el horno que entran en contacto al cerrar la puerta utilice nicamente jabones suaves y no abrasivos o deterge...

Page 43: ...el tomacorriente Acero Inoxidable No use virutas de acero stas da ar n la superficie Para limpiar la superficie de acero inoxidable use una tela caliente y h meda con un detergente suave adecuado par...

Page 44: ...ar la cocci n Presione START Previamente se hab a seleccionado otra opci n en el horno y no se presion el bot n OFF CLEAR para cancelarla Presione OFF CLEAR El tiempo de cocci n no se ingres luego de...

Page 45: ...as instrucciones del fabricante se podr n ocasionar interferencias en la recepci n de radio y televisi n Se realiz una evaluaci n por tipo y se encontr en cumplimiento con los l mites de un equipo ISM...

Page 46: ...nes comerciales Reemplazo de fusibles de su hogar o reajuste de los diferenciales Da o al producto causado por accidente fuego inundaciones o actos de Dios Da os sobre el acabado tales como xido sobre...

Page 47: ...de convertir este horno en un horno empotrable en pared Para instalaciones de 27 Modelo Kit PEB9159DJWW JX9152DJWW PEB9159DJBB JX9152DJBB PEB9159EJES JX9152EJES PEB9159SJSS JX9152SJSS CEB1599SJSS JX9...

Page 48: ...cualquier momento a trav s de Internet Los Servicios para los Electrodom sticos GE a n estar n all cuando su garant a caduque En EE UU GEAppliances com ge service and support shop for extended service...

Reviews: