Installation
Instructions
ZPK1
Icemaker Drain Pump
WARNING
Electrical Shock Hazard
Disconnect power before servicing.
Replace all panels before operating.
Failure to do so can result in death
or electrical shock.
IMPORTANT:
Connect drain pump to house drain
in accordance with all state and local codes and
ordinances.
Note:
• This drain pump is designed to pump water to a
maximum height of 10 feet.
• To minimize condensation on the drain tube,
insulate the full length of the tube from the pump to
the drain.
Kit Contents:
•
Drain Pump
• Drain Tube, 5/8" ID x 4-1/2" (bin to pump reservoir inlet)
• Drain Tube, 3/8" ID x 10 ft. (pump to house drain)
• Vent Tube, 3/8" ID x 32" (pump to cabinet back)
• 3 Cable Clamps (Secures vent tube to back of product)
• 5 Screws, #8 x 1/2" (secures vent hose clamps to back of cabinet
and pump to base plate)
• 2 Hose Clamps, 1/2" (secures vent and drain tube to pump)
• Hose Clamp, 5/8" (secures drain tube to bin)
If Icemaker Is Presently Installed:
• Push the selector switch to OFF.
• Unplug icemaker or disconnect power.
• Shut off water supply. Wait 5 to 10 minutes for the ice
to fall into the storage bin. Remove all ice from the
bin.
• Disconnect the water inlet line from the water valve.
• If the icemaker is installed between cabinets, pull
icemaker out of the opening.
• Unscrew the drain cap from the bottom of the water
pan located inside the storage bin. Allow water to
drain completely. Replace the drain cap.
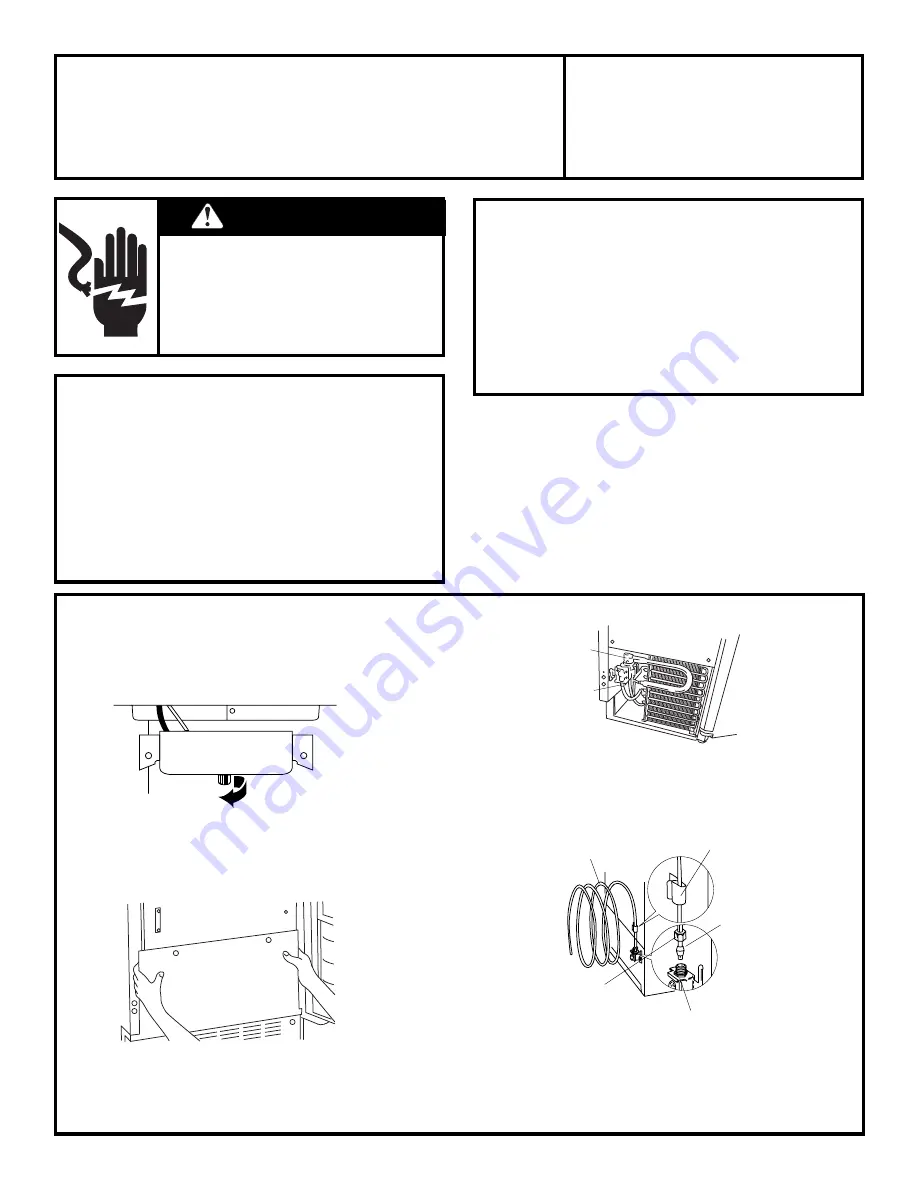
Disconnect Water Inlet
For connection in Front at Water Valve:
• Remove the 2 screws in the front lower access panel
and the 2 screws from the base grille area. Pull panel
forward to remove.
For Connection at Rear of Icemaker:
•␣ Pull icemaker forward.
• For compression nut, diconnect water line as shown.
• For union between copper tubing, disconnect union.
1/4" Copper Tubing
Tubing
Clamp
Ferrule
(Sleeve)
1/4"
Compression Nut
Icemaker Connection
PROCEED TO STEP 1
Water
Inlet
Water
Outlet


