background image

GE H

EALTHCARE

LOGIQ C3/C5 P

REMIUM

D

IRECTION

 5341787-100, R

EVISION


8


B

ASIC

 S

ERVICE

 M

ANUAL

Chapter 4 Functional Checks

4 - 29

4-3-14-3

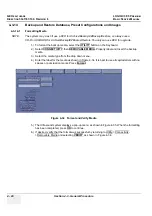
Restore System Presets and Configurations

1.) Insert the Backup/Restore CD (or USB memory device) into the drive. 

2.) On the Keyboard, press 

UTILITY

.

3.) On the LCD display, press 

SYSTEM

.

4.) On the LCD display, select 

BACKUP/RESTORE

.

NOTE:

If you are not logged in with administrator privileges, the Operator Login window is displayed. 
Log on with administrator privileges.

5.) In the Restore list, select Patient Archive, Report Archive and User Defined Configuration.

6.) In the Media field, select the Backup/Restore CD/DVD (or USB memory device).

7.) Select 

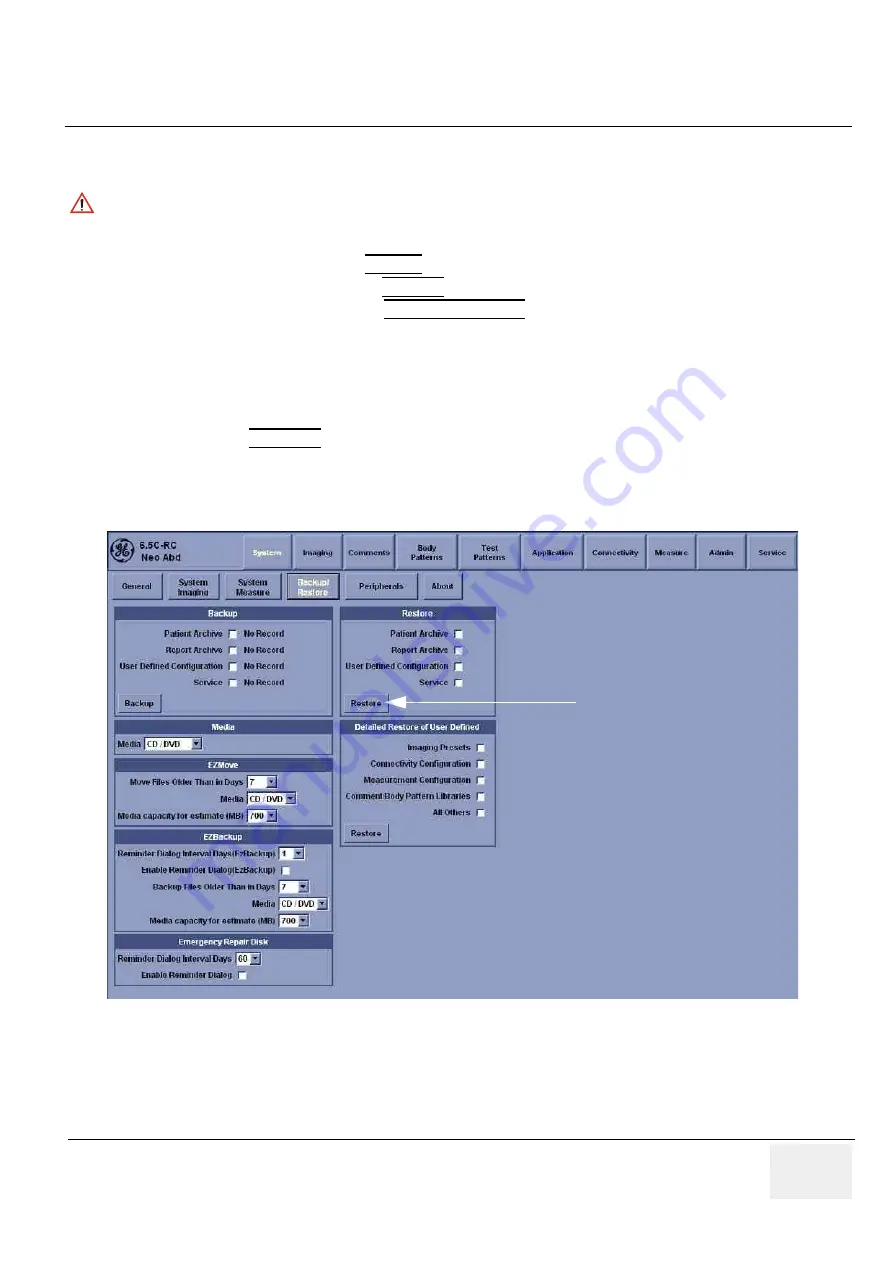
RESTORE

.

The system performs the restore. As it proceeds, status information is displayed on the Backup/Restore 
screen.

CAUTION

The restore procedure 

overwrites

 the existing database on the local hard drive. Make sure to insert 

the correct CD (or USB memory device).

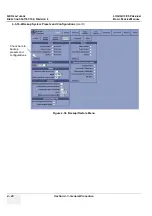
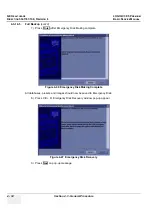
Figure 4-37  Backup/Restore Menu

Check here to 
restore presets and 
configurations.

Summary of Contents for LOGIQ C3 Premium

Page 1: ...GE Healthcare LOGIQ C3 C5 Premium Basic Service Manual Part Number 5341787 100 Revision 8...

Page 2: ......

Page 3: ...QUE L ANGLAIS C EST AU CLIENT QU IL INCOMBE DE LE FAIRE TRADUIRE NE PAS TENTER D INTERVENTION SUR LES QUIPEMENTS TANT QUE LE MANUEL SERVICE N A PAS T CONSULT ET COMPRIS LE NON RESPECT DE CET AVERTISS...

Page 4: ...OU PACIENTE DEVIDO A CHOQUES EL TRICOS MEC NICOS OU OUTROS ESTE MANUAL DE ASSIST NCIA EST DISPON VEL APENAS EM INGL S SE QUALQUER OUTRO SERVI O DE ASSIST NCIA T CNICA QUE N O A GEHC SOLICITAR ESTES M...

Page 5: ...KIELIST MATERIAALIA TARVITTAVAN K NN KSEN HANKKIMINEN ON ASIAKKAAN VASTUULLA L YRIT KORJATA LAITTEISTOA ENNEN KUIN OLET VARMASTI LUKENUT JA YMM RT NYT T M N HUOLTO OHJEEN MIK LI T T VAROITUSTA EI NOUD...

Page 6: ...B OBSLU N HO PERSON LU NEBO PACIENT VLIVEM ELEKTRICK HOP PROUDU RESPEKTIVE VLIVEM K RIZIKU MECHANICK HO PO KOZEN NEBO JIN MU RIZIKU DENNE SERVICEMANUAL FINDES KUN P ENGELSK HVIS EN KUNDES TEKNIKER HAR...

Page 7: ...GALI B TI SU EISTAS D L ELEKTROS SM GIO MECHANINI AR KIT PAVOJ DENNE SERVICEH NDBOKEN FINNES BARE P ENGELSK HVIS KUNDENS SERVICELEVERAND R TRENGER ET ANNET SPR K ER DET KUNDENS ANSVAR S RGE FOR OVERS...

Page 8: ...VERTISMENT AR PUTEA DUCE LA R NIREA DEPANATORULUI OPERATORULUI SAU PACIENTULUI N URMA PERICOLELOR DE ELECTROCUTARE MECANICE SAU DE ALT NATUR OVAJ PRIRU NIK ZA SERVISIRANJE DOSTUPAN JE SAMO NA ENGLESKO...

Page 9: ...PACIJENTA PROUZRO ENE STRUJNIM UDAROM MEHANI KIM I DRUGIM OPASNOSTIMA T TO SERVISN PR RU KA JE K DISPOZ CII LEN V ANGLI TINE AK Z KAZN KOV POSKYTOVATE SLU IEB VY ADUJE IN JAZYK AKO ANGLI TINU POSKYTNU...

Page 10: ...N KILAVUZUN NG L ZCE DI INDAK B R D LDE OLMASINI STERSE KILAVUZU TERC ME ETT RMEK M TER N N SORUMLULU UNDADIR SERV S KILAVUZUNU OKUYUP ANLAMADAN EK PMANLARA M DAHALE ETMEY N Z BU UYARININ G Z ARDI ED...

Page 11: ...GE HEALTHCARE LOGIQ C3 C5 PREMIUM DIRECTION 5341787 100 REVISION 8 BASIC SERVICE MANUAL ix ZH CN KO...

Page 12: ...ll comply with the requirements of the applicable electrical codes The purchaser of GE equipment shall only utilize qualified personnel i e GE s field engineers personnel of third party service compan...

Page 13: ...ing or basic service software does not extend to or cover this software or related documentation If you are a GE Healthcare employee or a customer who has entered into such a license agreement with GE...

Page 14: ...vironmental labels and add new spare parts Pages Revision Pages Revision Title Page N A Chapter 5 Theory pages 5 1 to 5 4 8 Important Precautions i to ix 8 Chapter 6 Service Adjustments pages 6 1 to 6...

Page 15: ...entions 1 4 Conventions Used in Book 1 4 Standard Hazard Icons 1 5 Product Icons 1 6 Safety Considerations 1 9 Introduction 1 9 Human Safety 1 9 Mechanical Safety 1 9 Electrical Safety 1 10 Label Loca...

Page 16: ...pose of chapter 2 2 1 General Console Requirements 2 2 Console Environmental Requirements 2 2 Electrical Requirements 2 2 EMI Limitations 2 4 Scan Probe Environmental Requirements 2 5 Facility Needs 2...

Page 17: ...y Customer Order 3 7 Physical Inspection 3 7 EMI Protection 3 7 Completing the Installation 3 8 Power On Boot Up 3 8 Power Off Shutdown 3 8 Transducer Connection 3 9 System Configuration 3 10 System S...

Page 18: ...oot Up 4 2 Power Off Shutdown 4 2 Archiving and Loading Presets 4 4 Adjusting the Display Monitor 4 5 System Features 4 6 B Mode Checks 4 9 M Mode Controls 4 12 Doppler Mode Checks 4 15 Color Flow Mod...

Page 19: ...341787 100 REVISION 8 BASIC SERVICE MANUAL Table of Contents v CHAPTER 5 Components and Functions Theory Overview 5 1 Purpose of Chapter 5 5 1 Block Diagram 5 2 System Diagram 5 2 Software Diagram 5 3...

Page 20: ...GIQ C3 C5 PREMIUM DIRECTION 5341787 100 REVISION 8 BASIC SERVICE MANUAL vi Table of Contents CHAPTER 6 Service Adjustments Overview 6 1 Purpose of this chapter 6 6 1 Monitor Adjustments 6 2 Adjustment...

Page 21: ...erview 7 4 Check and Record the Print or Store Key Function 7 4 Setting the Print or Store Key to USB Quick Save 7 5 Screen Captures 7 6 Check and Record the Store Key Function 7 6 Setting the Store K...

Page 22: ...MANUAL viii Table of Contents CHAPTER 8 Replacement Procedures Overview 8 1 Purpose of Chapter 8 8 1 DISASSEMBLY RE ASSEMBLY 8 2 Warning and Caution 8 2 Returning Shipping for repairs 8 2 Air filter...

Page 23: ...IC SERVICE MANUAL Table of Contents ix CHAPTER 9 Renewal Parts Overview 9 1 Purpose of Chapter 9 9 1 List of Abbreviations 9 1 Renewal Parts Lists 9 2 Equipment Models Covered in this Chapter 9 2 Oper...

Page 24: ...le 10 2 How often should care maintenance tasks be performed 10 2 Tools Required 10 4 Standard GE Tool Kit 10 4 Special Tools Supplies and Equipment 10 6 Input Power 10 7 Cleaning 10 7 Physical Inspec...

Page 25: ...are recommended as part of the installation or as required during servicing and periodic maintenance 5 Chapter 5 Components and Functions Theory Contains block diagrams and functional explanations of...

Page 26: ...r Description 5346769 LOGIQ C3 Premium Console for Europe 5346771 LOGIQ C3 Premium Console for India 5346772 LOGIQ C3 Premium Console for Argentina 5346774 LOGIQ C3 Premium Console for 110V Table 1 3...

Page 27: ...e for Europe 220V 5433034 LOGIQ C3 Premium Console for Latin America 220V 5433035 LOGIQ C3 Premium Console for Latin America 110V Table 1 7 LOGIQ C5 Model Designations For Software Version R2 1 0 Part...

Page 28: ...n or potential hazards are labeled in one of following ways NOTE Notes provide important information about an item or a procedure Information contained in a NOTE can often save you time or effort DANG...

Page 29: ...r In addition to text several different graphical icons symbols may be used to make you aware of specific types of hazards that could cause harm Other hazard icons make you aware of specific procedure...

Page 30: ...ss Label Used to indicate the degree of safety or protection IP Code IPX8 IPX8 FSU 1000 Indicates the degree of protection provided by the enclosure per IEC60 529 Bottom of footswitch Type BF Applied...

Page 31: ...People s Republic of China Electronic Industry Standard SJ T11364 2006 include the hazardous substances of lead mercury hexavalent chromium cadmium polybrominated biphenyl PBB and polybrominated diphe...

Page 32: ...oint on the LCD monitor Take care to avoid injuring hands or fingers when flipping down the LCD monitor Back of LCD Use the rear handle for horizontal movement only Back of LCD Consult accompanying do...

Page 33: ...MAY BECOME UNSTABLE AND TIP OVER WARNING WARNING ULTRASOUND PROBES ARE HIGHLY SENSITIVE MEDICAL INSTRUMENTS THAT CAN EASILY BE DAMAGED BY IMPROPER HANDLING USE CARE WHEN HANDLING AND PROTECT FROM DAM...

Page 34: ...be connected to an electrical ground The system is equipped with a three conductor AC power cable This must be plugged into an approved electrical outlet with safety ground The power outlet used for t...

Page 35: ...nd probe The purpose of the regulation is to protect employees in the transportation industry as well as the people who will receive or open this package NOTE The USER SERVICE staff should dispose all...

Page 36: ...f signal cables In addition to electromagnetic energy EMC also includes possible effects from electrical fields magnetic fields electrostatic discharge and disturbances in the electrical power supply...

Page 37: ...circumstance should a part or equipment with visible body fluids be taken or shipped from a clinic or site for example body coils or an ultrasound probe The purpose of the regulation is to protect em...

Page 38: ...ers for Customer Assistance Location Phone Number USA GE Vingmed Ultrasound Ultrasound Service Engineering 9900 Innovation Drive Wauwatosa WI 53226 Service On site Service Parts Application Support 1...

Page 39: ...cturer Manufacturer FAX Number GE Medical Systems China Co Ltd No 19 Changjiang Road Wuxi National Hi Tech Development Zone Jiangsu P R China 214028 TEL 86 510 85225888 FAX 86 510 85226688 Table 1 13...

Page 40: ...GE HEALTHCARE LOGIQ C3 C5 PREMIUM DIRECTION 5341787 100 REVISION 8 BASIC SERVICE MANUAL 1 16 Section 1 6 Customer Assistance This page was intentionally left blank...

Page 41: ...pose of chapter 2 This chapter provides the information required to plan and prepare for the installation of LOGIQ C3 C5 Premium Included are descriptions of the facility and electrical needs to be me...

Page 42: ...asound equipment This dedicated power shall originate at the last distribution panel before the system Sites with a mains power system with defined Neutral and Live The dedicated line shall consist of...

Page 43: ...2 2 5 Unit Power Plug If the unit arrives without the power plug or with the wrong plug you must contact your GE dealer or the installation engineer must supply what is locally required 2 2 2 6 Power...

Page 44: ...Poor grounding is the most likely reason a unit will have noisy images Check grounding of the power cord and power outlet Replace all screws RF gaskets covers cores After you finish repairing or upda...

Page 45: ...Environmental Requirements Operation 10 to 40 C Storage 5 to 50 C NOTE Temperature in degrees C Conversion to Degrees F Degrees C 9 5 32 NOTICE SYSTEMS AND ELECTRONIC PROBES ARE DESIGNED FOR STORAGE T...

Page 46: ...s Other connections between pieces of electrical equipment products involved and the accompanying electrical installations are highly sophisticated and special engineering competence is required All e...

Page 47: ...em without a defined Neutral The dedicated line shall consist of one phase two lines not shared with any other circuit and a full size ground wire from the distribution panel to the Ultrasound outlet...

Page 48: ...MMER DEDICATED POWER RECEPTACLE EXTERNAL PERIPHERALS SINK COUNTER TOP FILM VIEWER FILM SUPPLIES SINK LINEN SUPPLY PROBES SUPPLIES 24 IN 61 CM EXAMINARION TABLE 76 IN 193 CM DOOR 30 IN 76 CM An 8 by 10...

Page 49: ...p the on board monitor and peripherals enabling viewing to be done while scanning continues With DICOM images can be archived stored and retrieved faster easier and at a lower cost 2 3 4 4 DICOM Optio...

Page 50: ...s cont d Figure 2 2 Worksheet for DICOM Network Information LOGIQ C3 Host Name AE Title Local Port IP Address Net Mask ROUTING INFORMATION ROUTER2 ROUTER3 ROUTER1 Destination IP Addresses GATEWAY IP A...

Page 51: ...how to check and test the unit and external peripherals for electrical safety are included in this procedure Also included LOGIQ C3 C5 Premium in this section are guidelines for transporting the unit...

Page 52: ...installed and checked out by an experienced service technician in approximately 1 hour LOGIQ C3 C5 Premium consoles with optional equipment may take slightly longer Table 3 2 Average Installation Time...

Page 53: ...ice personnel should carry out servicing and troubleshooting NOTE For information regarding packing labels refer to LABELS ON PACKAGE 3 After being transported the unit may be very cold or hot If this...

Page 54: ...connect the unit to a properly grounded power outlet Do not use a three to two prong adapter This defeats safety grounding CAUTION Do NOT wear the ESD wrist strap when you work on live circuits and mo...

Page 55: ...apes from the packing box 2 Remove the upper cover of the packing box and then rotate the knob to the right to open the packing box 3 Remove the PE bag and plastic film from the system 4 Remove Access...

Page 56: ...han push from the front of the unit Before moving store all loose parts in the unit Wrap transducers in soft cloth or foam to prevent damage Although LOGIQ C3 C5 Premium is a mobile machine two people...

Page 57: ...um is found on a label to the right of the Power switch and External I O on the rear of the system 3 4 2 2 Video Formats Check that the video format is set to the locally used video standard NTSC or P...

Page 58: ...el LCD Peripherals and the Back end Processor 3 5 1 2 Turn on the system Press the Power On Off switch at the front of the system once When the Power On Off switch on the Control Panel is pressed once...

Page 59: ...power status LED is turned amber 5 Disconnect the probes Clean or disinfect all probes as necessary Store them in their shipping cases to avoid damage 3 5 2 2 Scanner Shutdown Disconnect the Mains Po...

Page 60: ...6 System Configuration 3 6 1 System Specifications 3 6 1 1 Physical Dimensions The physical dimensions of the LOGIQ C3 C5 Premium unit are summarized in Table 3 4 on page 3 10 The Size of LOGIQ C3 C5...

Page 61: ...ely 165 Table 3 6 Electrical Specifications for LOGIQ C3 C5 Premium System Voltage Current Frequency 1 110 120 V AC 500VA 50 60Hz 2 220 240 V AC 500VA 50 60Hz Table 3 7 List of Optional Peripherals De...

Page 62: ...Connector Located on the rear panel are Network port 2 USB port S Video Out VGA Audio Out Composite Out 1 2 USB Ports Printers Footswitch etc 2 Network Port 3 VGA 4 Audio Out 5 S Video Out 6 Composite...

Page 63: ...s Footswitch etc 3 6 5 3 Printer Box Rear Panel connector 1 1 USB Ports only for B W Printer NOTE Each outer case ground line of peripheral accessory connectors are protectively grounded Signal ground...

Page 64: ...NC 13 HSY 6 GND 14 VSY 7 GND 15 NC 8 GND Table 3 10 Pin Assignments of USB Pin No Signal Pin No Signal 1 5 VDC 5 5 VDC 2 DATA 6 DATA 3 DATA 7 DATA 4 GND 8 GND Table 3 11 Pin Assignments of Audio Pin...

Page 65: ...5 Connect Peripherals A Connect B W printer to the system B W Printer can be properly connected using USB Ports B Connect UP D23 color printer to the system UP D23 Color Printer can be properly connec...

Page 66: ...onnect the B W printer Sony UP 897MD to the system The B W printer can be properly connected using the Composite Out Port D Connect Foot Switch to the system Foot Switch can be properly connected usin...

Page 67: ...em Setup 3 17 3 6 5 5 Connect Peripherals cont d E Connect the USB Memory to the system The USB Memory can be properly connected using USB ports F ECG can be properly connected using USB ports ECG onl...

Page 68: ...onnect Peripherals cont d G Connect HP 470 Officejet printer to the system HP 470b Officejet Printer can be properly connected using USB Ports H Connect the USB HDD to the system The USB Harddisk can...

Page 69: ...Software Options Refer to the LOGIQ C3 C5 Premium Basic User Manual Chapter 16 Customizing Your System For information on configuring DICOM Connectivity Refer to the LOGIQ C3 C5 Premium Basic User Man...

Page 70: ...et Site System Information Services Destination Devices TCP IP Settings Device Type Manufacturer Name IP Address Port AE Title 1 2 3 4 5 6 7 8 9 10 11 12 Name AE Title Dept LOGIQ SN Type Floor Room RE...

Page 71: ...EALTHCARE VIVID FIVE DIRECTION 5273008 100 REVISION 8 BASIC SERVICE MANUAL Chapter 3 System Setup 3 21 Section 3 9 Loading Base Image Software Refer to Section 8 4 Loading Base Image Software on page...

Page 72: ...0 Software Version check out Section 3 10Software Version check out 3 10 1 Functional Check out 1 Power on LOGIQ C3 C5 Premium scanner and wait until system booting to main screen 2 Press UTILITY key...

Page 73: ...safety and user information is available during the operation and service of the complete system 3 11 1 Product Locator Installation NOTE The Product Locator Installation Card shown may not be same as...

Page 74: ...GE HEALTHCARE VIVID FIVE DIRECTION 5341787 100 REVISION 8 BASIC SERVICE MANUAL 3 24 Section 3 11 Paperwork This page was intentionally left blank...

Page 75: ...LOGIQ C3 C5 Premium console diagnostics by using the built in service software and power supply Section 4 2 Required Equipment To perform these tests you ll need any of the sector linear or convex tra...

Page 76: ...he system once When the Power On Off switch on the Control Panel is pressed once the Back end Processor starts and the software code is distributed to initiate the scanner No status messages are displ...

Page 77: ...down process takes a few seconds and the power off sequence is complete when the power status LED is turned amber 5 Disconnect the probes Clean or disinfect all probes as necessary Store them in their...

Page 78: ...pages can be saved on an CD R disk or USB memory device for reloading on the system 4 3 3 1 Archiving Presets to an CD R Disk or USB memory device 1 Insert an empty blank CD R disk into the DVD RW 2...

Page 79: ...into the DVD RW 2 Access to the Utility Menu and select System The Restore sheet will be shown on the LCD display 3 Select the item to restore either from Resource Files 4 Enter restore destination o...

Page 80: ...op Menu Controls 4 Keyboard 5 Preset Comment Harmonics keys 6 Patient key 7 Mode keys B Mode M Mode PW Mode PDI CF Mode 8 Gain Auto key 9 Zoom key 10 Ellipse key 11 Depth key 12 Reverse Print Store ke...

Page 81: ...3 5 2 LOGIQ C3 C5 Premium SoftMenu Key Tour 1 Top Menu Controls op Menu Controls 2 Sub menu Controls Activates Sub Menu for Modes and toggles changes functions A Press F5 on the keyboard to activate...

Page 82: ...Patient Name Patient Identification 13 Imaging Parameters by Mode current mode highlighted 3 Acoustic Output Readout 14 Focal Zone 4 GE Symbol Probe Orientation Marker Coincides with a probe orientati...

Page 83: ...lation to the System probe connector 2 Turn ON the scanner if it isn t turned on already Figure 4 26 Controls available in B Mode Figure 4 27 B Mode Screen Picture Example Biopsy Kit Frame Average Lin...

Page 84: ...ess the control to toggle between Focus Position and Focus Number Press Up Down Button to move or adjust the focal numbers 5 Activate Auto Optimize Optimize the image based upon a specified region of...

Page 85: ...t up to a higher frequency 5 Adjust Frame Average Temporal filter that averages frames together This has the effect of presenting a smoother softer image 6 Adjust Rotation Rotates the image by selecti...

Page 86: ...s listed in 3 6 6 Available Probes on page 3 19 in Chapter 3 Installation to the System probe connector 2 Turn ON the scanner if it isn t turned on already Figure 4 28 Controls available in M Mode Fig...

Page 87: ...Panel Controls Step Task Expected Result s 1 Press M Mode key M Mode Starts 2 Adjust Gain Controls the amount of echo information displayed in an image Turn B Mode dial to the left right to increase d...

Page 88: ...resented as shades of gray 4 Activate Colorize Enables gray scale image colorization To deactivate reselect a Gray Map 5 Activate Full Timeline Displays only timeline screen Press the Full Timescreen...

Page 89: ...t isn t turned on already Figure 4 30 Controls available in Doppler Mode Figure 4 31 Doppler Mode Screen Picture Example Secondary Menu Gain M D Cursor Primary Menu Frequency SV Length Sweep Speed Ang...

Page 90: ...ifies the overall strength of the echoes processed in the Color Flow window Turn the Gain dial PW Mode key to the left right to increase decrease Gain 3 Display M D Mode Cursor Displays the M D Mode c...

Page 91: ...invert the spectral trace The Plus and Minus signs on the velocity scale reverse when the spectrum is inverted 8 Auto Calculation Enables or disables auto calculation 9 Modify Calcs Activates the win...

Page 92: ...ay 18 Trace Sensitivity Adjusts the sensitivity to get more accurate envelope trace 19 Time Resolution Adjusts the resolution in frequency domain 20 Spectral Average Optimizes the smoothness of the sp...

Page 93: ...lable Probes on page 3 19 in Chapter 3 Installation to the System probe connector 2 Turn ON the scanner if it isn t turned on already Figure 4 32 Controls available in Color Flow Mode Figure 4 33 CFM...

Page 94: ...4 3 9 2 Color Flow Mode OP Panel Controls Table 4 9 Color Flow Mode OP Panel Controls Step Task Expected Result s 1 Press CFM Mode key CFM Mode Starts 2 Adjust Gain Amplifies the overall strength of...

Page 95: ...e frame rate is too slow reduce the size of the region of interest select a different line density setting or reduce the packet size 8 Activate Spatial Filter 9 Adjust Dynamic Range Dynamic Range cont...

Page 96: ...e 17 Power output Optimizes image quality and allows user to reduce beam intensity 10 increments between 0 100 Values greater than 0 1 are displayed 18 Wall Filter Wall Filter insulates the Doppler si...

Page 97: ...ipers adjust CURSOR SELECT NOTE After you complete the measurement to erase all data that has been measured to this point but not data entered onto worksheets press CLEAR 4 3 10 2 Circumference Area E...

Page 98: ...2 Activating the probe The probe activates in the currently selected operating mode The probe s default settings for the mode and selected exam are used automatically 4 3 11 3 Deactivating the probe 1...

Page 99: ...Frame up down Two Button Softkey upward to move forward through the CINE Loop Adjust the Softkey downward to move backward through the CINE Loop 4 3 12 4 Adjusting the CINE Loop Playback Speed Adjust...

Page 100: ...the UTILITY button on the Keyboard 2 Select CONNECTIVITY then REMOVABLE MEDIA Properly label and Insert the backup media 3 Select the media type from the drop down menu 4 Enter the label for the medi...

Page 101: ...ormatted CD into the drive 2 On the Keyboard press UTILITY 3 On the LCD display press SYSTEM 4 On the LCD display select BACKUP RESTORE NOTE If you are not logged in as GE Service or with administrato...

Page 102: ...MIUM DIRECTION 5341787 100 REVISION 8 BASIC SERVICE MANUAL 4 28 Section 4 3 General Procedure 4 3 14 2Backup System Presets and Configurations cont d Figure 4 36 Backup Restore Menu Check here to back...

Page 103: ...ivileges the Operator Login window is displayed Log on with administrator privileges 5 In the Restore list select Patient Archive Report Archive and User Defined Configuration 6 In the Media field sel...

Page 104: ...drive by date Therefore the best way is to label media by date NOTE Images will be moved from the hard drive by date Therefore the best way to label media is by date When images are moved to the archi...

Page 105: ...Archiving Images cont d 7 Press PATIENT and set the Dataflow to store images directly to CD ROM 8 From the image screen press EZBACKUP MOVE The Move Images pop up appears 9 Press Next on pop up messag...

Page 106: ...11 Press Finish after Backup Move complete All databases presets and images should now be saved to removable media 4 3 14 5 Full Backup 1 Connect the USB HDD to system 2 Select Backup Restore then Eme...

Page 107: ...al Checks 4 33 4 3 14 5 Full Backup cont d 4 Return to scan mode Press Ctrl B the Emergency Disk Making window pop up appears 5 Press Next on pop up message 6 A storage information message appears Pre...

Page 108: ...4 3 14 5 Full Backup cont d 7 Press Finish after Emergency Disk Making complete All databases presets and images should now be saved to Emergency Disk 8 Press Ctrl R Emergency Disk Recovery window po...

Page 109: ...ICE MANUAL Chapter 4 Functional Checks 4 35 4 3 14 5 Full Backup cont d 10 A recovery information message appears Press Next to continue 11 Press Finish after Emergency Disk Recovery complete Figure 4...

Page 110: ...rect 3 Check Language settings Desired Language is displayed 4 Check assignment of Printer Keys The default function for Store and Print Keys are Store store image Print print Store and Print Keys can...

Page 111: ...hapter 5 Components and Functions Theory Section 5 1 Overview 5 1 1 Purpose of Chapter 5 This chapter explains LOGIQ C3 C5 Premium system concepts component arrangement and subsystem function Table 5...

Page 112: ...CARE VIVID FIVE DIRECTION 5341787 100 REVISION 8 BASIC SERVICE MANUAL 5 2 Chapter 5 Components and Functions Theory Section 5 2Block Diagram 5 2 1 System Diagram Figure 5 50 LOGIQ C3 C5 Premium System...

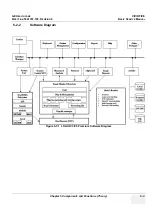
Page 113: ...GE HEALTHCARE VIVID FIVE DIRECTION 5341787 100 REVISION 8 BASIC SERVICE MANUAL Chapter 5 Components and Functions Theory 5 3 5 2 2 Software Diagram Figure 5 51 LOGIQ C3 C5 Premium Software Diagram...

Page 114: ...s and Functions Theory Section 5 3 Common Service Platform 5 3 1 Introduction The Service Platform contains a set of software modules that are common to all PC backend ultrasound and cardiology system...

Page 115: ...ter 6 Service Adjustments Section 6 1 Overview 6 1 1 Purpose of this chapter 6 This section describes how to test and adjust the scanner These tests are optional You may use them to check the system f...

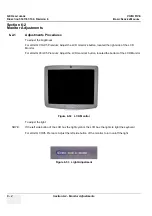
Page 116: ...the LCD monitor s button located the right side of the LCD Monitor For LOGIQ C3 LC5 Premium Adjust the LCD monitor s button located the bottom of the LCD Monitor To adjust the light NOTE If the left s...

Page 117: ...ftware that help maintain image quality and system operation Very basic host system and board level diagnostics are run whenever power is applied Some Service Tools may be run at the application level...

Page 118: ...ck to the manufacturer for analysis There are different options to acquire this data that would give different results 7 2 2 Collect Vital System Information The following information is necessary in...

Page 119: ...Logs Crash Log Power Supply Temperature NOTE Power Supply and Temperature logs are not currently being updated by the LOGIQ C3 C5 Premium This Alt D function is available at all times When Alt D is pr...

Page 120: ...NOTE The print key that has been assigned to the USB Quick Save function should not have any other service functions assigned to it 7 3 2 Check and Record the Print or Store Key Function Check the fu...

Page 121: ...the Buttons tab displayed go to the Destinations list 2 From the list select USB Quick Save Press to add the selection to the Printflow View section 3 Ensure that the Physical Print Buttons section f...

Page 122: ...gure 7 55 on page 7 4 If Store key is not set to Whole Screen as shown in Figure 7 55 proceed to step 5 to record the customer s customized settings 5 In the Destinations section record the service th...

Page 123: ...3 Click FREEZE to unfreeze the image to view the image screen and the snapshots displayed on the bottom 4 Highlight the snapshot to be stored to RD Removable Disk or CD R 5 Select Menu on the right si...

Page 124: ...onality recorded in section 7 3 2 on page 4 Refer to Figure 7 55 1 Click Utility on the keyboard 2 Select Connectivity from the Utilities Menu 3 Select the Buttons tab on the Connectivity screen 4 In...

Page 125: ...selections 7 5 1 1 Disruptive Mode Allows you to enable or disable disruptive mode troubleshooting 7 5 1 2 System Shutdown Allows for system shutdown from the diagnostic menu Select to Restart System...

Page 126: ...ection 7 5 Common Diagnostics 7 5 2 PC Diagnostics Non Interactive Tests 7 5 2 1 Essential Tests 7 5 2 2 System Board 7 5 2 3 Hard Disk Surface Scan 7 5 2 4 Hard Disk Quick Test 7 5 2 5 PCIBus 7 5 2 6...

Page 127: ...ION 8 BASIC SERVICE MANUAL Section 7 5 Common Diagnostics 7 11 7 5 3 PC Diagnostics Interactive Tests 7 5 3 1 Keyboard Test 7 5 3 2 Mouse Test 7 5 4 Restart LOGIQ C3 C5 Premium After Diagnostics Alway...

Page 128: ...6 Network Configuration Section 7 6 Network Configuration 7 6 1 Network Configuration 7 6 1 1 Wire LAN Network 1 Connect system with network 2 Press Utility Connectivity TCPIP in IP Settings window ch...

Page 129: ...ble DHCP option input static address in IP Address box Subnet Mask and Default Gateway box In Network Speed box choose the proper speed available 3 Click Save in popped up dialog choose Shutdown 4 Aft...

Page 130: ...GE HEALTHCARE LOGIQ C3 C5 PREMIUM DIRECTION 5341787 100 REVISION 8 BASIC SERVICE MANUAL 7 14 Section 7 6 Network Configuration This page was intentionally left blank...

Page 131: ...Purpose of Chapter 8 This chapter describes replacement procedures for the following modules and subsystems Table 8 1 Contents in Chapter 8 Section Description Page Number 8 1 Overview 8 1 8 2 DISASSE...

Page 132: ...erased from the Harddisk Storage Device In case that any patient information is still residing on the LOGIC3 C5 Premium GE will contact the customer and request for urgent collection of that patient i...

Page 133: ...hich fix air filter on the edge of power box refer to 8 2 3 Air filter and Knob Screw on page 8 3 2 Pull rightward the knob screw out the air filter refer to 8 2 3 Air filter and Knob Screw on page 8...

Page 134: ...a description on how to remove the trackball and clean the roller 8 3 0 1 Tools No need 8 3 0 2 Needed Manpower 1 person 3 minutes travel 8 3 0 3 Preparations Shut down the system 8 3 0 4 Procedure Re...

Page 135: ...LTHCARE VIVID FIVE DIRECTION 5341787 100 REVISION 8 BASIC SERVICE MANUAL Section 8 3 Trackball Roller Cleaning 8 5 Section 8 3 Trackball Roller Cleaning cont d Figure 8 64 Trackball Roller Cleaning 1...

Page 136: ...ble is connected during system upgrade 1 Insert the disk labeled System Application Software into the DVD ROM drive 2 Properly turn off the scanner by momentarily pressing the Power On Off Switch Sele...

Page 137: ...elect one of the options for loading the system Select choice 1 to load the complete disk 7 Press any key to continue when below message display as shown below Figure 8 66 Selection for loading the sy...

Page 138: ...ystem CD will be loaded as shown in the screen below 9 System updating finished refer to Figure 8 69 on page 8 8 10 Press power key to reboot system then remove the CDROM from the drive immediately Wh...

Page 139: ...ions Assy Assembly Ctrl Control FRU 1 Replacement part available in part hub FRU 2 Replacement part available from the manufacturer lead time involved Int Internal I O Input Output LCD Liquid Crystal...

Page 140: ...ower cord India Class 1 1 AC Power Cord 5177195 Power cord Argentina Class 1 1 AC Power Cord 5176907 Power cord UK Class 1 1 AC Power Cord 5177153 Power cord Denmark Class 1 1 AC Power Cord 5177154 Po...

Page 141: ...DIRECTION 5341787 100 REVISION 8 BASIC SERVICE MANUAL Chapter 9 Renewal Parts 9 3 Section 9 4Operator Console Assy Figure 9 70 Operator Console Assy LOGIQ C3 Premium LOGIQ C5 Premium LCD Assy Keyboard...

Page 142: ...der Cable 5220410 TGC Cable 5001 5352549 Cable Kit Underside including the following cables 1 2 5332371 MTK 5332373 HDD_SATA 5340119 DVD_SATA 5340734 Cable from MST PWA to TX and Relay 5333465 System...

Page 143: ...95 4 LOGIQ C Premium R2 0 3 System and Application DVD 2 1 5012 5343395 7 LOGIQ C Premium R2 0 6 System and Application DVD 2 1 5013 5343395 8 LOGIQ C Premium R2 0 7 System and Application DVD 2 1 501...

Page 144: ...C5 Premium English 1 N 6002 5341361 101 User Manual LOGIQ C3 C5 Premium French 1 N 6003 5341361 106 User Manual LOGIQ C3 C5 Premium Spanish 1 N 6004 5341361 108 User Manual LOGIQ C3 C5 Premium German...

Page 145: ...Probe Center Frequency 7 5MHz 1 1 7002 6 5C RC 5315685 Probe Center Frequency 6 5MHz 1 1 7003 E7C RC 5315686 Probe Center Frequency 6 5MHz 1 1 7004 3S RC 5213343 Probe Center Frequency 2 0MHz 1 1 7005...

Page 146: ...GE HEALTHCARE VIVID FIVE DIRECTION 5341787 100 REVISION 8 BASIC SERVICE MANUAL 9 8 Section 9 7 Probes This page was intentionally left blank...

Page 147: ...apter completely and familiarize yourself with the procedures before performing a task Table 10 1 Contents in Chapter 10 Section Description Page Number 10 1 Overview 10 1 10 2 Why do Maintenance 10 2...

Page 148: ...of corrective action must be documented and maintained on the site Your GE service representative can help you with establishing performing and maintaining records for a quality assurance program Plea...

Page 149: ...bile Unit Check Weekly Inspect Cables and Connectors Clean Console Inspect Wheels Casters brakes and Swivel Locks Mobile Unit Check Daily Check Control Panel Movement Mobile Unit Check Daily Console L...

Page 150: ...nt 9 4151 Screwdriver Blade Stubby 9 41322 Pickup Tool Claw type 9 41421 Screwdriver Blade Pocket clip 9 6757 6 pc Needle File Set 9 41594 Screwdriver Blade 1 8 in x 4 in 9 9487 Utility Knife 9 41581...

Page 151: ...ol ID Description 9 45381 Pliers Arc Joint 9 1 2 inch 9 44067 Socket 1 1 16 in for 1 2 in drive 9 45092 Pliers Linesman 8 1 2 inch 9 42679 Socket 10MM Hex for 1 2 in drive 2273333 9 42882 Punch Pin 3...

Page 152: ...nductive ground cord Anti Static Vacuum Cleaner 46 194427P278 46 194427P279 120V 230V Air Filter air intake Safety Analyzer The Safety Analyzer tool should be calibrated and compliant with AAMI ESI 19...

Page 153: ...probe holders they may need to be soaked to remove excess gel Table 10 8 Physical Checks Step Item Description 1 Labeling Verify that all system labeling is present and in readable condition refer to...

Page 154: ...noting the combination of lights that are illuminated Any problems found should be reported to the hospital immediately and the receptacle should not be used NOTE No outlet tester can detect the cond...

Page 155: ...test the ground wire resistance 1 Turn the LOGIQ C3 C5 Premium unit OFF 2 Plug the unit into the meter and the meter into the tested AC wall outlet 3 Plug the black chassis cable into the meter s CHA...

Page 156: ...ith the unit ON and OFF with the power line polarity Normal and Reversed Record the highest reading of current When using the Microguard or a similar test instrument its power plug may be inserted int...

Page 157: ...le Record the highest leakage current measured 10 4 10 Isolated Patient Lead Sink Leakage Isolation Test reference the procedure in the IEC 60601 1 Select the ALL position on the lead selector Depress...

Page 158: ...nce Limit GROUND OPEN GROUND CLOSED Patient Lead to Ground Leakage Current Test and Patient Lead to Lead Leakage Current Test 115V 10uA 10uA 220 240V 500uA 10uA Table 10 10 Maximum Allowance Limit for...

Page 159: ...leakage current dependent on its design Small variations in probe leakage currents are normal from probe to probe Other variations will result from differences in line voltage and test lead placement...

Page 160: ...possibility Never switch the Polarity and the status of Neutral when the unit is powered ON Be sure to turn the unit power OFF before switching them using the POLARITY switch and or the NEUTRAL switch...

Page 161: ...ate if the fault lies with the probe or the scanner NOTE Each probe will have some amount of leakage dependent on its design Small variations in probe leakage currents are normal from probe to probe O...

Page 162: ...requency Scan Format Model Number Serial Number Probe 2 Frequency Scan Format Model Number Serial Number Probe 3 Frequency Scan Format Model Number Serial Number Probe 4 Frequency Scan Format Model Nu...

Page 163: ...nd Continuity Chassis Source Leakage Current Probe Chassis Source Leakage Current Caster Chassis Source Leakage Current CRT Patient Lead Source Leakage Lead to Ground Patient Lead Source Leakage Lead...

Page 164: ...GE HEALTHCARE LOGIQ C3 C5 PREMIUM DIRECTION 5341787 100 REVISION 8 BASIC SERVICE MANUAL 10 18 Section 10 5 When There s Too Much Leakage Current This page was intentionally left blank...

Page 165: ...tion 2 9 E Electrical Safety 1 10 Electrostatic Discharge Warning 1 12 EMI 1 12 ESD 1 12 Exam study display location 4 8 F Focal zone display location 4 8 Functional Checks 4 1 Basic Measurements 4 23...

Page 166: ...edures Voltage Settings 3 7 Probe identifier display location 4 8 Probe orientation marker display location 4 8 Probes Connector Usage Functional Checks 4 24 Product Icons 1 6 R Required Features 2 7...

Page 167: ......
Page 168: ...2009 2012 General Electric Company GE Healthcare GEMedical Systems Ultrasound 9900 Innovation Drive Wawautosa Wisconsin 53226 USA...

Reviews: