E4
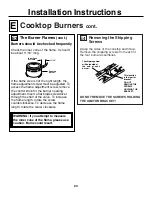
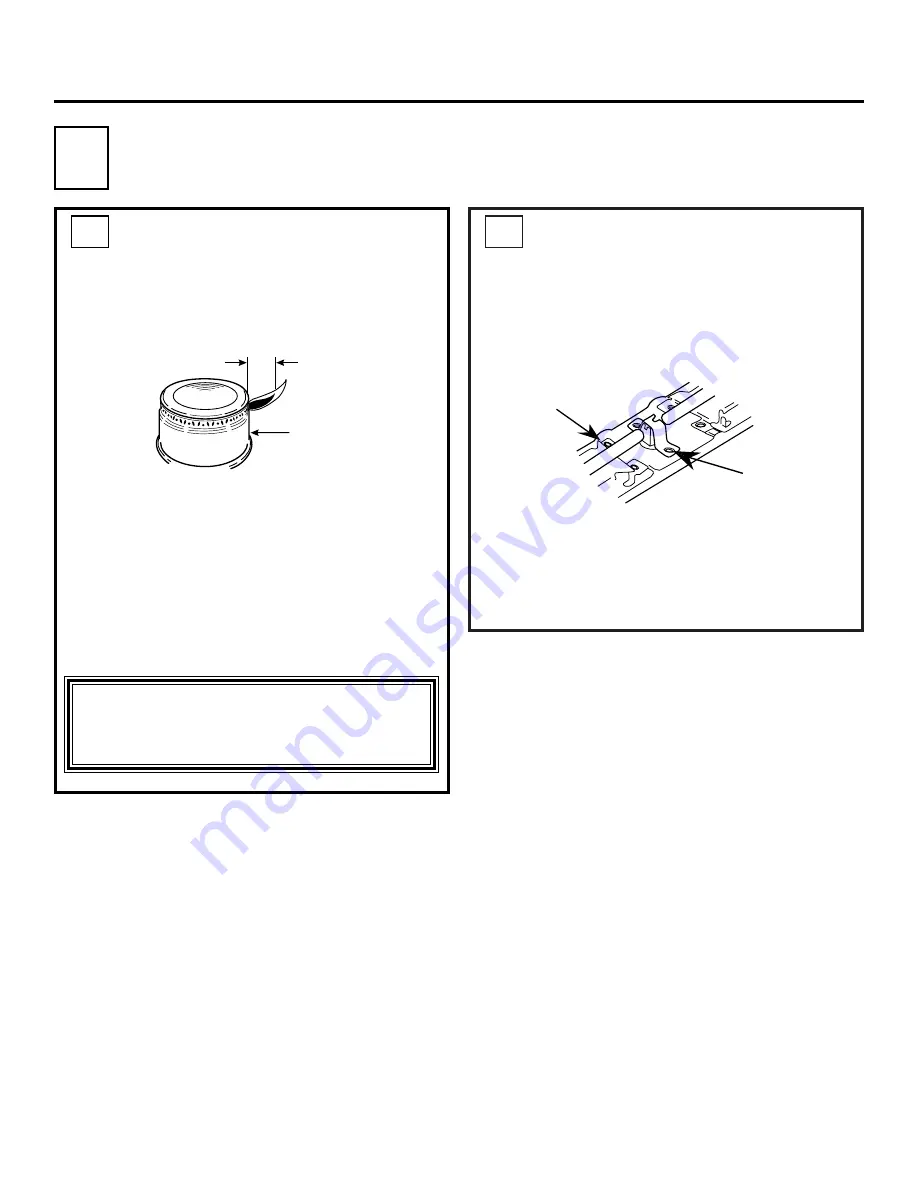
Removing the Shipping
Screws
Grasp the sides of the cooktop and lift up.
Remove the shipping screws from each of
the four burner assemblies.
DO NOT REMOVE THE SCREWS HOLDING
THE IGNITOR BRACKET!
Cooktop Burners
cont.
E
Installation Instructions
23
The shipping screw
will be located at
the end of each
burner.
This location
is the ignitor
bracket.
DO NOT
REMOVE THE
SCREWS
HOLDING THE
BRACKET.
E3
The Burner Flames
(cont.)
Check the inner cone of the flame. It should
be about 11/16
″
long.
If the flame size is not the right length, the
flame adjustment screw must be adjusted. To
access the flame adjustment screw, remove
the control knob for the burner needing
adjustment. Insert a flat blade screwdriver
through the shaft of the valve. To increase
the flame length, rotate the screw
counterclockwise. To decrease the flame
length, rotate the screw clockwise.
Burners should be checked frequently
WARNING: If you attempt to measure
the inner cone of the flame, please use
caution. Burns could result.
11/16"
Inner Cone
of Flame
Cooktop
Burner
Summary of Contents for JGP321
Page 58: ...Seguridad Operaci n Cuidado y limpieza Solucionar problemas Apoyo al consumidor Notas 26...
Page 59: ...27 Apoyo al consumidor Solucionar problemas Operaci n Seguridad Cuidado y limpieza Notas...
Page 60: ...Seguridad Operaci n Cuidado y limpieza Solucionar problemas Apoyo al consumidor Notas 28...
Page 61: ...29 Apoyo al consumidor Solucionar problemas Operaci n Seguridad Cuidado y limpieza Notas...
Page 62: ...Seguridad Operaci n Cuidado y limpieza Solucionar problemas Apoyo al consumidor Notas 30...


