


– 2 –
THERMOCOUPLE
―
HOW IT WORKS
The thermocouple is an electronic device that senses if
the pilot
fl
ame is the proper size and hot enough to ignite
natural gas or propane fuel to the burner.
Note:
The thermocouple is a part of the pilot assembly.
To replace the thermocouple, order a pilot assembly.
The thermocouple (technically called a thermocouple
junction) is a device that contains two metal wires
welded at the ends, forming a sensor, and placed inside
a protective metal case. The thermocouple sensor is
found at the end near the pilot burner and is designed
to be placed in the hottest part of the pilot
fl
ame. The
other end is connected to the oven thermostat. As the
thermocouple heats up, it produces a small amount of
electricity (3 to 20 millivolts) that is applied to a small
electromagnetic valve in the oven thermostat. The
energized electromagnetic valve will keep the pilot gas
valve open.
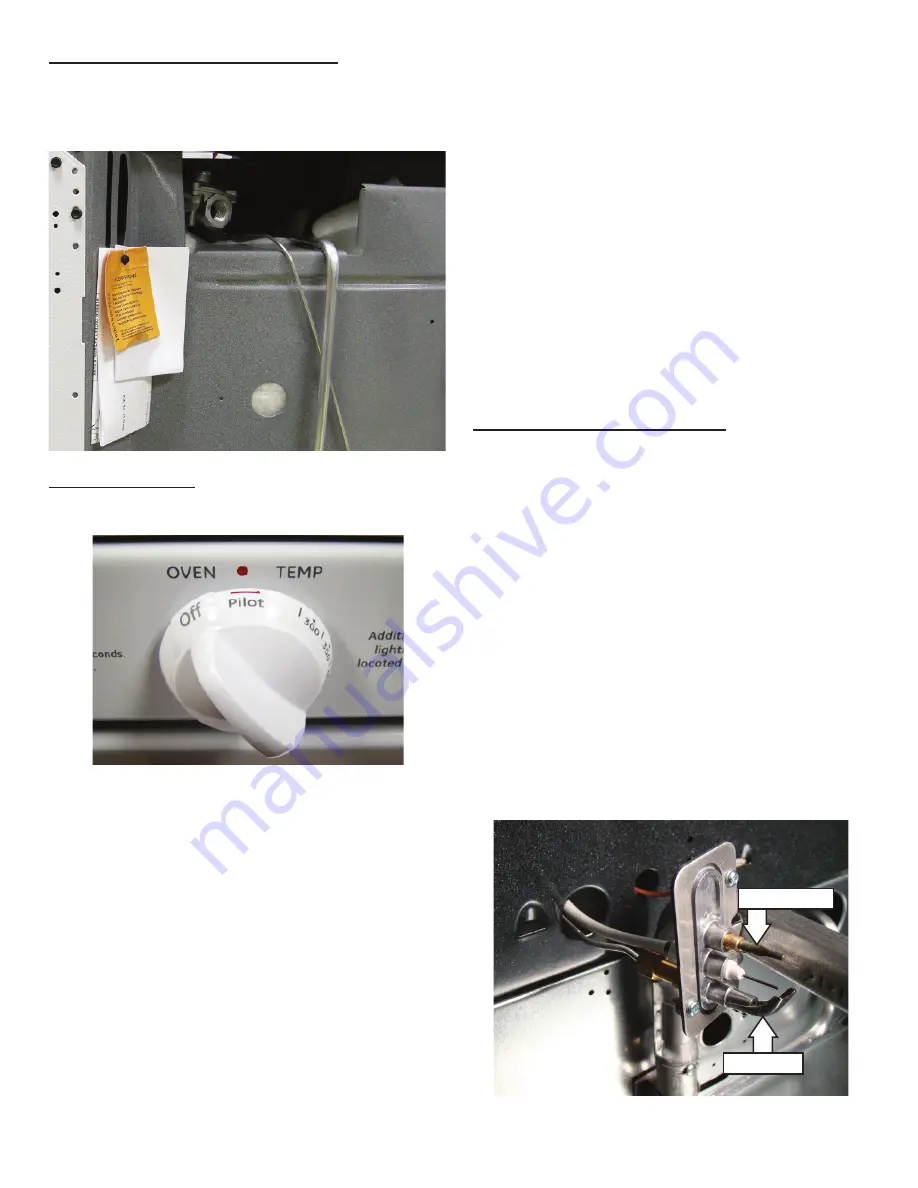
TO LIGHT THE OVEN:
1. Turn thermostat knob to the
Pilot
position.
MINI-MANUAL AND LP CONVERSION KIT:
The Mini-manual and the LP conversion kit are attached
to the back of the range near the gas inlet pipe with a
1/4-in. hex-head screw.
1. Push the thermostat knob in completely and hold it
in for 10 seconds. This 10-second period allows gas
to be supplied and ignited at the pilot burner and
heat applied to the thermocouple.
2. Turn the thermostat knob to the desired temperature.
This allows gas to be supplied to the oven burner and
ignited.
3. Open the oven door and check for burner
fl
ame.
3. Lift the back of the oven bottom then remove the
bottom from the oven cavity.
4. Locate the oven burner pilot at the left rear of the
oven burner.
5. Hold a lit match to the oven burner pilot. Turn the
oven control knob to the
Pilot
position and push it in
completely.
6. After the pilot is lit, continue to hold in
fi
rmly on the
knob for 10 seconds before releasing.
7. Pilot should remain lit, if not, repeat steps 5 and 6.
8. Replace oven bottom, racks, and door.
9. Turn knob to the desired temperature setting. Oven
will operate normally.
10. Turn oven control knob to
Off
when
fi
nished baking.
Note:
The oven may be lit with a match and operated
normally even if the battery is too weak to activate the
spark system.
To match-lite the oven burner:
1. Remove the oven door and oven racks.
2. Remove the two 1/4-in. hex-head screws at the back
of the oven bottom.
Thermocouple
Pilot Burner
Pilot Assembly


