background image

9

Safety Instructions

Operating Instructions

Care and Cleaning

Troubleshooting T

ips

Customer Service

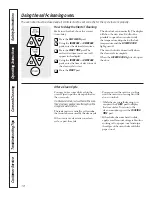
Special features of your oven control.

Your new touch pad control has additional features that you may choose to use. The following are the features and
how you may activate them. 

The special feature modes can only be activated while the display is showing the time of day. They remain in the
control’s memory until the steps are repeated. 

When the display shows your choice, press the START pad. The special features will remain in memory after 
a power failure.

12 Hour Shut-Off

With this feature, should you forget and leave the
oven on, the control will automatically turn off the
oven after 12 hours during baking functions or
after 3 hours during a broil function.

If you wish to turn 

OFF

this feature, follow

the steps below.

Press the 

BAKE

and 

BROIL HI/LO

pads 

at the same time for 3 seconds until 

the display shows 

SF.

Press the 

START TIME

pad. The

display will show 

12 shdn

(12 hour

shut-off). Press the 

START TIME

pad again and the display will show 

no shdn

(no shut-off).

Press the 

START

pad to activate the

no shut-off and leave the control 

set in this special features mode.

Fahrenheit or Celsius Temperature Selection

Your oven control is set to use the Fahrenheit
temperature selections but you may change this
to use the Celsius selections.

Press the 

BAKE

and 

BROIL HI/LO

pads 

at the same time for 3 seconds until 

the display shows 

SF.

Press the 

BROIL HI/LO

pad. The

display will show 

F

(Fahrenheit).

Press the 

BROIL HI/LO

pad again. The

display will show 

C

(Celsius).

Press the 

START

pad.

Control Lockout

Your control will allow you to lock out the touch
pads so they cannot be activated when pressed.

Press the 

BAKE

and 

BROIL HI/LO

pads 

at the same time for 3 seconds until 

the display shows 

SF.

Press the 

SELF CLEAN

pad. The

display will show 

LOC OFF.

Press the 

SELF CLEAN

pad again. The

display will show 

LOC ON.

Press the 

START

pad to activate the

control lockout feature and leave the

control set in this special features

mode.

When this feature is on and the touch

pads are pressed the control will beep and

the display will show 

LOC.

NOTE:

The control lockout mode will not 

affect the CLOCK and KITCHEN TIMER ON/OFF
touch pads.

Summary of Contents for JDP36

Page 1: ...Part No 164D3333P101 1 Pub No 49 8866 1 12 98 CG OFF LO M E D H I OFF LO M E D H I OFF LO M E D H I OFF LO M E D H I FRONT REAR FRONT REAR SURFACE UNITS OVEN LIGHT JDP36 JDP37 JDP39 Owner s Manual Ra...

Page 2: ...t Registration 29 Warranty 31 Service Telephone Numbers Back Cover Inside you will find many helpful hints on how to use and maintain your range properly Just a little preventive care on your part can...

Page 3: ...o repair or replace any part of your range unless it is specifically recommended in this manual All other servicing should be referred to a qualified technician Do not store flammable materials in an...

Page 4: ...ther flammable vapors and liquids in the vicinity of this or any other appliance Always keep dish towels dish cloths pot holders and other linens a safe distance from your range Always keep wooden and...

Page 5: ...ven can ignite Do not leave paper products cooking utensils or food in the oven when not in use After broiling always take the broiler pan out of the range and clean it Leftover grease in the broiler...

Page 6: ...aceunits Always turn the surface units off before removing cookware Do not immerse or soak the removable surface units Do not put them in a dishwasher Do not self clean the surface units in the oven A...

Page 7: ...evenly at low to medium heat settings Steel pans may cook unevenly if not combined with other metals For best cooking results pans should be flat on the bottom Match the size of the saucepan to the s...

Page 8: ...INCREASE or DECREASE pads to set the amount of time you want yourfoodtocook The oven will shut off when the cooking time has run out START TIME Pad Press this pad and the INCREASE or DECREASE pads to...

Page 9: ...E pad again and the display will show no shdn no shut off Press the START pad to activate the no shut off and leave the control set in this special features mode Fahrenheit or Celsius Temperature Sele...

Page 10: ...s the one beep every 6 seconds Press the START pad 12 Hour 24 Hour or Clock Black Out Your control is set to use a 12 hour clock If you would prefer to have a 24 hour military time clock or black out...

Page 11: ...ctivate the cook and hold feature and leave the control set in this special features mode Changing the Speed of the Increase or Decrease Pads As you use the INCREASE or DECREASE pads when setting a ti...

Page 12: ...gel food cake A bundt or pound cakes Biscuits muffins brownies B or C cookies cupcakes layer cakes pies Casseroles B or C Preheating and Pan Placement Preheat the oven if the recipe calls for it Prehe...

Page 13: ...lb 4 patties C 10 7 Space evenly Up to 8 Well Done 1 2 to 3 4 thick patties take about the same time Beef Steaks Rare 1 thick C 6 5 Steaks less than 1 Medium 1 to 11 2 lbs C 8 6 thick cook through We...

Page 14: ...0 the control will beep 3 times followed by one beep every 6 seconds until the KITCHEN TIMER ON OFF pad is pressed The 6 second tone can be canceled by following the steps in the Special features of y...

Page 15: ...ing time countdown The display starts changing once the temperature reaches 100 F The oven will continue to cook for the programmed amount of time then shut off automatically Press the CLEAR OFF pad t...

Page 16: ...hotter or 35 F cooler Press the INCREASE pad to increase the temperature in 1 degree increments Press the DECREASE pad to decrease the temperature in 1 degree increments When you have made the adjustm...

Page 17: ...bottom Make sure the oven light bulb cover is in place and the oven light is off IMPORTANT The health of some birds is extremely sensitive to the fumes given off during the self cleaning cycle of any...

Page 18: ...he lock temperature and the LOCKED DOOR light goes off The oven shuts off automatically when the clean cycle is complete When the LOCKED DOOR light is off open the door After a Clean Cycle You may not...

Page 19: ...solution of vinegar and hot water works well Clear groove in stem Molded rib How to Remove Packaging Tape To assure no damage is done to the finish of the product the safest way to remove the adhesiv...

Page 20: ...the handle To remove the door open it to the broil stop position Grasp firmly on each side and lift the door straight up and off the hinges Do not place hands between the hinge and the oven door fram...

Page 21: ...inse the broiler pan and grid in hot water with a soap filled or plastic scouring pad If food has burned on sprinkle the grid with detergent while hot and cover with wet paper towels or a dishcloth So...

Page 22: ...bend the surface unit plug terminals Do not attempt to clean adjust or in any way repair the plug in receptacle Drip Pans Remove the surface units Then lift out the drip pans For best results clean th...

Page 23: ...hold bulb Reconnect electrical power to the range For improved lighting inside the oven clean the glass cover frequently using a wet cloth This should be done when the oven is completely cool Bulb Soc...

Page 24: ...ck air flow is blocked from the oven vent and cause the cooktop to get hot Food does not bake Oven controls See the Using the oven section or roast properly improperly set Shelf position is incorrect...

Page 25: ...fuse or reset the circuit breaker blown or the circuit breaker tripped Oven controls See the Using the oven section improperly set Oven will not self clean The oven temperature Allow the oven to cool...

Page 26: ...ome may be Replace the fuse or reset the circuit breaker blown or the circuit breaker tripped The clock is in the See the Special features of your oven control section black out mode Display flashes P...

Page 27: ...27 Safety Instructions Operating Instructions Care and Cleaning Troubleshooting Tips Customer Service Notes...

Page 28: ...28 Safety Instructions Operating Instructions Care and Cleaning Troubleshooting Tips Customer Service Notes...

Page 29: ...protection or you may request your money back on the remaining value of your contract No questions asked It s that simple Protect your refrigerator dishwasher washer and dryer range TV VCR and much mo...

Page 30: ...tment Complete and mail your Consumer Product Ownership Registration today Have the peace of mind of knowing we can contact you in the unlikely event of a safety modification After mailing the registr...

Page 31: ...used for other than the intended purpose or used commercially Replacement of house fuses or resetting of circuit breakers Damage to the product caused by accident fire floods or acts of God Incidenta...

Page 32: ...expires Parts and Accessories 800 626 2002 Individuals qualified to service their own appliances can have parts or accessories sent directly to their homes VISA MasterCard and Discover cards are accep...

Reviews: