


INSTALLING THE COOKTOP
5
Installation Instructions
C
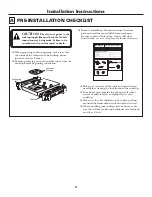
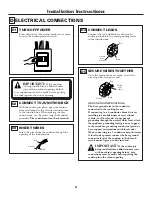
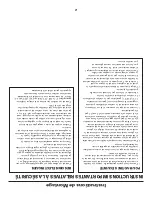
C1 INSTALLING THE
JUNCTION BOX
Install an approved junction box where it will
be easily reached through the front of the
cabinet where the cooktop will be located.
The cooktop conduit is 3 feet long.
Install junction box
so that it can be
reached through the
front of the cabinet.
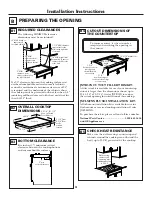
C2 PLACE COOKTOP ON A
SURFACE
Place a towel or tablecloth on the countertop.
Lay the cooktop upside down onto the protected
surface.
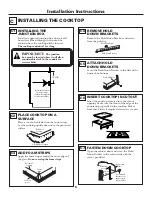
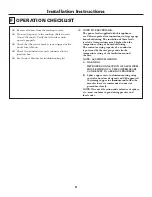
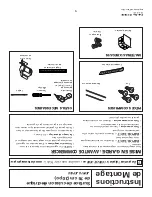
C4 REMOVE HOLD
DOWN BRACKETS
Remove the Hold Down Brackets and screws
from the poly bag.
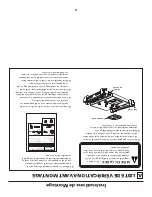
C6 INSERT COOKTOP IN CUTOUT
Insert the cooktop centered into the cutout
opening. Make sure the front of the edge of the
countertop is parallel to the cooktop. Make a
final check that all required clearances are met.
C7 FASTEN DOWN COOKTOP
Open the cabinet door and screw the Hold
Down Bracket to the cabinet side with the
screws provided.
IMPORTANT:
The junction
box must be located where it will allow
considerable slack in the conduit for
serviceability.
Mounting Screw
Hold Down Bracket
COOKTOP
16
″
MIN.
C3 ADD FOAM STRIPS
Apply the foam strips around the outer edge of
the glass.
Do not overlap the foam strips.
C5 ATTACH HOLD
DOWN BRACKETS
Screw the Hold Down Bracket to the side of the
burner box bottom.
Foam
strips
Bottom of
cooktop
Cooktop
glass
Pre-drilled hole
Cooktop
Burner box
sides
Use suitable
fasteners for
anchorage in
cabinet sides
Cabinet
side
Mounting
screw
Bottom of
cooktop
Cloth under cooktop


