background image

Care and cleaning of the range.

Be sure all controls are off and all surfaces are cool before cleaning any part of the range.

How to Remove Protective Shipping Film and Packaging Tape

Carefully grasp a corner of the protective
shipping film with your fingers and slowly
peel it from the appliance surface. Do
not use any sharp items to remove the
film. Remove all of the film before using
the appliance for the first time.

To assure no damage is done to the 
finish of the product, the safest way to
remove the adhesive from packaging
tape on new appliances is an application
of a household liquid dishwashing
detergent. Apply with a soft cloth and
allow to soak.

NOTE: 

The adhesive must be removed from all

parts. It cannot be removed if it is baked on.

If your range is removed for cleaning, servicing or any reason, be sure the anti-tip
device is reengaged properly when the range is replaced. Failure to take this
precaution could result in tipping of the range and cause injury.

Control Knobs

The control knobs may be removed for easier
cleaning.

Make sure the knobs are in the 

OFF

positions and pull them straight off the
stems for cleaning.

The knobs can be cleaned in a
dishwasher or they may also be washed
with soap and water. Make sure the inside
of the knobs are dry before replacing.

Replace the knobs in the 

OFF

position to

ensure proper placement.

Control Panel

It’s a good idea to wipe the control panel
after each use of the oven. Use a damp
cloth to clean or rinse. For cleaning, use
mild soap and water or a 50/50 solution
of vinegar and water. For rinsing, use
clean water. Polish dry with a soft cloth.

Do not use abrasive cleansers, strong
liquid cleaners, plastic scouring pads or
oven cleaners on the control panel—
they will damage the finish.

Painted Surfaces

Painted surfaces include the sides of the
range and the door, top of control panel
and the drawer front. Clean these with
soap and water or a vinegar and water
solution.

Do not use commercial oven cleaners,
cleaning powders, steel wool or harsh
abrasives on any painted surface.

18

Oven Vent 

The oven vent is located behind the right rear
surface unit. 

This area could become hot during 
oven use. 

It is normal for steam to come out 
of the vent, and moisture may collect
underneath it when the oven is in use.

The vent is important for proper air circulation.
Never block this vent.

Consumer Support

Tr

oubleshooting T

ips

Care and Cleaning

Operating Instructions

Safety Instructions

Summary of Contents for JBS55BKBB

Page 1: ...Information First Name________________________ _ Last Name________________________ _ Address ___________________________ City _____________________________ _ State _______ Zip_______________ Phone __...

Page 2: ...ing Radiant Safety Instructions 2 6 Operating Instructions Clock and Timer 14 Oven 10 17 Power Outage 11 Sabbath Feature 16 Special Features 15 Thermostat 17 Surface Units 7 9 Care and Cleaning Contro...

Page 3: ...ny reason make sure the device is properly engaged when you push the range back against the wall If it is not there is a possible risk of the range tipping over and causing injury if you or a child st...

Page 4: ...ass is broken Food splatter or cleaning solution may penetrate a broken control panel and create a risk of electrical shock Contact a qualified technician immediately should your glass control panel b...

Page 5: ...and other linens a safe distance from your range Always keep wooden and plastic utensils and canned food a safe distance from your range Always keep combustible wall coverings curtains or drapes a saf...

Page 6: ...or store items that can melt or catch fire on the glass cooktop even when it is not being used Be careful when placing spoons or other stirring utensils on glass cooktop surface when it is in use The...

Page 7: ...ns Pulling out the shelf to the stop lock is a convenience in lifting heavy foods It is also a precaution against burns from touching hot surfaces of the door or oven walls Do not use the oven to dry...

Page 8: ...the SMALL BURNER portion of the switch above the control knob To use the large 8 or 9 inch surface unit push in the LARGE BURNER portion of the switch above the control knob At both OFF and HI the co...

Page 9: ...l disappear as the glass cools to room temperature The surface unit will cycle on and off to maintain your selected control setting It is safe to place hot cookware on the glass surface even when the...

Page 10: ...tely However do not let these pots boil dry Overheated metal can bond to glass cooktops An overheated copper bottom pot will leave a residue that will permanently stain the cooktop if not removed imme...

Page 11: ...s been a power outage Reset the clock Touch the CLEAR OFF pad Allow the oven to cool for one hour Put the oven back into operation If the function error code repeats disconnect the power to the range...

Page 12: ...oven operations except the clock and timer BROIL HI LO Pad Touch this pad to select the broil function BROIL Light Flashes while in edit mode you can switch from HI to LO BROIL at this point Glows whe...

Page 13: ...eful not to burn your hand on the door when using the shelf in the lowest position A The oven has 6 shelf positions How to Set the Oven for Baking or Roasting Your oven is not designed for open door c...

Page 14: ...10 12 Well Done E 20 20 Chicken 1 whole cut up C 25 25 Brush each side with 2 to 21 2 lbs melted butter split lengthwise Broil skin side down Breast C 25 15 first Bakery Product Bread toast 2 to 4 sli...

Page 15: ...he or pads If the or pads are not touched within one minute after you touch the CLOCK pad the display reverts to the original setting If this happens touch the CLOCK pad twice and reenter the time of...

Page 16: ...ath feature and the Thermostat Adjustment feature are also Special Features but they are addressed separately in the following sections Special features of your oven control ge com 12 Hour Shut Off Wi...

Page 17: ...ements The temperature can be set between 170 and 550 No signal or temperature will be given Touch the START ON pad After a random delay period of approximately 30 seconds to 1 minute will appear in t...

Page 18: ...ecipe failure can result if cakes pies pastries cookies or candies are made with low fat spreads The lower the fat content of a spread product the more noticeable these differences become Federal stan...

Page 19: ...stems for cleaning The knobs can be cleaned in a dishwasher or they may also be washed with soap and water Make sure the inside of the knobs are dry before replacing Replace the knobs in the OFF posit...

Page 20: ...ner Follow the package directions Do not spray oven cleaner on the electrical controls and switches because it could cause a short circuit and result in sparking or fire Do not allow a film from the c...

Page 21: ...fruit juices tomato sauces and basting materials containing acids may cause discoloration and should be wiped up immediately When surface is cool clean and rinse Do not use oven cleaners cleaning powd...

Page 22: ...the front of the drawer until the stops clear the guides Remove the drawer To replace the drawer Place the drawer rails on the guides Push the drawer back until it stops Lift the front of the drawer a...

Page 23: ...owel The CERAMA BRYTE Ceramic Cooktop Scraper and all recommended supplies are available through our Parts Center See instructions under To Order Parts section on next page NOTE Do not use a dull or n...

Page 24: ...e has already occurred the cooktop glass will have to be replaced In this case service will be necessary Damage from Sugary Spills and Melted Plastic Our testing shows that if you are cooking high sug...

Page 25: ...as been slid across the cooktop surface Areas of discoloration Food spillovers not cleaned See the Cleaning the glass cooktop section on the cooktop before next use Hot surface on a model This is norm...

Page 26: ...d Improper shelf position See the Broiling Guide being used Cookware not suited Use a broiling pan and grid for broiling Aluminum foil used on the See the Using the oven section the broiling pan and g...

Page 27: ...hen reconnect power If the function error code repeats call for service Display flashes bAd The installed connection Contact installer or electrician to correct miswire then linE with a from the house...

Page 28: ...during normal business hours Have your model number ready Tired of discolored racks Wishing you had extra heavy duty oven racks NOW AVAILABLE for your range GE s innovative self cleanable porcelain co...

Page 29: ...28 Consumer Support Troubleshooting Tips Care and Cleaning Operating Instructions Safety Instructions Notes...

Page 30: ...protection or you may request your money back on the remaining value of your contract No questions asked It s that simple Protect your refrigerator dishwasher washer and dryer range TV VCR and much mo...

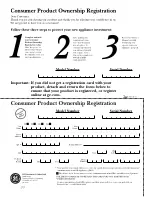
Page 31: ...ere Complete and mail your Consumer Product Ownership Registration today Have the peace of mind of knowing we can contact you in the unlikely event of a safety modification After mailing the registrat...

Page 32: ...cated in an area where service by a GE Authorized Servicer is not available you may be responsible for a trip charge or you may be required to bring the product to an Authorized GE Service location fo...

Page 33: ...warranty and learn about special discounts that are available while your warranty is still in effect You can purchase it on line anytime or call 800 626 2224 during normal business hours GE Consumer...

Reviews: