21
engine adjustment
There are regional variances in the composition of natural
gas. Each home generator unit leaves the factory set for
NG operation. If the generator output voltage or frequency
measured during
Initial Start-Up
is outside the listed ranges,
the combustibility of the gas supplied at the installtion
site may be substantially different from the fuel used at
the factory.
To adjust the engine for this difference, proceed as follows.
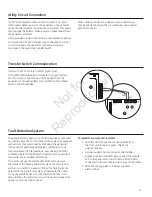
1. Remove four screws that secure control panel to
enclosure to expose unit’s circuit breaker.
2. Connect an accurate frequency meter to line side of
generator’s main circuit breaker.
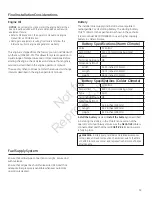
3. Ensure that the 15 Amp fuse is installed.
4. Set the generator’s main circuit breaker
on
.
5. Set the generator’s system switch to
auto
.
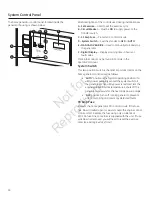
6. Push
ManuaL oVer-riDe
button on control panel.
When the engine starts, allow it to warm up for
five minutes.
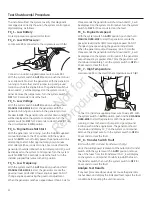
7. Normal no load frequency is 62.0 to 62.5 Hz. If
adjustment is needed at no load, remove unit
side panels. Using needle nose pliers, bend spring
anchor tang (
a
) slowly up or down until frequency is
62.0 to 62.5 Hz.
A
8. Turn service disconnect to transfer switch
off
.
After a short time delay, transfer switch will connect
to generator.
9. Load generator to full load.
10. After load stabilizes, frequency should be
above 57.0 Hz.
11. If frequency is below 57.0 Hz, bend spring anchor
tang slowly up or down until frequency is above
57.0 Hz.
12. Turn service disconnect to transfer switch ON.
Transfer switch will connect to utility power after
five minutes.
13. Push and hold
ManuaL oVer-riDe
button on
control panel until engine stops.
14. After the engine has stopped:
• If an adjustment was made in step 11, repeat steps
2 through 7.
• If an adjustment was not made in step 11, proceed
to step 15.
If no load frequency falls out of the no load range shown
in step 7 after full load adjustment is made, contact an
authorized service center.
15. Reinstall control panel into enclosure, then reinstall
side panels.
Not
for
Reproduction


