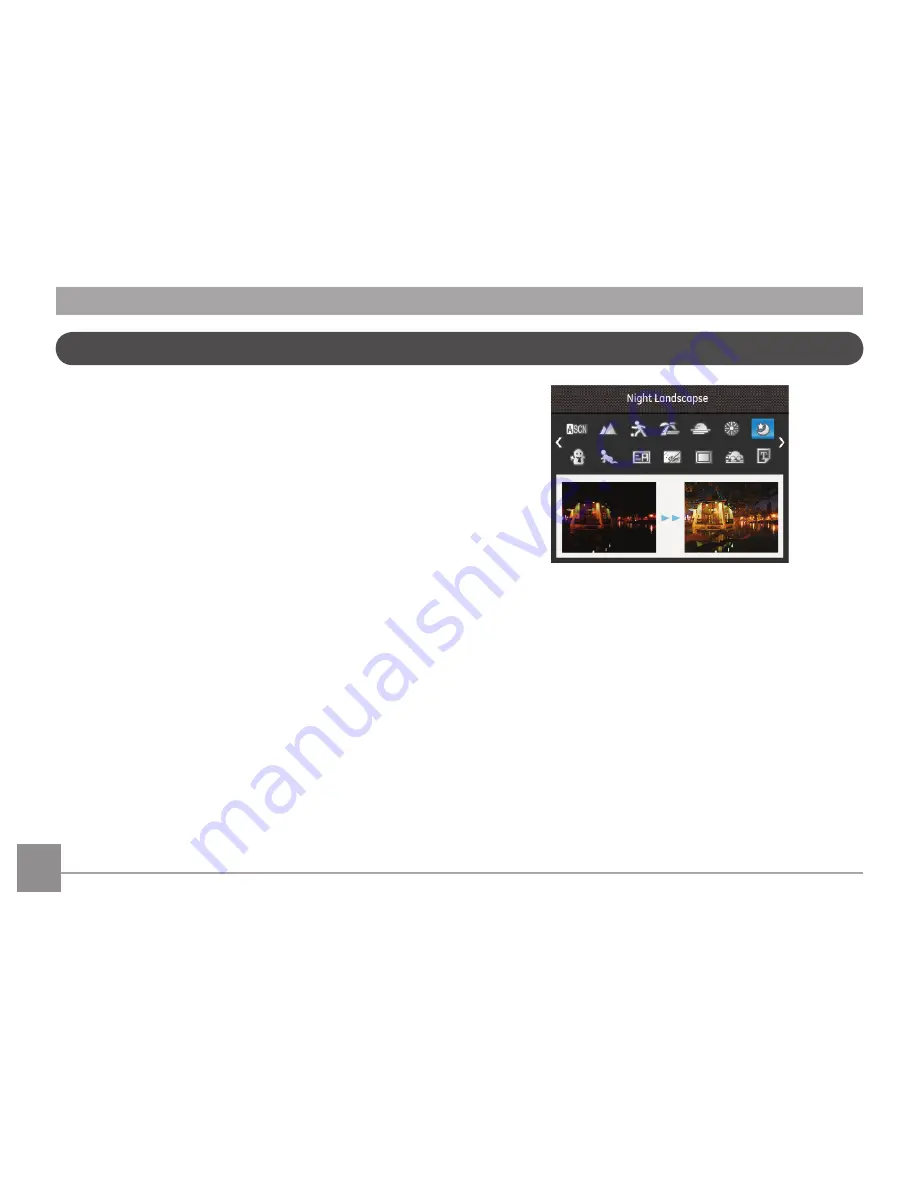
GE C1440W User Manual Download Page 27

24

25

In 

Manual Scene

 Mode, you can select from a total of 23 

scene types to match your needs. Select the desired scene for 
the occasion and the camera will automatically adjust the 
optimal settings for you.

Press the 

SET

 button to enter Scene Mode. The LCD will display 

a menu like the example below:

Manual Scene Mode (SCN)

Select a scene using the Up/Down/Left/Right button and press 

the 

SET

 button.

Summary of Contents for C1440W

Page 1: ...EN Appendix Camera Connectivity Using the Menus Playback Camera Function Controls Basic Operation Getting Started Smart Series C1440W User Manual GE Digital Camera imagination at work...

Page 2: ...camera battery pack or other accessories to rain or humidity to avoid a potential fire hazard or possible electric shock For customers in the U S A Tested To Comply With FCC Standards FOR HOME OR OFFI...

Page 3: ...or corruption Battery Notes Incorrect use of the battery may cause it to leak become hot ignite or burst Always observe the following precautions Do not expose the battery to water and take particular...

Page 4: ...only and are properties of their respective owners Safety Information Please read the following important information carefully before using this product Do not take apart or attempt to service the ca...

Page 5: ...tly damp soft cloth About This Manual This manual provides you with instructions on how to use your GE digital camera Every effort has been made to ensure that the contents of this manual are accurate...

Page 6: ...SD SDHC Card card not included 10 Turning On and Off 12 Setting Language and Date Time 13 Set Display Language 13 Set Date Time 14 About the LCD Screen 15 Using the Modes 16 Display Setting 16 LCD Scr...

Page 7: ...ty 26 Indoor 26 Leaf 26 Museum 26 Night Portrait 26 Sketch 26 Anti shake 26 Auto Scene Mode ASCN 27 BASIC OPERATION 29 Shooting in Auto Mode 29 Using the Zoom Function 29 Basic Functions Menu 30 Flash...

Page 8: ...s Setting 40 Image Color Setting 40 White Balance Setting 41 Setting Menu 42 Quality 42 AF Assist Beam 43 Digital Zoom 43 Date Imprint 44 Quick Review 44 Movie Mode Menu 45 Image Pixel 45 Playback Men...

Page 9: ...ng the USB Mode 56 Transferring Files to your PC 56 Connecting to a PictBridge Compatible Printer 58 Setting the USB Mode 58 Connecting the Camera and Printer 59 Video System 60 Using the PictBridge M...

Page 10: ...in the camera model you purchased along with the following items If anything is missing or appears to be damaged please contact General Imaging Package Contents USB Cable Wrist Strap AA size Alkaline...

Page 11: ...Camera Views Front View Back View Right View 2 4 3 1 6 5 8 9 10 11 12 13 14 15 7...

Page 12: ...ction SET Button 4 Lens 16 USB AV Port 5 LCD Screen 17 Wrist Strap Mount 6 Zoom Button 18 Speaker 7 Power Indicator 19 Power Button 8 Playback Button 20 Movie button 9 Menu Button 21 Shutter Button 10...

Page 13: ...10 Insert the Battery and SD SDHC Card card not included 2 Insert the battery while observing the correct polarity 1 Open the battery compartment...

Page 14: ...11 11 4 Close the battery compartment 3 Insert an SD SDHC card not included into the memory card slot as shown...

Page 15: ...e To remove the SD SDHC card open the battery compartment and gently push the card to release it Pull the card out carefully Turning On and Off Press the Power button to turn the camera on To turn the...

Page 16: ...ccess the General Setup Menu follow the steps below 1 Press the Power button to turn the camera on 2 Press the func menu button press Up Down button to switch between menus select Set Menu press SET b...

Page 17: ...tton to select Date Time press SET or Right button to enter setting mode 2 Press Up Down to select the date display mode press right button to select the item to be set press Up Down button to select...

Page 18: ...duce vomiting Then seek medical assistance immediately About the LCD Screen When you turn the camera on various icons are shown on the LCD screen to indicate the current camera settings and status To...

Page 19: ...modes Default Grid and Clean Default mode Display the camera parameters on screen 1234 0 3 EV 400 ISO Grid Camera parameters with Grid and Histogram 1234 0 3 EV 400 ISO Clean Does not display any add...

Page 20: ...ons Auto Mode Manual Mode Scene Mode Panorama Mode 2 Macro Mode 3 Zoom 4 Remaining number of pictures 5 SD Memory card built in memory 6 Battery Status 7 Image Size 8 White Balance Adjustable only in...

Page 21: ...18 14 AF Mode Single AF Multi AF 15 Flash Mode Force Off Flash Auto Force Flash Slow Sync Slow Sync Red Eye Red Eye Reduction 16 Self Timer 2sec 10sec Smile 17 Continuous Shot Off On...

Page 22: ...activated 5 Remaining time for video recording 6 SD Memory Card Built in Memory 7 Battery Status 8 Video Quality 9 Picture Color 10 Exposure Compensation EV value 11 Metering For optimal video shooti...

Page 23: ...4 5 2 10 1 6 8 7 1 DPOF File 2 File Protection 3 Memory Space this picture total number of pictures 4 SD Memory Card Built in Memory 5 Battery Status 6 Zoom Magnification Area 7 Image Zoom Ratios 8 I...

Page 24: ...ET button to confirm your selection All the available modes are listed as follows Mode Name Icon Description Auto Mode The camera selects all the settings automatically Manual Mode Many of the camera...

Page 25: ...way to focus on the subject 3 The focus frame in the middle of the LCD will turn to green when the subject is properly in focus 4 Press the Shutter button completely down to capture the image Manual M...

Page 26: ...icon on the screen will move towards the square frame icon When the circle icon and square frame overlap and turn green the camera will automatically capture the next image Repeat this step for up to...

Page 27: ...the desired scene for the occasion and the camera will automatically adjust the optimal settings for you Press the SET button to enter Scene Mode The LCD will display a menu like the example below Ma...

Page 28: ...areas with strong sunlight Sunset For sunsets Capture subjects in strong sunlight Fireworks For fireworks at night Slower shutter speed adjusted for brilliant images The use of a tripod is recommende...

Page 29: ...fish eye effect Party For taking pictures of large groups or in areas with uneven lighting Indoor For indoor settings Reduce blur and improve color accuracy Leaf For plants Capture brilliant shots of...

Page 30: ...it Mode Macro Mode Night Portrait Auto Mode Backlit Portrait To use ASCN 1 Press mode button to select SCN mode then select ASCN function LCD screen will be shown as follows 2 Hold the camera steadily...

Page 31: ...re for people and night scenes Backlit Portrait When the sun or any other light source is behind you ASCN will automatically adjust the foreground exposure to produce the best pictures possible Night...

Page 32: ...l and digital zoom Shooting in Auto Mode Auto mode is the easiest mode to take photos While operating in this mode the camera automatically optimizes your photos for best results To start shooting do...

Page 33: ...nifthereisenough availablelighttotakethephotowithoutflash Slow Sync This allows for night scenery photos that include people in the foreground The use of a tripod is recommended when shooting with thi...

Page 34: ...3 Press Left Right button to select self timer function menu Self timer Off Disables the self timer Self timer 2sec A single picture is shot 2 seconds after the Shutter button is pressed Self timer 10...

Page 35: ...ress the SET button to confirm the settings and exit the menu SET Function Menu The SET function menu of the camera includes EV ISO The appropriate function setting can give you better photographs and...

Page 36: ...he ISO setting is only available when the camera is in the M Manual mode Pictures taken with higher ISO will generally have more noise than those taken with lower ISO The options of ISO include automa...

Page 37: ...rough the photos or video clips stored in the internal memory or memory card 3 To play a selected video clip press the SET button to enter the movie playback mode During video playback the operating i...

Page 38: ...in playback mode press on the zoom button to display thumbnail images of photos and videos on the screen W Zoom out T Zoom in 1 Use the Zoom button to switch between 3x3 4x4 and Date Folder thumbnail...

Page 39: ...buttons can also be used during playback This allows you to magnify photos between 2x to 8x 1 Press the button to switch to playback mode 2 Use the Left Right navigation buttons to select a photo to m...

Page 40: ...layback Mode 2 Select a picture or video clip you want to delete with the Left Right button 3 Press the Down Delete button and the delete screen will appear 4 Select Delete One or the Back option with...

Page 41: ...stheUpbuttonto returntotheStillPicturemenuforotherPhotoSetupor CameraSetuppages OryoucanpresstheDownbutton severaltimestomovetothenextsetupmenupage Refer to the following pages for more details about...

Page 42: ...ously holding the shutter button down There are two options Cont Shot Off Turn off the Continuous Shot function Cont Shot On Shoot at the rate of 2 3 pictures per second Continuous AF When Continuous...

Page 43: ...s for optimum focus There are 2 options Single AF Multi AF Image Color Setting Image color setting allows you to select different color effects Image color setting effect has the following 4 options N...

Page 44: ...ing sources to ensure accurate color reproduction 1 Press Left Right button to select the following 7 modes AWB Daylight Cloudy Fluorescent Fluorescent CWF Incandescent Manual WB Press the Shutter but...

Page 45: ...and select setting menu 2 Press SET or Right button to set menu Setting Menu Quality The camera s quality setting adjusts the compression ratio of the images Higher quality settings produce better qua...

Page 46: ...able the Digital Zoom function When Digital Zoom is turned off only the optical zoom is functional AF Assist Beam This option can turn on or turn off the AF assist lamp The AF assist beam is useful fo...

Page 47: ...the photo image Off Date Date Time Quick Review This setting refers to the brief photo review immediately after taking a picture The picture stays on the LCD screen for an adjustable period of time F...

Page 48: ...ht button to select functions Image Pixel The quality of photos can be changed by selecting image resolution ratio The speed requirements for reading and writing high resolution pixel images to a SD c...

Page 49: ...layback setting menu Please refer to the following sections for detailed instructions on the various menu options Protect To prevent any pictures or videos from being accidentally erased use this sett...

Page 50: ...rotect to lock displayed photos or videos or select Unprotect to unlock then press SET and select Back to return to the playback menu Delete There are two ways to delete files Delete One 1 In the Dele...

Page 51: ...File protection must be removed first before a file can be deleted Deleting files will cause DPOF settings to be reset DPOF Digital Print Order Format DPOF allows you to record a selection of pictures...

Page 52: ...u The image cannot be cropped again when it is cropped to 640 x 480 Red Eye Reduction Use this setting to remove red eye in your photos 1 In the playback mode press Left Right button to select the pho...

Page 53: ...he SET button to confirm the setting Videos and panoramic pictures cannot be rotated The rotated picture file will replace the original one Slideshow This setting allows you to view all the stored pic...

Page 54: ...Beep You can change the tones used for button presses time lapse and sound effects during power on off To change these settings 1 Select the Beep setting from the Setup menu as described previously Se...

Page 55: ...wer Saver This setting allows you to save power and get the maximum possible running time for your batteries Follow the steps below to turn off the LCD screen and camera automatically after a period o...

Page 56: ...mat Memory Please note formatting enables you to delete all contents in the memory card and built in memory including protected photo and movie files To use this setting 1 Select Format Memory in the...

Page 57: ...f there is no card available in the camera this function will not be displayed File Numbering After you take a picture or video clip the camera will save it in sequential order You can use this to res...

Page 58: ...est firmware version you can go to the following website www ge com digitalcameras and look under Support Reset Settings Use this setting to restore the camera to its original factory default settings...

Page 59: ...USB AV OUT port on your camera 3 Connect the other end of the cable to an available USB port on your PC Connecting to a PC You can use a USB cable to connect the camera and copy transmit photos to a...

Page 60: ...o PC Turn the camera off and disconnect the USB cable Windows operating system Windows 2000 Windows XP Windows Vista Windows 7 Click the Safely remove the hardware icon and remove the USB connector ac...

Page 61: ...y with a PictBridge compatible printer using the supplied USB cable without the need for a PC Setting the USB Mode Since the camera s USB port can be set to connect with either a PC or a Printer the f...

Page 62: ...cable to the USB port on the printer If the camera is not connected to a PictBridge compatible printer the following error message will appear on the LCD screen The above error message would also app...

Page 63: ...uttons to select NTSC or PAL Then press the SET button to confirm The video output signal can be switched to NTSC or PAL to accommodate different regional TV standards The appropriate setting will var...

Page 64: ...o the following sections for more detailed information on each setting Print with Date If you have set the date and time of your camera the date and time will be recorded and saved with each photo you...

Page 65: ...hen press SET button cancel print Print without Date Use this setting to print the photos without dates on them 1 Select Print without date from the PictBridge menu The following screen will appear 2...

Page 66: ...ncel print Print Index You can use this setting to print all indexes to show all photos currently in your camera 1 Select Print index from the PictBridge menu The following screen will appear 2 Select...

Page 67: ...e DPOF section on page 48 1 Select Print DPOF from the PictBridge menu The following screen will appear 2 Select Yes then press SET button confirm print Select Cancel then press SET button cancel prin...

Page 68: ...48 Megapixels 1 2 3 CCD Lens Focal Length 4 9mm Wide 19 6mm Tele 35mm film equivalent 27mm Wide 108mm Tele F number F3 0 Wide F6 6 Tele Lens Construction 7 groups 7 elements Optical Zoom 4x Focusing...

Page 69: ...Yes File Format Still Image Exif 2 2 JPEG Movie Movie Format MOV Motion JPEG Audio G7 11 Monaural Shooting Modes Auto Manual Movie Scene Auto Scene Landscape Sport Beach Sunset Fireworks Night Landsca...

Page 70: ...ificial Intelligence AE AiAE Face AE Exposure Control Method Program AE AE Lock Available Exposure Compensation 2EV in 1 3 Step Increments Shutter Speed 1 2000 4 Seconds Continuous Shooting Yes Playba...

Page 71: ...upport 25 Languages Jacks AV OUT USB 2 0 Micro 5 pin USB Power 2 x AA Alkaline Battery AA NiMH Battery Not Included Shooting Capability Battery Performance AA Alkaline Batteries Approx 140 shots based...

Page 72: ...cture is corrupted No picture There are no images in the memory card or in the internal memory Lens error The lens is probably stuck and the camera will power off automatically System error Unexpected...

Page 73: ...t No other actions allowed to perform during video audio recording Warning Battery exhausted The battery is out of charge This file cannot be played back The picture format cannot be recognized by the...

Page 74: ...ars whentakingpictures Use a soft cloth to clean the lens on your camera Use the Image Stabilization mode Images and video files cannot be saved The memory card is full Replace the memory card with a...

Page 75: ...ad some paper in the printer Replace the ink cartridge in the printer Remove the jammed paper Writing to memory card is slow A Class 4 memory card or below may inhibit recording of slow the process do...

Page 76: ...http www ge com digitalcameras 2012 General Imaging Company Printed in China imagination at work Follow us on...

Reviews: