background image

36

2. Press the delete/erase button on base again. 

ALL PLAYED MSG ERASED

shows in the display.

To erase a message from the handset:

1. Press the format/answerer button on the handset.

2. Press the play/stop button on the handset (the 2 key).

3. Press erase on the handset (the 0 key) to erase the message that is playing.

NOTE: 

Erased messages cannot be restored. Also, be careful not to press the

erase button as the next unheard message is playing because that message will
also be erased.

L

EAVING


A

 M

EMO

Use the memo feature to leave a message.

1. Press and hold the memo button.

2. Begin speaking after you hear the beep.

3. Release the memo button when you are finished recording the memo.

R

EMOTE

 A

CCESS

This section explains two types of remote access: using the handset to
access the answering system and accessing the answering system from
another location.

You may access the answering system on the base with the handset buttons.

You may also access your answering system from any touch-tone phone
by entering a 3-digit security code after you hear the outgoing
announcement. A voice menu system guides you through the steps.

U

SING


THE

 H

ANDSET

Press the format/answerer button to access the answering system.

After you access the answering system, use the marked handset keys just
as if you were pressing the corresponding buttons on the base (see
“Answering System Operation” for details on functions). To make it easy
for you, the functions are listed on the handset above each number. For
example, to play messages:

Summary of Contents for 27959

Page 1: ...1 We bring good things to life 40 Channel 2 4 GHz CallWaiting Caller ID CordlessTelephone with Answering Machine Speakerphone User s Guide 27959 ...

Page 2: ...e 2 afford you the opportunity to correct the situation and 3 inform you of your right to bring a complaint to the Commission pursuant to procedures set forth in Subpart E of Part 68 FCC Rules and Regulations The telephone company may make changes in its communications facilities equipment operations or procedures where such action is required in the operation of its business and not inconsistent ...

Page 3: ...U BEGIN 8 PARTS CHECKLIST 8 TELEPHONE JACK REQUIREMENTS 8 DIGITAL SECURITY CODE 8 IMPORTANT INSTALLATION INFORMATION 8 IMPORTANT INSTALLATION GUIDELINES 9 INSTALLING THE PHONE 9 WALL MOUNTING THE BASE 10 TELEPHONE SET UP 11 PROGRAMMING THE BASE 11 MENU MODE 11 LANGUAGE 11 DISPLAY CONTRAST 12 RING TO ANSWER 12 USING TOLL SAVER 12 SECURITY CODE 13 RING LEVEL 13 RINGER TONE 14 TONE PULSE 14 SET DAY 1...

Page 4: ...DATA 33 CALL WAITING CALLER ID 33 ANSWERING SYSTEM SET UP 33 VOICE INSTRUCTIONS 33 ANSWERING SYSTEM OPERATION 34 RECORDING THE OUTGOING ANNOUNCEMENT 34 REVIEWING ANNOUNCEMENT 34 MESSAGES INDICATOR 34 SCREENING CALLS FROM THE BASE 34 MESSAGE PLAYBACK FROM THE BASE 35 MEMORY FULL 35 ERASING MESSAGES 35 LEAVING A MEMO 36 REMOTE ACCESS 36 USING THE HANDSET 36 ANSWERING SYSTEM INDICATOR 37 SCREENING CA...

Page 5: ... been designed to be simple to use however you can reach its full potential more quickly by taking a few minutes to read this instruction book This telephone is a multifunction product for use with Call Waiting and Caller ID services available from your local telephone company Your Caller ID Call Waiting phone allows you to View the name and telephone number of a caller while you are on the phone ...

Page 6: ...dless telephone should not be placed near or on top of a TV microwave ovens or VCR If such interference continues move the cordless telephone farther away from these appliances Certain other communications devices may also use the 2 4GHz frequency for communication and if not properly set these devices may interfere with each other and or your new telephone If you are concerned with interference p...

Page 7: ...ton answerer on off indicator new message indicator Display CID VOL caller ID volume button format answerer button play stop button skip button review button PAUSE button flash program button intercom button ringer switch conf memory conference memory button chan delete channel delete button erase button redial button TALK callback button TONE cancel button mic flash program button SPEAKER call ba...

Page 8: ...urity code After a power outage or battery replacement you should place the handset in the base for about 20 seconds to reset the code IMPORTANT INSTALLATION INFORMATION Never install telephone wiring during a lightning storm Never install telephone jacks in wet locations unless the jack is specifically designed for wet locations Never touch non insulated telephone wires or terminals unless the te...

Page 9: ...utlet and telephone wall jack RJ11C 2 Plug the AC power converter into the electrical outlet and the DC connector into the power jack on the back of the base CAUTION Use only the ATLINKS USA Inc power converter 5 2596 black that came with this unit Using other power converters may damage the unit 3 Install the handset battery NOTE You must connect the handset battery before use Push down on the to...

Page 10: ...tery is not properly installed in the handset or if the battery pack is not properly connected to the jack inside the battery compartment NO BATTERY shows in the display when the handset is placed in the charging cradle WALL MOUNTING THE BASE NOTE For best results leave the base on a flat surface during initial charging before you hang it on the wall 1 Turn the base over 2 Attach the wall mounting...

Page 11: ...tion To exit the menu press flash program repeatedly or press the TONE exit button on the base or TONE cancel button on the handset LANGUAGE NOTE This setting may be made with the base or the handset 1 Press the flash program button until SET LANGUAGE 1ENG 2FRA 3ESP shows on the base unit display or 1ENG 2FRA 3ESP shows on the handset display 1ENG ENGLISH is the default setting Prompt displayed on...

Page 12: ...e your selection You will hear a confirmation tone RING TO ANSWER NOTE This setting may only be made with the base You may set the number of times you want the phone to ring before the answering system answers a call 1 Press the flash program button until RING TO ANSWER 3 5 TOLL shows in the display 5 is the default setting 2 Press 3 or 5 or use the cid messages or to scroll to 3 5 or TOLL 3 Press...

Page 13: ...orized access to your answering system You may only change the security code at the base 1 Press the flash program button until SECURITY CODE 1 2 3 shows in the display 2 Use the touch tone pad to enter your new 3 digit security code For example press the 6 2 and 8 number keys for security code 628 The default security code is 123 NOTE If you want to re enter the security code enter the numbers ag...

Page 14: ... choose from three different ringer tones 1 Press the flash program button until SET RINGER TONE 1 2 3 shows on the base unit display or RINGERTONE 1 shows on the handset display The default ringer tone is 1 Prompt displayed on the base unit Prompt displayed on the handset 2 Use the touch tone pad to select 1 2 3 or use the cid messages or buttons on the base unit or CID VOL or buttons on the hand...

Page 15: ...mation tone NOTE If you aren t sure which dialing system you have set the telephone to tone dialing and make a test call If the call connects the setting is correct If the call does not connect set the telephone to pulse dialing SET DAY NOTE This setting may only be made with the base NOTE If you want to keep the current day press the flash program button again to skip when the display shows SET D...

Page 16: ...The default setting is 12 00 AM 2 Use the touch tone pad to enter the current time In the display the arrow automatically moves to the AM field Use the cid messages or button to move the arrow to PM if necessary 3 Press flash program again to store your selection You will hear a confirmation tone AREA CODE NOTE This setting may be made with the base and the handset If you enter a 3 digit area code...

Page 17: ...h this system you may prefer to use the system s original settings Follow these steps to return to the factory settings 1 Press the flash program button until DEFAULT SETTING 1YES 2NO shows on the base unit display or DEFAULT NO shows on the handset display The default setting is NO Prompt displayed on the base unit Prompt displayed on the handset 2 Use the touch tone pad to select 1YES or 2NO or ...

Page 18: ...y the person to whom you are talking CHARGE IN USE INDICATOR When the charge in use indicator on the base is lit the handset is correctly seated in the cradle and is charging The indicator flashes when the base is paged when the base pages the handset or when you receive an incoming call MAKING A CALL WITH THE HANDSET 1 Pick up the handset and press the TALK callback button Listen for a dial tone ...

Page 19: ...the TALK callback button on the handset to switch it off or put the handset in the base cradle When the SPEAKER callback button is pressed the button lights If you want to switch from speakerphone to handset press the TALK callback button on the handset first and then press the SPEAKER callback button on the base CALL TIMER When you pressTALK callback on the handset or SPEAKER callback on the base...

Page 20: ... t press the TALK callback button on the handset or the SPEAKER callback button on the base to activate a custom calling service such as call waiting or you ll hang up the phone LAST NUMBER REDIAL You may redial a number up to 32 digits long If the number is longer than 32 digits you will hear an error tone To quickly redial the last number you dialed 1 Press the TALK callback button on the handse...

Page 21: ...r you but you can still hear them 1 Press the mute button on the base The base display shows MUTE ON and the mute button light turns on 2 Press the mute button again to cancel and return to your phone conversation TEMPORARY TONE DIALING This feature is useful only if you use pulse dialing service Temporary tone dialing enables pulse rotary service phone users to access touch tone services offered ...

Page 22: ...iver volume by pressing the CID VOL or buttons There are four volume levels and each press of the CID VOL or button adjusts the receiver volume by one level When the maximum or minimum volume level is reached the phone beeps twice PAGING This feature helps you locate a misplaced handset and send and receive pages for intercom calls NOTE Make sure the phone is OFF not in talk mode The ringer does n...

Page 23: ...onversation between the base and handset MAKING AN INTERCOM CALL 1 Make sure the phone is OFF not in talk mode 2 Press the page intercom button on the base PAGING HANDSET shows on the base display OR Press the intercom button on the handset PAGING shows in the handset display The receiving party is paged 3 When the receiving party answers the page the intercom is activated 4 When finished press th...

Page 24: ...ge intercom button base or intercom button cordless handset depending on where the external call originated The external caller is placed on hold and both intercom users may speak privately 2 To answer the intercom page press the page intercom button base or intercom button cordless handset When finished press the page intercom button or intercom button to retrieve the external caller THREE WAY IN...

Page 25: ... If the memory location is unoccupied EMPTY shows in the display 3 Press the memory or conf memory button again The display shows ENTER NAME 4 Use the base or cordless handset touch tone pad to enter a name up to 15 characters More than one letter is stored in each of the number keys For example to enter Bill Smith press the 2 key twice for the letter B Press the 4 key 3 times for the letter I Pre...

Page 26: ...to enter the name then press memory or conf memory ENTER NUMBR shows in the display 6 Press redial to display the redial number and name 7 Press memory or conf memory again to confirm NOTE If the number you want to redial has more than 24 digits the telephone number cannot be stored in memory INSERTING A PAUSE IN THE DIALING SEQUENCE Press the PAUSE button on the touch tone pad to insert a delay i...

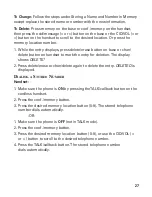
Page 27: ... mark the entry for deletion The display shows DELETE 2 Press delete erase or chan delete again to delete the entry DELETED is displayed DIALING A STORED NUMBER Handset 1 Make sure the phone is ON by pressing theTALK callback button on the cordless handset 2 Press the conf memory button 3 Press the desired memory location button 0 9 The stored telephone number dials automatically OR 1 Make sure th...

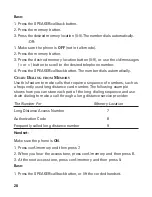
Page 28: ...o make calls that require a sequence of numbers such as a frequently used long distance card number The following example shows how you can store each part of the long dialing sequence and use chain dialing to make a call through a long distance service provider The Number For Memory Location Long Distance Access Number 7 Authorization Code 8 Frequently called long distance number 9 Handset Make s...

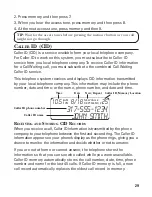
Page 29: ...e the phone number date and time or the name phone number and date and time RECEIVING AND STORING CID RECORDS When you receive a call Caller ID information is transmitted by the phone company to your telephone between the first and second ring The Caller ID information appears on your phone s display as the phone rings giving you a chance to monitor the information and decide whether or not to ans...

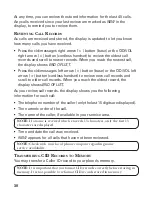
Page 30: ...ds and scroll to older call records When you reach the oldest record the display shows END OF LIST As you review call records the display shows you the following information for each call The telephone number of the caller only the last 15 digits are displayed The numeric order of the call The name of the caller if available in your service area NOTE If a name is received which exceeds 15 characte...

Page 31: ...can dial back the caller s number 1 Make sure the phone is OFF not in talk mode 2 Press cid messages or button base or CID VOL or button cordless handset until the desired call record is displayed Depending on a how the incoming caller s phone number is formatted when received and b whether or not you pre programmed your local area code into memory you may need to adjust the format of the caller s...

Page 32: ...field an error tone sounds from the handset or base and the number cannot be dialed DELETING THE CURRENT CALLER ID RECORD To delete only the record in the display 1 Use the cid messages or button base or CID VOL or button cordless handset to display the desired Caller ID record 2 Press delete erase button base or chan delete button handset The display shows DELETE CALL ID for several seconds 3 Pre...

Page 33: ...le on Call Waiting calls and see who is calling when you hear the call waiting tone in the handset receiver The CID information for the waiting call appears in the display after you hear the tone Press flash program to put the current call on hold and answer the incoming call To switch back and forth between the two calls press the flash program button ANSWERING SYSTEM SET UP This section shows yo...

Page 34: ...the base and then release it when you hear the beep Sample Outgoing Announcement Hi this is use your name here I can t answer the phone right now so please leave your name number and a brief message after the tone and I ll get back to you Thanks REVIEWING ANNOUNCEMENT Press and release the announce button to play your outgoing announcement MESSAGES INDICATOR The base display shows you how many mes...

Page 35: ... message MEMORY FULL When the memory is full the system answers after 10 rings You should erase some messages so the answering system may record new messages ERASING MESSAGES You may erase messages three ways 1 One message at a time by pressing the delete erase button on the base during message playback 2 All previously played messages by pressing and holding the delete erase button on the base 3 ...

Page 36: ...inished recording the memo REMOTE ACCESS This section explains two types of remote access using the handset to access the answering system and accessing the answering system from another location You may access the answering system on the base with the handset buttons You may also access your answering system from any touch tone phone by entering a 3 digit security code after you hear the outgoing...

Page 37: ...K callback button to speak to the caller or press the answer format button to stop screening the call MEMORY FULL When the answering system s memory is full the system answers after 10 rings beeps and waits for you to enter the 3 digit security code You have 10 seconds to enter the security code before the phone hangs up You should erase some of the messages in order for the system to record incom...

Page 38: ...P You can bypass the outgoing announcement by pressing any numbered key on the touch tone pad while the announcement is playing Then you can enter your security code to access the answering system CHANGING THE SECURITY CODE The default security code for accessing the answering system from another location is 1 2 3 You must use the base to change the security code Please refer toTelephone Set Up se...

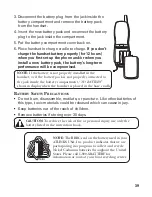
Page 39: ...ack is not properly connected to the jack inside the battery compartment NO BATTERY shows in display when the handset is placed in the base cradle BATTERY SAFETY PRECAUTIONS Do not burn disassemble mutilate or puncture Like other batteries of this type toxic materials could be released which can cause injury Keep batteries out of the reach of children Remove batteries if storing over 30 days CAUTI...

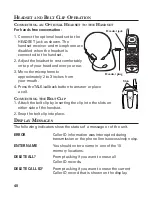
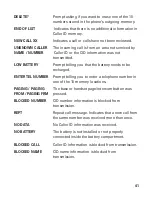
Page 40: ...ton to answer or place a call CONNECTING THE BELT CLIP 1 Attach the belt clip by inserting the clip into the slots on either side of the handset 2 Snap the belt clip into place DISPLAY MESSAGES The following indicators show the status of a message or of the unit ERROR Caller ID information was interrupted during transmission or the phone line is excessively noisy ENTER NAME You should enter a name...

Page 41: ... to be recharged ENTERTEL NUMBER Prompt telling you to enter a telephone number in one of the 10 memory locations PAGING PAGING The base or handset page intercom button was FROM PAGING FRM pressed BLOCKED NUMBER CID number information is blocked from transmission REPT Repeat call message Indicates that a new call from the same number was received more than once NO DATA No Caller ID information was...

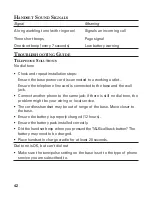
Page 42: ... the wall jack Connect another phone to the same jack if there is still no dial tone the problem might be your wiring or local service The cordless handset may be out of range of the base Move closer to the base Ensure the battery is properly charged 12 hours Ensure the battery pack installed correctly Did the handset beep when you pressed theTALK callback button The battery may need to be charged...

Page 43: ... out Change channels The cordless handset may be out of range of the base Move closer to the base Make sure base is not plugged into an outlet with another household appliance Charge the battery Unit beeps Place the handset in the cradle for 20 seconds If it still beeps charge battery for 12 hours Clean charging contacts on cordless handset and charge cradle with a soft cloth or an eraser See solu...

Page 44: ...trical outlet Disconnect the AC power supply from the base and reconnect it Caller ID Error Message The unit displays this message if it detects anything other than valid Caller ID information during the silent period after the first ring This message indicates the presence of noise on the line No Caller ID In order to receive Caller ID information you must subscribe to the standard name number Ca...

Page 45: ...e finish Retain the original packaging in case you need to ship the phone at a later date Periodically clean the charge contacts on the handset and base with a clean pencil eraser CAUSES OF POOR RECEPTION Aluminum siding Foil backing on insulation Heating ducts and other metal construction that can shield radio signals You re too close to appliances such as microwaves stoves computers etc Atmosphe...

Page 46: ...from Memory 28 Changing the Battery 38 Changing the Security Code 38 Charge In Use Indicator 18 Connecting an Optional Headset to the Handset 40 Connecting the Belt Clip 40 Cordless Handset 22 D Deleting All Caller ID Records 32 Deleting the Current Caller ID Record 32 Dialing a Caller ID Number 31 Dialing a Stored Number 27 Digital Security Code 8 Display Contrast 12 Display Messages 40 E Equipme...

Page 47: ...g the Outgoing Announcement 34 Remote Access 36 Reviewing Announcement 34 Reviewing Call Records 30 Reviewing Changing or Deleting Stored Names Number 26 Ring Level 13 Ring to Answer 12 Ringer Tone 14 Ringer Volume Control 20 S Screening Calls from the Base 34 Screening Calls from the Handset 37 Security Code 13 Service 48 Set Day 15 SetTime 16 Speakerphone 18 22 Storing a Name and Number in Memor...

Page 48: ... Indianapolis IN 46206 Attach your sales receipt to the booklet for future reference or jot down the date this product was purchased or received as a gift This information will be valuable if service should be required during the warranty period Purchase date ________________________________________________ Name of store ________________________________________________ ACCESSORY ORDER FORM DESCRIP...

Page 49: ...orporated into other products Products purchased or serviced outside the USA Acts of nature such as but not limited to lightning damage Product Registration Please complete and mail the Product Registration Card packed with your unit It will make it easier to contact you should it ever be necessary The return of the card is not required for warranty coverage Limitation of Warranty THE WARRANTY STA...

Page 50: ...Model 27959 55909320 Rev 1 E S 04 37 Printed in China ATLINKS USA Inc 101 West 103rd Street Indianapolis IN 46290 2004 ATLINKS USA Inc Trademark s Registered Marca s Registrada s ...

Page 51: ...1 Creamos cosas buenas para la vida Teléfono Inalámbrico y Altavoz con Sistema Contestador de 2 4 GHz con 40 Canales e Identificador de Llamada en Espera Guía del Usuario 27959 ...

Page 52: ...ón temporal de servico 2 concederle a Ud la oportunidad de corregir la situación 3 informarle a Ud de sus derechos de presentar una questa a la Comisión de acuerdo con los procedimientos dictados en la Subparte E de la Parte 68 de las Regulaciones y Reglas de la FCC La compañía telefónica puede hacer los cambios en sus instalaciones de comunicación en equipos en sus funcionamientos o procedimiento...

Page 53: ...INSTALACIÓN8 PAUTAS IMPORTANTES PARA LA INSTALACIÓN 9 PARA INSTALAR EL TELÉFONO 9 MONTAJE DE LA BASE SOBRE PARED 10 PROGRAMACIÓN DEL TELÉFONO 11 PARA PROGRAMAR LA BASE 11 MODALIDAD DE MENÚ 11 IDIOMA 11 CONTRASTE DE LA PANTALLA 12 TIMBRES PARA CONTESTAR 12 PARA USAR EL AHORRADOR DE CARGOS 12 CÓDIGO DE SEGURIDAD 13 NIVEL DEL TIMBRE 13 TONO DEL TIMBRE 14 TONO PULSO 14 PARA PROGRAMAR EL DÍA 15 PARA PR...

Page 54: ... NO HAY INFORMACIÓN 33 IDENTIFICADOR DE LLAMADA EN ESPERA 33 PROGRAMACIÓN DEL SISTEMA CONTESTADOR 33 INSTRUCCIONES ORALES 33 OPERACIÓN DEL SISTEMA CONTESTADOR 34 PARA GRABAR EL ANUNCIO SALIENTE 34 PARA REVISAR EL ANUNCIO 34 INDICADOR DE MENSAJES 34 PARA FILTRAR LLAMADAS DESDE LA BASE 34 REPRODUCCIÓN DE MENSAJES DESDE LA BASE 35 MEMORIA LLENA 35 PARA BORRAR MENSAJES 35 PARA DEJAR UN RECADO MEMO 36 ...

Page 55: ...u potencial si se toma unos minutos ahora mismo para leer este manual de instrucciones Este teléfono es un producto con múltiples funciones que puede utilizarse junto con los servicios de Identificador de Llamada en Espera y de Identificador de Llamadas que le son disponibles a través de su compañía telefónica local Su teléfono con Identificador de Llamada en Espera le permite Ver el nombre y núme...

Page 56: ...ico no debe ser colocada cerca o encima de la televisión de un horno de microondas o de la videocasetera Si dicha interferencia continúa mueva el teléfono lejos del aparato eléctrico causante de la interferencia Algunos otros accesorios para la comunicación pueden utilizar frecuencias de 2 4 GHz para comunicarse y si no están adecuadamente instalados estos aparatos pueden interferir entre sí o con...

Page 57: ...tón para hablar devolver el llamado announce botón para grabar anuncio memo botón para recados play stop botón para reproducir detener pantalla format botón de formato cid messages botones del Identificador mensajes memory botón para memoria mic SPEAKER call back indicador de altavoz regresar llamada hold botón de retención charge in use indicador de carga uso mute botón enmudecedor botón de volum...

Page 58: ... o de reemplazar la batería usted debe colocar el auricular en la base aproximadamente 20 segundos para re programar el código INFORMACIÓN IMPORTANTE PARA LA INSTALACIÓN Nunca instale cableado telefónico durante una tormenta de relámpagos Nunca instale enchufes telefónicos en localizaciones mojadas a menos que el enchufe haya sido diseñado específicamente para localizaciones mojadas Nunca toque ca...

Page 59: ...ico de pared RJ11C 2 Conecte el convertidor de la corriente AC en el enchufe eléctrico y el conector DC en el enchufe de corriente en la parte posterior de la base CUIDADO Utilice únicamente el cable de corriente ATLINKS USA Inc 5 2596 negro que es compatible con esta unidad El uso de otros cables de corriente puede resultar en daño al aparato 3 Instale la batería del auricular NOTA Usted debe con...

Page 60: ...a batería no está adecuadamente instalada en el teléfono o si la batería no está apropiadamente conectada al receptáculo dentro del compartimento de la batería NO BATTERY SIN BATERIA se muestra en la pantalla cuando el teléfono es colocado en la base para carga MONTAJE DE LA BASE SOBRE PARED NOTA Para mejores resultados deje la base sobre una superficie plana para la carga inicial del aparato ante...

Page 61: ... salir del menú oprima el botón para programar flash program repetidamente o presione el botón TONE exit en la base o el botón TONE cancel en el auricular IDIOMA NOTA Esta programación puede hacerse desde la base o desde el auricular 1 Oprima el botón para programar flash program hasta que la indicación de idioma aparezca en la pantalla de la base SET LANGUAGE 1ENG 2FRA 3ESP o en la pantalla del a...

Page 62: ... tono de confirmación TIMBRES PARA CONTESTAR NOTA Esta programación puede hacerse únicamente desde la base Usted puede programar el número de veces que usted quiera que el teléfono timbre antes de que el sistema contestador conteste la llamada 1 Oprima el botón para programar flash program hasta que la indicación de timbres para contestar aparezca en la pantalla TIMBRE CONTESTA 3 5 TOLL aparezca e...

Page 63: ... cambiar el código de seguridad desde la base 1 Oprima el botón para programar flash program hasta que la indicación del código CLAVE SEGURIDAD 1 2 3 aparezca en la pantalla 2 Utilice el teclado de tono para inscribir su código de seguridad de 3 dígitos Por ejemplo oprima el 6 2 y 8 para elegir ese número como su código 628 El código de seguridad programado de fábrica es 123 NOTA Si usted quiere v...

Page 64: ...ed puede seleccionar entre diferentes tonos de timbre 1 Oprima el botón para programar flash program hasta que la indicación de tono del timbre aparezca en la pantalla PROGTONOTIMBRE 1 2 3 de la base o TONO TIMBRE 1 en el auricular La programación de fábrica para el tono es 1 Indicación en la pantalla de la base Indicación en la pantalla del auricular 2 Utilice el teclado de tono para seleccionar ...

Page 65: ...á un tono de confirmación NOTA Si usted no está seguro de qué sistema para marcar tiene programe el teléfono en modalidad por tono y haga una llamada de prueba Si la llamada conecta la programación es correcta Si la llamada no conecta programe el teléfono en marcado por pulso PARA PROGRAMAR EL DÍA NOTA Esta programación puede hacerse únicamente desde la base NOTA Si usted quiere mantener el día ac...

Page 66: ...ación de fábrica es 12 00 AM 2 Utilice el teclado numérico para inscribir la hora actual En la pantalla la flecha se mueve automáticamente al campo de AM Utilice el botón del Identificador cid messages de las flechas o para llegar hasta PM si fuera necesario 3 Oprima nuevamente el botón de programación flash program para almacenar su selección Usted escuchará un tono de confirmación CLAVE DE ÁREA ...

Page 67: ...ciones originales del sistema Siga los siguientes pasos para volver a las programaciones de fábrica 1 Oprima el botón para programar flash program hasta que la indicación de programaciones de fábrica aparezca en la pantalla PROG DE FABRICA 1SI 2NO de la base y FABRICA NO en la pantalla del auricular La selección de fábrica es NO Indicación en la pantalla de la base Indicación en la pantalla del au...

Page 68: ...DE CARGA USO Cuando el indicador de carga uso en la base está iluminado el auricular está colocado en la base correctamente y se está cargando El indicador parpadea cuando la base se está localizando cuando la base localiza al auricular o cuando usted recibe una llamada entrante PARA HACER UNA LLAMADA CON EL AURICULAR 1 Levante el auricular y oprima el botón para hablar TALK callback Espere al ton...

Page 69: ...esactivarlo o coloque el auricular sobre la base Cuando el botón de altavoz SPEAKER callback es oprimido el botón se ilumina Si usted quiere cambiar de altavoz a auricular oprima el botón TALK callback en el auricular primero y después oprima el botón SPEAKER callback en la base TEMPORIZADOR TIMER DE LLAMADAS Cuando usted ha oprimido el botón TALK callback en el auricular inalámbrico o el botón sp...

Page 70: ...ocal SUGERENCIA No oprima el botón TALK callback en el auricular inalámbrico o el botón speaker callback para activar un servicio de llamadas como llamada en espera porque de ser así usted colgará el teléfono ÚLTIMO NÚMERO MARCADO Usted puede volver a marcar un número de hasta 32 dígitos Si el número es mayor que 32 dígitos usted escuchará un tono de error Para volver a marcar rápidamente el últim...

Page 71: ...rles a ellos 1 Oprima el botón enmudecedor mute en la base La indicación del enmudecedor ENMU ACTIVE aparece en la pantalla de la base y el indicador del enmudecedor se ilumina 2 Oprima nuevamente el botón del enmudecedor mute para cancelar esta función y volver a su conversación telefónica TONO TEMPORAL Esta función es útil únicamente para usuarios de servicio de pulso El tono temporario le permi...

Page 72: ...VOL de las flechas o Hay cuatro niveles de volumen y cada vez que oprime el botón CID VOL de las flechas o el volumen del recibidor se ajusta un nivel Cuando usted alcanza el nivel de volumen máximo o mínimo el teléfono emite dos tonos LOCALIZADOR Esta función le ayuda a localizar un auricular extraviado así como mandar y recibir llamadas en el interfono NOTA Asegúrese que el teléfono esté apagado...

Page 73: ...n ilimitada PARA HACER UNA LLAMADA DE INTERFONO 1 Asegúrese que su teléfono esté en modalidad de apagado OFF no en modalidad de marcar 2 Oprima el botón de interfono page intercom en la base La indicación LOCALIZAR AURICULR aparece en la pantalla de la base O Oprima el botón de interfono en el auricular La indicación LOCALIZAR aparece en la pantalla del auricular La persona que recibe escucha el t...

Page 74: ...rico dependiendo de dónde se originó la llamada externa La persona en la llamada externa se pone en espera y ambos usuarios del interfono pueden hablar en privado 2 Para contestar la llamada del interfono oprima el de interfono page intercom en la base o el botón de interfono en el auricular inalámbrico Cuando haya terminado oprima el botón de interfono page intercom o el botón de interfono para r...

Page 75: ...moria está vacía la indicación VACIO aparece en la pantalla 3 Oprima el botón de memoria o el botón conf memory otra vez La pantalla muestra la indicación INSCRIBA NOMBRE 4 Utilice el teclado de tono de la base o el auricular inalámbrico para almacenar un nombre hasta 15 caracteres Más de una letra es almacenada en cada una de las teclas numéricas Por ejemplo para inscribir Bill Smith oprima la te...

Page 76: ...el nombre y después oprima el botón de memoria o el botón conf memory La indicación INSCRIBA NUMERO aparece en la pantalla 6 Oprima el botón para volver a marcar redial para mostrar el nombre y número que va a marcarse 7 Oprima nuevamente el botón de memoria o el botón conf memory otra para confirmar NOTA Si el número a marcar tiene más de 24 dígitos entonces este número no puede ser almacenado en...

Page 77: ...rrar chan delete en el auricular para borrar la inscripción La indicación BORRADO aparece en la pantalla PARA MARCAR UN NÚMERO ALMACENADO Auricular 1 Asegúrese que el teléfono esté activado ON oprimiendo el botón TALK callback en el auricular inalámbrico 2 Oprima el botón de memoria conf memory 3 Oprima el botón de la localización de memoria deseada 0 9 El número almacenado se marca automáticament...

Page 78: ...a hacer una llamada a través de un servicio de larga distancia El Número Para Localización de Memoria Número de Acceso de Larga Distancia 7 Código de Autorización 8 Número de larga distancia llamado frecuentemente 9 Auricular Asegúrese de que el teléfono esté activado ON 1 Oprima el botón de memoria conf memory y después oprima el 7 2 Cuando usted escuche el tono de acceso oprima el botón de memor...

Page 79: ...s aparece en la pantalla mientras el teléfono timbra dándole a usted la oportunidad de ver la información y decidir si quiere o no contestar la llamada Si usted no está en casa o no puede contestar la memoria del Identificador de Llamadas de su teléfono automáticamente almacena el número de llamada para que usted pueda ver quién llamó mientras usted no estaba La memoria del Identificador automátic...

Page 80: ...as en la memoria del Identificador de Llamadas la pantalla le muestra la siguiente información para cada llamada Número telefónico de la persona que llamó sólo los últimos 15 dígitos se muestran Orden numérico de la llamada El nombre de la persona que llamó si el servicio es disponible en su área NOTA Si se recibe un nombre con más caracteres que 15 sólo los primeros 15 dígitos se muestran La hora...

Page 81: ... número telefónico que se muestra en la pantalla 1 Asegúrese que el teléfono esté desactivado OFF no en modalidad para hablar 2 Utilice el botón del Identificador cid messages de las flechas o en la base o el botón del Identificador CID VOL de las flechas o en el auricular hasta que el archivo deseado se muestre en la pantalla Dependiendo de a cómo estaba formateado cuando se recibió el número tel...

Page 82: ...ar y el número no podrá ser marcado PARA BORRAR EL ARCHIVO ACTUAL DEL IDENTIFICADOR DE LLAMADAS Para borrar únicamente el archivo que aparece en la pantalla 1 Utilice el botón del Identificador cid messages de las flechas o en la base o el botón del Identificador CID VOL de las flechas o en el auricular para mostrar el archivo deseado en la pantalla 2 Oprima el botón para borrar delete erase en la...

Page 83: ...e al servicio de Identificador de Llamadas con Llamada en Espera a través de su compañía telefónica usted recibirá información del Identificador de Llamadas CID si ésta es disponible con el Identificador de Llamada en Espera y puede ver quién llama cuando usted escucha el tono de llamada en espera en el recibidor La información del Identificador de Llamadas aparece en la pantalla después de que us...

Page 84: ...o puedo contestar el teléfono ahora mismo así que por favor deje su nombre número y un mensaje breve después del tono y yo la llamaré después Gracias PARA REVISAR EL ANUNCIO Oprima y suelte el botón de anuncio announce para reproducir su anuncio saliente INDICADOR DE MENSAJES La pantalla de la base le muestra cuántos mensajes tiene usted El indicador de mensajes nuevos parpadea para indicarle que ...

Page 85: ...s Usted debe borrar algunos mensajes para que el sistema contestador pueda grabar mensajes nuevos PARA BORRAR MENSAJES Usted puede borrar mensajes en la base de tres maneras 1 Un mensaje a la vez presionando el botón delete erase en la base durante la reproducción de mensajes 2 Todos los mensajes reproducidos previamente presionando y sosteniendo el botón delete erase en la base 3 Un mensaje a la ...

Page 86: ...pos de acceso remoto usando el auricular para accesar el sistema de la contestadora y accesando el sistema de la contestadora desde otra ubicación Usted puede tener acceso al sistema contestador en la base con los botones del auricular Usted puede también tener acceso a su sistema contestador desde cualquier teléfono de tono al inscribir los 3 dígitos de su código de seguridad después de que usted...

Page 87: ...lar con la persona que llama u oprima el botón de contestador answerer format para dejar de filtrar la llamada MEMORIA LLENA Cuando la memoria del sistema contestador está llena el sistema contesta después de 10 timbres emite un tono y espera a que usted inscriba su código de seguridad de 3 dígitos Usted tiene 10 segundos para inscribir su código de seguridad antes de que el teléfono le desconecte...

Page 88: ...UGERENCIA Durante el acceso por control remoto usted puede saltarse el anuncio saliente oprimiendo cualquier tecla numérica del teclado mientras el anuncio se reproduce Después inscriba el código de seguridad para tener acceso al sistema contestador PARA CAMBIAR EL CÓDIGO DE SEGURIDAD El código de seguridad de fábrica para tener acceso de control remoto desde otra localización es 1 2 3 Usted debe ...

Page 89: ...tado adecuadamente dentro del compartimiento la pantalla así lo indicará NO BATERIA cuando se coloca el auricular sobre la base PRECAUCIONES DE SEGURIDAD PARA LA BATERÍA No queme desarme mutile o agujere Igual que otras baterías de este tipo materiales tóxicos pueden escaparse y causarle daño Mantenga las baterías fuera del alcance de los niños Quite las baterías si va a guardar el aparato durante...

Page 90: ... lados del gancho del cinturón en las ranuras localizadas a cada lado del auricular 2 Empuje los extremos del gancho del cinturón a que entren en su sitio MENSAJES DE LA PANTALLA Los siguientes indicadores le indican el estado actual de un mensaje o del aparato ERROR ERREUR La información del Identificador de Llamadas ha sido interrumpida durante la transmisión o el teléfono es excesivamente ruido...

Page 91: ...o INSCRIB NUMTEL en una de las 10 localizaciones de memoria PAGING PAGING El botón del interfono page intercom en la base o FROM PAGING FRM en el auricular ha sido oprimido LOCALZANDO LOCALIZER DESDE BLOCKED NUMBER Indica que la información del Identificador de Llamadas NUMERO PRIVADO ha sido bloqueada y no se transmitirá REPT Mensaje de llamada repetido Indica que una llamada nueva fue recibida m...

Page 92: ...chufe de pared Conecte otro teléfono al mismo enchufe si no hay tono de marcar en el segundo teléfono el problema puede estar en su cableado o su servicio local El auricular inalámbrico puede estar fuera de rango con la base Acérquelo a la base Asegúrese de que la batería ha sido cargada adecuadamente 12 horas Asegúrese que el paquete de la batería esté instalado correctamente El auricular emitió ...

Page 93: ...nte Cambie canales El auricular inalámbrico puede estar fuera de rango con la base Acérquelo a la base Asegúrese de que la base no esté conectada en un enchufe con otro aparato eléctrico Cargue la batería El aparato emite bips Coloque el auricular sobre la base durante 20 segundos Si sigue emitiendo bips cargue la batería durante 12 horas Limpie los contactos en el auricular inalámbrico y cargue e...

Page 94: ...rico que no tenga selector para apagarse Desconecte el aparato del enchufe y conéctelo nuevamente Error en el Mensaje del Caller ID El aparato muestra este mensaje si detecta cualquier cosa que no sea información válida del Caller ID durante el periodo de silencio después del primer timbre Este mensaje indica la presencia de ruido en la línea No sirve el Caller ID Para pode recibir la información ...

Page 95: ... de que necesite embarcar el auricular en el futuro Periódicamente limpie los contactos de carga del auricular y de la base con una goma de lápiz limpia CAUSAS DE UNA MALA RECEPCIÓN Recubrimiento externo de la casa con aluminio Aislación con revestimiento de papel de aluminio Conductos de calefacción y otras construcciones de metal que paran las señales de radio Está demasiado cerca de los aparato...

Page 96: ... Indicador de Carga Uso 18 Indicador de Mensajes 34 Indicador del Sistema Contestador 37 Información de Interferencias 2 Información Importante para la Instalación 8 Información Sobre la Aprobación de Equipo 2 Instrucciones Orales 33 Introducción 5 L Lista de Partes 8 Llamadas de Interfono de Dos Personas 24 Llamadas de Interfono deTres Personas 24 Localizador 22 M Marcado en Cadena desde la Memor...

Page 97: ...te una Llamada de Interfono 24 Para Recibir y Almacenar Archivos del Identificado de Llamadas 29 Para Revisar Cambiar o Borrar Nombres Números Almacenados 26 Para Revisar el Anuncio 34 Para Revisar los Archivos de Llamadas 30 ParaTener Acceso al Sistema Contestador desde Otra Localización 37 Para Transferir Archivos del Identificador de Llamadas a la Memoria 30 Para Usar el Ahorrador de Cargos 12 ...

Page 98: ...uario 1 800 448 0329 O envíe sus preguntas a ATLINKS USA Inc Gerente Servicio al Consumidor P O Box 1976 Indianápolis IN 46206 Adjunte su recibo al folleto para futura referencia o anote la fecha en la que se compró o recibió este producto como regalo Esta información será valiosa si se llegase a requerir durante el período de garantía Fecha de compra_______________________________________________...

Page 99: ...s Estados Unidos Desastres naturales por ejemplo y sin limitarse a ellos daños por relámpagos Registro del Producto Por favor llene y envíe por correo la Tarjeta de Registro del Producto que se embarcó con su producto Hará más fácil que hagamos contacto con usted si fuera necesario No se requiere la devolución de la tarjeta para tener la cobertura de la garantía Limitaciones sobre la Garantía LA G...

Page 100: ...Modelo 27959 55909320 Rev 1 E S 04 37 Impreso en China ATLINKS USA Inc 101 West 103rd Street Indianapolis IN 46290 2004 ATLINKS USA Inc Trademark s Registered Marca s Registrada s ...

Reviews: