background image

9

I

NDICACIONES

 I

MPORTANTES


PARA


LA

 I

NSTALACIÓN

:

Instale el teléfono cerca de un enchufe telefónico (modular) y un enchufe de

corriente eléctrica.

Evite áreas de mucho ruido, como una ventana hacia una calle con mucho

tráfico, y ruido eléctrico como motores, hornos de micro ondas, o lámparas de
luz fluorescente.

Evite fuentes de calor, como conductos de calefacción, aparatos eléctricos que

se calientan, radiadores y luz de sol directa.

Evite áreas con humedad excesiva o temperaturas demasiado bajas.

Evite áreas con mucho polvo.

Evite colocar cerca de otros teléfonos o computadoras personales.

Retenga el empaque original en caso de que necesite embarcar el auricular en

el futuro.

P

ARA

 I

NSTALAR


EL

 T

ELÉFONO

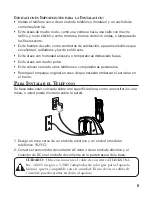
Su base debe estar colocada sobre una superficie plana, como un escritorio o una
mesa, o usted puede montarlo sobre la pared.

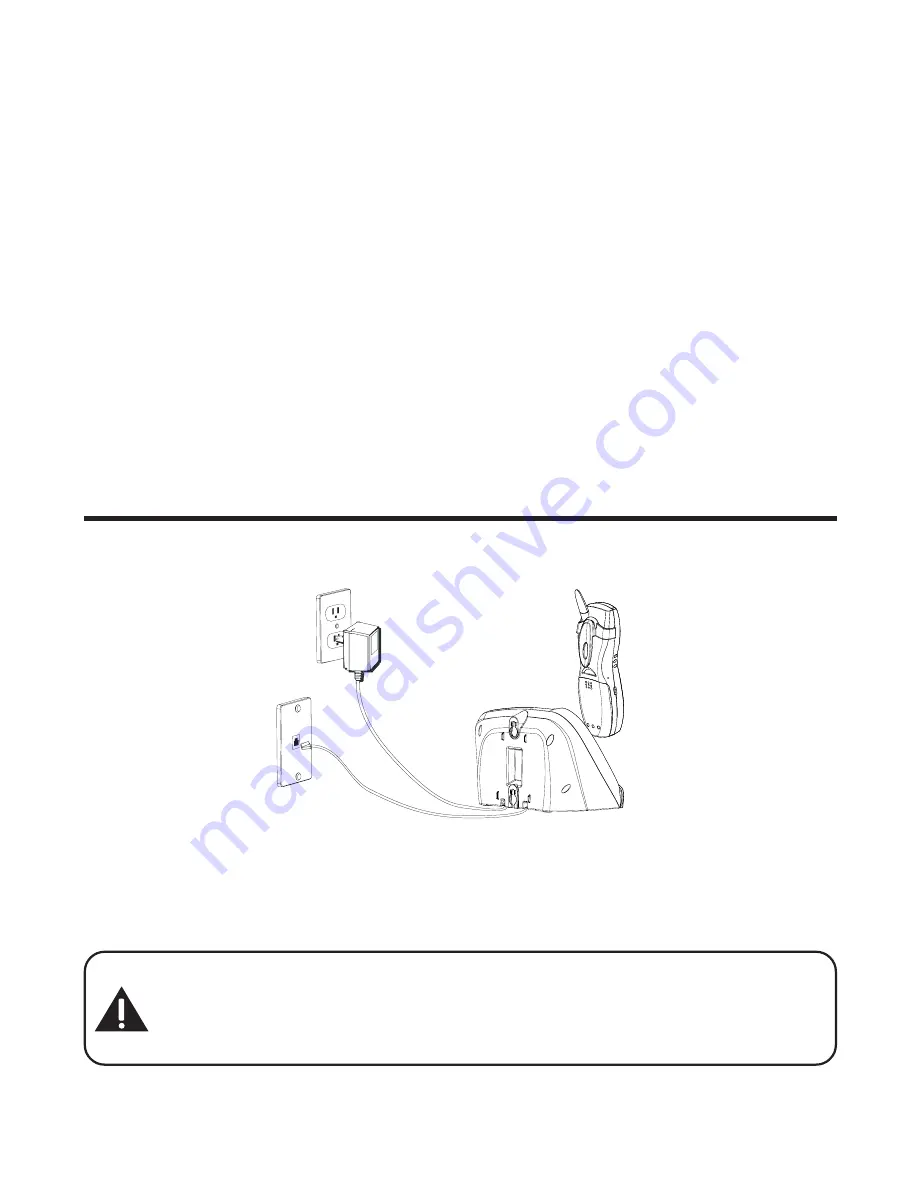
1. Escoja un área cerca de un enchufe eléctrico y un enchufe modular

telefónico (RJ11C).

2. Conecte el convertidor de corriente AC dentro de un enchufe eléctrico y el

conector de DC en el enchufe de corriente en la parte trasera de la base.

CUIDADO: 

 Utilice únicamente el cable de corriente ATLINKS USA ,

Inc. 5-2605 (negro) o 5-2645


(adaptador de color gris para el aparato

blanco)


que es compatible con esta unidad. El uso de otros cables de

corriente puede resultar en daño al aparato.

Summary of Contents for 25859

Page 1: ...1 We bring good things to life 5 8GHz 40 Channel CallWaiting Caller ID CordlessTelephone with Answering Machine Speakerphone User s Guide 25859 ...

Page 2: ...2 afford you the opportunity to correct the situation and 3 inform you of your right to bring a complaint to the Commission pursuant to procedures set forth in Subpart E of Part 68 FCC Rules and Regulations The telephone company may make changes in its communications facilities equipment operations or procedures where such action is required in the operation of its business and not inconsistent wi...

Page 3: ... 7 BEFORE YOU BEGIN 8 PARTS CHECKLIST 8 TELEPHONE JACK REQUIREMENT 8 DIGITAL SECURITY SYSTEM 8 IMPORTANT INSTALLATION INFORMATION 8 IMPORTANT INSTALLATION GUIDELINES 9 INSTALLING THE PHONE 9 WALL MOUNTING THE BASE 11 TELEPHONE SET UP 11 MENU MODE 11 LANGUAGE 12 DISPLAY CONTRAST 12 SECURITY CODE 13 RINGER LEVEL 13 RINGERTONE 14 SET DAY 14 SETTIME 15 AREA CODE 16 FACTORY DEFAULT 16 BASIC OPERATION 1...

Page 4: ...LLER ID ERRORS 30 CALL WAITING CALLER ID 31 ANSWERING SYSTEM OPERATION 31 STANDBY DISPLAY 31 SETTING THE RINGS TO ANSWER 32 USINGTOLL SAVER 32 RECORDING THE OUTGOING ANNOUNCEMENT 32 REVIEWING THE ANNOUNCEMENT 32 MESSAGE INDICATOR 33 SCREENING CALLS AT THE BASE 33 MESSAGE PLAYBACK 33 ERASING MESSAGES 33 MEMO 34 REMOTE ACCESS 35 ACCESSING THE ANSWERING SYSTEM WITH THE HANDSET 35 SCREENING CALLS WITH...

Page 5: ...aling This telephone has been designed to be simple to use however you can reach its full potential more quickly by taking a few minutes to read this instruction book This telephone is a multifunction product for use with Call Waiting and Caller ID services available from your local telephone company Your Caller ID Call Waiting phone allows you to View the name and telephone number of a caller whi...

Page 6: ...lephone should not be placed near or on top of a TV microwave ovens or VCR If such interference continues move the cordless telephone farther away from these appliances Certain other communications devices may also use the 5 8 GHz 900MHz frequency for communication and if not properly set these devices may interfere with each other and or your new telephone If you are concerned with interference p...

Page 7: ... call back button CID skip caller ID skip button new message indicator ans on off answerer on off button delete button format button redial button pause button mic flash program button speaker call back button with indicator memory conference button mute button with indicator exit button volume button page int page intercom button announce button memo memory button CID rev caller ID review button ...

Page 8: ... verifies its security code After a power outage or battery replacement you should place the handset in the base for about 20 seconds to reset the code IMPORTANT INSTALLATION INFORMATION Never install telephone wiring during a lightning storm Never install telephone jacks in wet locations unless the jack is specifically designed for wet locations Never touch non insulated telephone wires or termin...

Page 9: ...tors microwave ovens and fluorescent lighting Avoid heat sources such as heating air ducts heating appliances radiators and direct sunlight Avoid areas of excessive moisture or extremely low temperature Avoid dusty locations Avoid other cordless telephones or personal computers INSTALLING THE PHONE Your base should be placed on a level surface such as a desk or table top or you may mount the base ...

Page 10: ...k inside the compartment NOTE It is important to maintain the polarity black and red wires to the jack inside the compartment as shown in the illustration Slide the battery compartment cover back into place 4 Connect the telephone line cord by plugging one end of the telephone line cord into the jack on the back of the base and other end into a telephone wall jack 5 Place the handset in the base c...

Page 11: ...f the unit over the wall plate posts and slide the unit down into place Wall plate not included TELEPHONE SET UP There are nine programmable menus available LANGUAGE DISPLAY CONTRAST SECURITY CODE RINGER LEVEL RINGERTONE SET DAY SETTIME AREA CODE AND FACTORY DEFAULT MENU MODE Your phone must be in MENU mode before you begin programming 1 Make sure your phone is OFF not in talk mode 2 Press the fla...

Page 12: ...OL or buttons on the handset to scroll to 1ENG 2FRA or 3ESP 3 Press flash program or flash prog again to store your selection You will hear a confirmation tone DISPLAY CONTRAST NOTE This setting may only be made with the base 1 Press the flash program button until SET CONTRAST 1 2 3 shows in the display 1 is the default setting 2 Press 1 2 or 3 on the base touch tone to enter your selection or use...

Page 13: ...touch tone pad to enter your new 3 digit security code For example press the 6 2 and 8 number keys for security code 628 The default security code is 123 NOTE If you want to re enter the security code enter the numbers again and press the flash program button The new numbers replace the old numbers 3 Press flash program again to store your selection You will hear a confirmation tone RINGER LEVEL N...

Page 14: ...NE 1 shows on the handset display The default ringer tone is 1 Prompt displayed on the base Prompt displayed on the handset 2 Use the touch tone pad to select 1 2 3 or use the CID rev or CID skip buttons on the base unit or CID VOL or buttons on the handset to scroll to your selection The ringer tone plays for few seconds 3 Press flash program or flash prog to store your selection You will hear a ...

Page 15: ...lly when you receive your first CID record Otherwise you can set the time manually NOTE If you want to keep the current time press the flash program button when the display shows 12 00 AM PM 1 Press the flash program button until SET TIME 12 00 AM PM shows on the display The default setting is 12 00 AM 2 Use the touch tone pad to enter the current time The cursor automatically moves to the AM fiel...

Page 16: ...dset 2 Use the touch tone pad to enter your three digit area code NOTE If you make a mistake press the delete button on your base or the del chan button on your handset to erase the incorrect area code and repeat above step 3 Press flash program or flash prog again to store your selection You will hear a confirmation FACTORY DEFAULT NOTE This setting may be made with the base and the handset As yo...

Page 17: ...ore your selection You will hear a confirmation tone BASIC OPERATION SPEAKERPHONE For hands free operation and convenience your system is equipped with a speakerphone For best speakerphone performance avoid the following Areas with high background noise The microphone might pick up these sounds Surfaces affected by vibration Recessed areas such as in a corner under a cupboard or next to a cabinet ...

Page 18: ...When finished press the speaker button to hang up NOTE You can enter up to 32 pre dial digits If you want to delete the pre dial number you entered press the delete button on base or del chan button on handset until all of the digits are erased ANSWERING A CALL WITH THE HANDSET 1 When the phone rings press the talk call back button on the handset 2 When finished press the talk call back button aga...

Page 19: ...SET Use the two position switch on the handset to turn the ringer volume off or on BASE UNIT The base ringer volume is set through the programming menu Refer to Telephone Set Up for more information The ringer switch must be in the ON position for the handset to ring when incoming calls are received CALL WAITING If you subscribe to the combined Call Waiting Caller ID service from your local teleph...

Page 20: ... talk call back button on the handset or the speaker button on the base 2 Press the redial button OR 3 Press the redial button first then press the talk call back button or the speaker button OR 4 If you get a busy signal and want to keep dialing the number press the redial button to quickly redial the number EXIT Press the EXIT button on the base or handset to end an operation such as preview dia...

Page 21: ...maximum or minimum volume level is reached the phone beeps twice PAGING THE HANDSET This feature helps you locate a misplaced handset If you misplace your handset press the page int button on the base The handset emits a continuous paging tone for 2 minutes to help you to find it PAGING FRM BASE shows in the display When you find the handset press the talk call back button on the handset or press ...

Page 22: ...ll Press the talk callback button on handset or the speaker callback button on the base to answer the external telephone call USING INTERCOM WITH A TELEPHONE CALL During a telephone call you can use the intercom paging function to page the base or the handset and set up a private 2 way intercom conversation with another user while the telephone call is placed on hold Or you can create a 3 way conf...

Page 23: ...n separate memory storage areas Store ten 15 character names and 24 digit telephone numbers in the handset memory ten 15 character names and 24 digit telephone numbers in the base memory STORING A NAME AND NUMBER IN MEMORY 1 Make sure the phone is OFF not inTALK mode 2 Press the memory button on the handset or base 3 Press the desired memory location button 0 through 9 number keys or use the CID V...

Page 24: ...e and number in a different memory location return to step 1 and repeat the process STORING A REDIAL NUMBER 1 Repeat steps 1 through 6 in Storing a Name and Number in Memory 2 Press redial button to display the redial number and name 3 Press memory again to confirm NOTE If the number you want to redial has more than 24 digits the telephone number cannot be stored in memory INSERTING A PAUSE IN THE...

Page 25: ...ton on handset to mark the entry for deletion The display shows DELETE 4 Press delete or del chan again to delete the entry DELETED is displayed DIALING A STORED NUMBER HANDSET Make sure the phone is ON by pressing the talk call back button on the cordless handset 1 Press the memory button 2 Press the desired memory location button 0 9 The stored telephone number dials automatically OR 1 Make sure...

Page 26: ...ce and use chain dialing to make a call through a long distance service provider The Number For Memory Location Long Distance Access Number 7 Authorization Code 8 Frequently called long distance number 9 Make sure the phone is ON 1 Press memory and then press 7 2 When you hear the access tone press memory and then press 8 3 At the next access tone press memory and then press 9 TIP Wait for the acc...

Page 27: ... unavailable Caller ID memory automatically stores the call number date time phone number and name for the last 40 calls If Caller ID memory is full a new call record automatically replaces the oldest call record in memory At any time you can review the stored information for the last 40 calls Any calls received since your last review are marked as NEW in the display to remind you to review them R...

Page 28: ...al phone company regarding name service availability TRANSFERRING CID RECORDS TO MEMORY You may transfer a Caller ID record to your phone s memory NOTE It is important that you format CID records correctly before storing in memory It is not possible to reformat CID records stored in memory 1 Use the CID rev or CID skip buttons base or CID VOL or buttons handset to scroll to the desired record 2 Pr...

Page 29: ...mber Available formats include Number of digits Explanation Example Eleven digits long distance code 1 3 digit area code 7 digit telephone number 1 317 888 8888 Ten digits 3 digit area code 7 digit telephone number 317 888 8888 Seven digits 7 digit telephone number 888 8888 NOTE If the incoming number is a Direct Dial Number it is supplied by your local phone company and you may not adjust its for...

Page 30: ...e button on the base or del chan button on handset again within ten seconds to erase the record The display shows DELETED confirming the deletion DELETING ALL CALLER ID RECORDS To delete all the Caller ID records in memory 1 Use the CID rev or CID skip buttons base or CID VOL or buttons handset to display any Caller ID record 2 Press and hold delete button on base or del chan button on handset The...

Page 31: ...ing Caller ID Service To know who is calling while you are on the phone you must subscribe to Call Waiting Caller ID Service ANSWERING SYSTEM OPERATION STANDBY DISPLAY When the phone is not in use the base displays the status of the answering system The default setting status of the answering machine is on If the answering system is turned off then it displays ANSWERER OFF The answering system sto...

Page 32: ... should be about nine inches from the microphone and eliminate as much background noise as possible 1 Make sure the answering system is ON 2 Press and hold the announce button 3 Begin speaking after you hear the beep 4 Release the button when you finish your announcement NOTE If you choose not to record an outgoing announcement a default announcement plays instead To return to the default announce...

Page 33: ...K The new message indicator lets you know when you have new messages To play messages press the play stop button While a message is playing you may do the following 1 Press the play stop button on the base to stop message playback 2 Press CID rev button on the base once to re play the current message 3 Press CID rev button twice to review previous messages 4 Press CID skip button to skip to the ne...

Page 34: ...Press and hold the delete button on the base ERASE ALL PLAYED MSG shows in the display 3 Press the delete button on the base again ALL PLAYED MSG ERASED shows in the display MEMO Use the memo feature to leave a message for yourself 1 Press and hold the memo button 2 Begin speaking after you hear the beep 3 Release the memo button when you are finished recording the memo PLAYED MSG ERASE ALL MSG ER...

Page 35: ...answering system use the marked handset keys just as if you were pressing the corresponding buttons on the base see Answering System Operation for details on functions 4 When you are finished reviewing your messages press button 2 play stop to stop message playback and then press the format answerer button to exit the ANSWERER REMOTE ACCESS mode SCREENING CALLS WITH THE HANDSET You may use the han...

Page 36: ... code to access the answering system MEMORY FULL When you access your answering system remotely and the answering system s memory is full the system answers after 10 rings beeps and waits for you to enter the 3 digit security code You have 7 seconds to enter the security code before the phone disconnects You should erase some old messages so the system can record new messages NOTE The unit also an...

Page 37: ...et 3 Insert the new battery pack and reconnect the battery plug to the jack inside the compartment 4 Put the battery compartment cover back on 5 Place handset in charge cradle to charge If you don t charge the handset battery properly for 12 hours when you first set up the phone and or when you install a new battery pack the battery s long term performance will be compromised NOTE If the battery i...

Page 38: ...ING THE BELT CLIP There are two slots one on each side of the handset Attach the belt clip by inserting the sides of the belt clip into the slots Snap the ends of the belt clip into place DISPLAY MESSAGES The following indicators show the status of a message or of the unit ERROR Caller information has been interrupted during transmission or the phone line is excessively noisy ENTER NAME Prompt tel...

Page 39: ... Prompt telling you to enter a telephone number in one of the 10 memory locations PAGING FROM Someone has pressed the page intercom HANDSET PAGING button on the base or handset FRM BASE BLOCKED NUMBER The person is calling from a number that has been blocked from transmission REPT Repeat call message Indicates that a new call from the same number was received more than once NO DATA No Caller ID in...

Page 40: ...m might be your wiring or local service The handset may be out of range of the base Move closer to the base Ensure the battery is properly charged 12 hours Ensure the battery pack installed correctly Did the handset beep when you pressed the talk call back button The battery may need to be charged Place handset in charge cradle for at least 20 seconds Handset Base does not ring Make sure the hands...

Page 41: ...ing contacts on the handset and charge cradle with a soft cloth or an eraser See solutions for No dial tone on previous page Replace the battery Memory Dialing doesn t work Did you program the memory location keys correctly Did you follow proper dialing sequence Unit locks up and no communication between the base and handset Unplug the AC power supply from the wall outlet and the back of the base ...

Page 42: ...ing other than valid Caller ID information during the silent period after the first ring This message indicates the presence of noise on the line No Caller ID In order to receive Caller ID information you must subscribe to the standard name number Caller ID service from your local telephone company BATTERY SOLUTIONS If you experience any of the following problems even after fully recharging the ba...

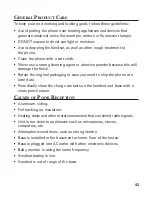
Page 43: ...finish Retain the original packaging in case you need to ship the phone at a later date Periodically clean the charge contacts on the handset and base with a clean pencil eraser CAUSES OF POOR RECEPTION Aluminum siding Foil backing on insulation Heating ducts and other metal construction that can shield radio signals Unit is too close to appliances such as microwaves stoves computers etc Atmospher...

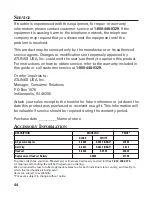
Page 44: ...mer Relations P O Box 1976 Indianapolis IN 46206 Attach your sales receipt to the booklet for future reference or jot down the date this product was purchased or received as a gift This information will be valuable if service should be required during the warranty period Purchase date __________Name of store DESCRIPTION MODEL NO PRICE BLACK WHITE AC power adapter 5 2605 5 2645 GRAY 18 35 Belt Clip...

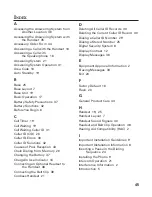
Page 45: ... Changing the Battery 37 Charge In Use Indicator 18 Connecting an Optional Headset to the Handset 38 Connecting the Belt Clip 38 Cordless Handset 21 D Deleting All Caller ID Records 30 Deleting the Current Caller ID Record 30 Dialing a Caller ID Number 29 Dialing a Stored Number 25 Digital Security System 8 Display Contrast 12 Display Messages 38 E Equipment Approval Information 2 Erasing Messages...

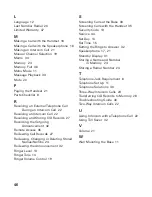
Page 46: ...ing Call Records 27 Reviewing Changing or Deleting Stored Names Numbe 24 Reviewing the Announcement 32 Ringer Level 13 RingerTone 14 Ringer Volume Control 19 S Screening Calls at the Base 33 Screening Calls with the Handset 35 Security Code 13 Service 44 Set Day 14 SetTime 15 Setting the Rings to Answer 32 Speakerphone 17 21 Standby Display 31 Storing a Name and Number in Memory 23 Storing a Redia...

Page 47: ...orporated into other products Products purchased or serviced outside the USA Acts of nature such as but not limited to lightning damage Product Registration Please complete and mail the Product Registration Card packed with your unit It will make it easier to contact you should it ever be necessary The return of the card is not required for warranty coverage Limitation of Warranty THE WARRANTY STA...

Page 48: ...Model 25859 55908580 Rev 1 E S 04 39 Printed in China ATLINKS USA Inc 101 West 103rd Street Indianapolis IN 46290 2004 ATLINKS USA Inc Trademark s Registered Marca s Registrada s ...

Page 49: ...1 Creamos cosas buenas para la vida Teléfono Inalámbrico de 5 8 GHz con 40 Canales Identificador de Llamada en Espera Sistema Contestador y Altavoz Guía del Usuario 25859 ...

Page 50: ...temporal de servico 2 concederle a Ud la oportunidad de corregir la situación 3 informarle a Ud de sus derechos de presentar una questa a la Comisión de acuerdo con los procedimientos dictados en la Subparte E de la Parte 68 de las Regulaciones y Reglas de la FCC La compañía telefónica puede hacer los cambios en sus instalaciones de comunicación en equipos en sus funcionamientos o procedimientos q...

Page 51: ...IENTE 7 ANTES DE COMENZAR 8 LISTA DE PARTES 8 REQUERIMIENTOS PARA ENCHUFE TELEFÓNICO 8 SISTEMA DIGITAL DE SEGURIDAD 8 INFORMACIÓN IMPORTANTE PARA LA INSTALACIÓN 8 INDICACIONES IMPORTANTES PARA LA INSTALACIÓN 9 PARA INSTALAR EL TELÉFONO 9 PARA MONTAR LA BASE SOBRE LA PARED 11 PARA PROGRAMAR EL TELÉFONO 11 MODALIDAD DE MENÚ 11 IDIOMA 11 CONTRASTE DE LA PANTALLA 12 CÓDIGO DE SEGURIDAD 12 NIVEL DELTIM...

Page 52: ...PARA BORRARTODOS LOS ARCHIVOS DEL IDENTIFICADOR DE LLAMADAS 30 ERRORES DEL IDENTIFICADOR DE LLAMADAS 30 IDENTIFICADOR DE LLAMADA EN ESPERA 31 OPERACIÓN DEL SISTEMA CONTESTADOR 31 PANTALLA DE ALERTA 31 PROGRAMACIÓN DETIMBRES PARA CONTESTAR 32 PARA UTILIZAR EL AHORRADOR DE CARGOS 32 PARA GRABAR EL ANUNCIO SALIENTE 32 PARA REVISAR EL ANUNCIO 32 INDICADOR DE MENSAJES 32 PARA FILTRAR LLAMADAS EN LA BAS...

Page 53: ...de aprovechar al máximo de su potencial si se toma unos minutos ahora mismo para leer este manual de instrucciones Este teléfono es un producto con múltiples funciones que puede utilizarse junto con los servicios de Identificador de Llamada en Espera y de Identificador de Llamadas que le son disponibles a través de su compañía telefónica local Su teléfono con Identificador de Llamada en Espera le ...

Page 54: ...debe ser colocada cerca o encima de la televisión de un horno de microondas o de la videocasetera Si dicha interferencia continúa mueva el teléfono lejos del aparato eléctrico causante de la interferencia Algunos otros accesorios para la comunicación pueden utilizar frecuencias de 5 8 GHz 900MHz para comunicarse y si no están adecuadamente instalados estos aparatos pueden interferir entre sí o con...

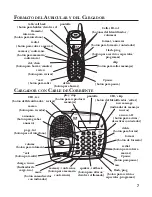
Page 55: ... CID skip botón del Identificador saltar new message indicador de mensajes nuevos ans on off botón para activar desactivar contestador delete botón para borrar format botón de formato redial botón para volver a marcar pause botón para pausa mic flash prog botón para servicios especiales programar speaker call back botón para altavoz devolver el llamado memory conference botón para memoria conferen...

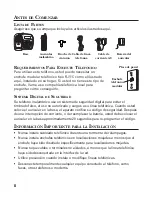
Page 56: ...interrupción de corriente o de reemplazar la batería usted debe colocar el auricular en la base aproximadamente 20 segundos para re programar el código INFORMACIÓN IMPORTANTE PARA LA INSTALACIÓN Nunca instale cableado telefónico durante una tormenta de relámpagos Nunca instale enchufes telefónicos en localizaciones mojadas a menos que el enchufe haya sido diseñado específicamente para localizacion...

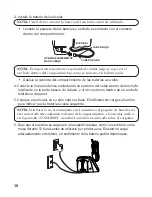
Page 57: ...s teléfonos o computadoras personales Retenga el empaque original en caso de que necesite embarcar el auricular en el futuro PARA INSTALAR EL TELÉFONO Su base debe estar colocada sobre una superficie plana como un escritorio o una mesa o usted puede montarlo sobre la pared 1 Escoja un área cerca de un enchufe eléctrico y un enchufe modular telefónico RJ11C 2 Conecte el convertidor de corriente AC ...

Page 58: ...e la base y el otro extremo dentro de un enchufe telefónico de pared 5 Coloque el auricular en su sitio sobre la base El indicador de carga se ilumina para indicar que la batería se está cargando NOTA Si la batería no está instalada en el auricular o el paquete de baterías no está conectado adecuadamente dentro del compartimiento el auricular indica en la pantalla NO BATERIA cuando el auricular es...

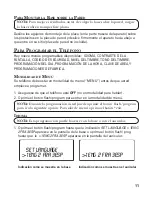
Page 59: ... MODALIDAD DE MENÚ Su teléfono debe estar en modalidad de menú MENU antes de que usted empiece a programar 1 Asegúrese de que el teléfono esté OFF no en modalidad para hablar 2 Oprima el botón flash program para entrar en la modalidad de menú NOTA Durante la programación usted puede oprimir el botón flash program para ir a la siguiente opción Para salir de menú oprima el botón exit IDIOMA NOTA Est...

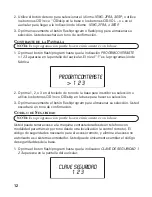
Page 60: ...clado de tono de la base para inscribir su selección o utilice los botones CID rev o CID skip en la base para hacer su selección 3 Oprima nuevamente el botón flash program para almacenar su selección Usted escuchará un tono de confirmación CÓDIGO DE SEGURIDAD NOTA Esta programación puede hacerse únicamente con la base Usted puede tener acceso a la máquina contestadora desde un teléfono con modalid...

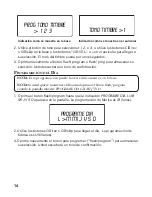
Page 61: ... NIVELTIMBR 1ALT 2BAJ 3APG aparezca en la pantalla del auricular La programación de fábrica es 1ALT 2 Utilice el teclado de tono para seleccionar 1 2 o 3 o utilice los botones CID rev o CID skip para recorrer las opciones 1ALT 2BAJ o 3APG 3 Oprima nuevamente el botón para programar flash program para almacenar su selección Usted escuchará un tono de confirmación NOTA Si usted apaga el timbre OFF l...

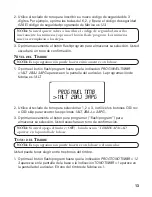
Page 62: ...N DEL DÍA NOTA Esta programación puede hacerse únicamente con la base NOTA Si usted quiere mantener el día actual oprima el botón flash program cuando la pantalla muestre PROGRAME DIA L M MI J V S D 1 Oprima el botón flash program hasta que la indicación PROGRAME DIA L M MI J V S D aparezca en la pantalla La programación de fábrica es M lunes 2 Utilice los botones CID rev o CID skip para llegar al...

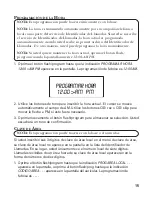
Page 63: ...ir la hora actual El cursor se mueve automáticamente al campo de AM Utilice los botones CID rev o CID skip para mover la flecha a PM si esto fuera necesario 3 Oprima nuevamente el botón flash program para almacenar su selección Usted escuchará un tono de confirmación CLAVE DE ÁREA NOTA Esta programación puede hacerse con la base o el auricular Si usted inscribió sus 3 dígitos de clave de área loca...

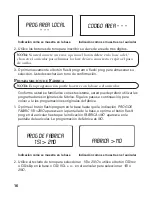
Page 64: ...riza con este sistema usted puede preferir utilizar las programaciones originales de fábrica Siga los pasos a continuación para volver a la las programaciones originales de fábrica 1 Oprima el botón flash program en la base hasta que la indicación PROG DE FABRIC 1SI 2NO aparezca en la pantalla de la base u oprima el botón flash prog en el auricular hasta que la indicación FABRICA NO aparezca en la...

Page 65: ...s pueden generar un efecto de eco Siga las siguientes pautas cuando utilice el altavoz Quédese razonablemente cerca del teléfono para que pueda ser escuchado claramente por la persona con la que está hablando INDICADOR DE CARGA EN USO Cuando el indicador charge in use está iluminado el auricular está colocado correctamente sobre la base y está cargando El indicador parpadea cuando la base está sie...

Page 66: ...TAVOZ 1 Cuando el teléfono timbra oprima el botón speaker para contestar una llamada 2 Cuando haya terminado oprima nuevamente el botón speaker NOTA Si usted ha estado usando el auricular y quiere cambiar a altavoz del auricular oprima el botón speaker en la base primero y después oprima ya sea el botón talk call back en el auricular para apagarlo o coloque el auricular sobre su sitio en la base C...

Page 67: ...ono suena y usted está suscrito al servicio de Identificador de Llamada en Espera a través de su compañía telefónica local usted recibirá información si ésta es disponible de Identificador de Llamadas en Espera Durante una llamada telefónica usted escuchará un tono que significa que hay una llamada en espera en la línea la información del Identificador de Llamadas en Espera aparecerá en la pantall...

Page 68: ... en la base o en el auricular para terminar cualquier operación como pre marcado o para salir del menú programable ENMUDECEDOR Para tener una conversación privada fuera de la línea utilice la función del enmudecedor La persona del otro lado de la línea no puede escucharle pero usted todavía puede escucharles a ellos 1 Oprima el botón mute en la base La indicación ENMUDECEDOR ENC aparece en la pant...

Page 69: ...otón talk call back en el auricular u oprima el botón page en la base nuevamente para cancelar el tono NOTA Usted puede aún localizar el auricular cuando el timbre está apagado OPERACIÓN DEL INTERFONO La función del interfono le permite tener una conversación de duración ilimitada entre la base y el auricular PARA HACER UNA LLAMADA DE INTERFONO 1 Asegúrese que el teléfono esté OFF no en modalidad ...

Page 70: ... que la llamada telefónica se pone en espera O usted puede crear una conversación telefónica con 3 personas entre la persona que llama por teléfono la base y el auricular inalámbrico LLAMADAS DE INTERFONO CON DOS PERSONAS 1 Para hacer una llamada de interfono oprima el botón page int en la base o el botón de intercom en el auricular inalámbrico dependiendo de donde es originada la llamada entrante...

Page 71: ...o de hasta 24 dígitos PARA ALMACENAR UN NOMBRE Y NÚMERO EN LA MEMORIA 1 Asegúrese de que el teléfono esté OFF no en modalidad para hablar 2 Oprima el botón memory en el auricular o en la base 3 Oprima el botón de la localización de memoria deseada teclas del 0 al 9 o utilice los botones CID VOL o en el auricular o los botones CID rev o CID skip en la base para llegar a la localización de memoria d...

Page 72: ...moria 2 Oprima el botón redial para mostrar el número 3 Oprima nuevamente el botón memory para confirmar NOTA Si el número a marcar tiene más de 24 dígitos entonces este número no puede ser almacenado en la memoria PARA INTRODUCIR UNA PAUSA EN LA SECUENCIA DE MARCADO Si una pausa es necesaria para esperar al tono de marcar oprima el botón pause en el teclado numérico para introducir un retraso en ...

Page 73: ...l auricular para borrar esta inscripción La pantalla indica BORRADO PARA MARCAR UN NÚMERO ALMACENADO AURICULAR Asegúrese de que el teléfono esté OFF no en modalidad para hablar en el auricular inalámbrico 1 Oprima el botón memory 2 Oprima el botón de la localización de memoria deseada 0 al 9 El número almacenado se marca automáticamente O 1 Asegúrese de que el teléfono esté OFF no en modalidad par...

Page 74: ... de la Memoria Número de Acceso de Larga Distancia 7 Código de Autorización 8 Número de larga distancia llamado frecuentemente 9 Asegúrese de que el teléfono esté ON 1 Oprima el botón de memoria y después oprima el 7 2 Cuando escuche el tono de acceso oprima el botón de memoria y después oprima el 8 3 Al siguiente tono de acceso oprima el botón de memoria y después oprima el 9 SUGERENCIA Espera a ...

Page 75: ...echa la hora el número telefónico y el nombre de la persona que llamó en las 40 últimas llamadas Si la memoria del Identificador de Llamadas está llena un archivo de llamada nuevo reemplazará al archivo más viejo en la memoria En cualquier momento usted puede revisar la información almacenada de las últimas 40 llamadas Las llamadas recibidas desde la última revisión se mostrarán como llamadas nuev...

Page 76: ...a compañía telefónica con respecto a la disponibilidad del servicio de nombre PARA TRANSFERIR ARCHIVOS DEL IDENTIFICADOR DE LLAMADAS A LA MEMORIA Usted puede transferir archivos del Identificador de Llamadas a la memoria de su teléfono NOTA Es importante que usted formatee los archivos del Identificador de Llamadas correctamente antes de almacenarlos en la memoria No es posible volver a formatear ...

Page 77: ...de formato le permite cambiar el formato del número telefónico mostrado en la pantalla Los formatos disponibles incluyen Número de dígitos Explicación Ejemplo Once dígitos clave de larga distancia 1 3 dígitos de clave de área 7 dígitos de número telefónico 1 317 888 8888 Diez dígitos 3 dígitos de clave de área 7 dígitos de número telefónico 317 888 8888 Siete dígitos 7 dígitos de número telefónico...

Page 78: ...guientes diez segundos para borrar el archivo La pantalla muestra brevemente la indicación BORRADO para confirmar que ha borrado PARA BORRAR TODOS LOS ARCHIVOS DEL IDENTIFICADOR DE LLAMADAS Para borrar todos los archivos del Identificador de Llamadas en la memoria 1 Utilice los botones CID rev o CID skip en la base o los botones CID VOL o en la auricular hasta que cualquier archivo aparezca en la ...

Page 79: ...as con Llamada en Espera Caller ID with Call Waiting Para saber quién llama mientras usted está en el teléfono usted debe suscribirse al Servicio de Identificador de Llamadas con Llamada en Espera Caller ID with Call Waiting OPERACIÓN DEL SISTEMA CONTESTADOR PANTALLA DE ALERTA Cuando el teléfono no está en uso la base muestra el estado del sistema contestador La programación de fábrica establece q...

Page 80: ...como a nueve pulgadas del micrófono y elimine tanto ruido de fondo como le sea posible 1 Asegúrese que el sistema contestador esté ON 2 Oprima y sostenga el botón announce 3 Empiece a hablar después de que usted escucha el timbre 4 Suelte el botón cuando usted haya acabado su grabación NOTA Si usted elige no grabar un anuncio saliente un anuncio pre grabado de fábrica se reproduce en su lugar Para...

Page 81: ...play stop Mientras el mensaje se reproduce usted puede hacer lo siguiente 1 Oprima el botón play stop en la base para detener la reproducción del mensaje 2 Oprima el botón CID rev en la base una vez para volver a reproducir el mensaje actual 3 Oprima el botón CID rev dos veces para reproducir mensajes previos 4 Oprima el botón CID skip para saltar al siguiente mensaje 5 Oprima el botón delete para...

Page 82: ...EPRO aparecerá en la pantalla 3 Oprima el botón delete en la base nuevamente La indicación TODOS MNS REPRO BORRADO en la pantalla confirma que el aparato ha borrado todos los mensajes RECADOS Utilice la función memo para dejar un mensaje para usted 1 Oprima y sostenga el botón memo 2 Empiece a hablar después de que usted escuche el tono 3 Suelte el botón memo cuando usted haya terminado de grabar ...

Page 83: ...eración del Sistema de Contestadora para detalles sobre las funciones 4 Cuando usted ha terminado de revisar sus mensajes oprima el botón 2 play stop para detener la reproducción de mensajes y después el botón format answerer para salir de la modalidad de acceso a control remoto ACC REMOTO CONT PARA FILTRAR LLAMADAS CON EL AURICULAR Usted puede utilizar el auricular para filtrar llamadas a control...

Page 84: ...és de 10 timbres emite un tono y espera a que usted inscriba su código de seguridad de 3 dígitos Usted tiene 7 segundos para inscribir su código de seguridad antes de que el teléfono le desconecte Usted debe borrar algunos de los mensajes viejos para que el sistema pueda grabar nuevos mensajes NOTA El aparato también contesta después del décimo timbre si está apagado Para tener acceso a la máquina...

Page 85: ...ro del enchufe en el compartimiento 4 Ponga la tapa del compartimiento de la batería en su sitio 5 Coloque el auricular sobre el cargador para que se cargue Si usted no carga adecuadamente las baterías del auricular durante 12 horas cuando usted programa inicialmente su teléfono y o cuando usted instala un nuevo paquete de baterías la calidad de funcionamiento de las baterías a largo plazo podría ...

Page 86: ...CHO DEL CINTURÓN Hay dos ranuras una a cada lado del auricular Sujete el gancho para cinturón metiendo los lados del gancho para cinturón dentro de las ranuras Empuje suavemente las orillas del gancho del cinturón a que entren en su sitio MENSAJES EN LA PANTALLA Los siguientes mensajes especiales indican el estado actual de un mensaje o del aparato ERROR La información de la persona que llama ha s...

Page 87: ...ea no NAME NUMBER incluido en el servicio de Caller ID o la información no NOM NUM fue enviada DESCONOCIDO LOW BATTERY Indica que la batería necesita ser re cargada BAJA BATERIA ENTERTEL NUMBER Indicación pidiéndole que inscriba un número INSCRIBA NUMERO telefónico en una de las 10 localizaciones de memoria PAGING FROM HANDSET Alguien ha oprimido el botón page intercom en la PAGING FRM BASE base o...

Page 88: ...L TELÉFONO No hay tono de marcar Verifique y repita los pasos de la instalación Asegúrese que el cable de corriente de la base esté conectado a un enchufe que sirva Asegúrese que todos los cables de línea conectados al teléfono y al enchufe de pared Conecte otro teléfono al mismo enchufe si no hay tono de marcar en el segundo teléfono el problema puede estar en su cableado o su servicio local El a...

Page 89: ...tro aparato eléctrico Cargue la batería El aparato emite bips Coloque el auricular sobre la base durante 20 segundos Si sigue emitiendo bips cargue la batería durante 12 horas Limpie los contactos de carga del auricular y cargador con un trapo suave o con una goma de borrar Vea las soluciones para No hay tono de marcar Cambie la batería La función de Marcar por Memoria no sirve Programó usted las ...

Page 90: ...osa que no sea información válida del Caller ID durante el periodo de silencio después del primer timbre Este mensaje indica la presencia de ruido en la línea No sirve el Caller ID Para pode recibir la información del Identificador usted debe suscribirse al servicio estándar de nombre número disponible con su compañía telefónica SOLUCIONES PARA LA BATERÍA Si usted experimenta cualquiera de los sig...

Page 91: ...cesite embarcar el auricular en el futuro Periódicamente limpie los contactos de carga del auricular y de la base con una goma de lápiz limpia CAUSAS DE UNA MALA RECEPCIÓN Recubrimiento externo de la casa con aluminio Aislación con revestimiento de papel de aluminio Conductos de calefacción y otras construcciones de metal que paran las señales de radio El aparato está demasiado cerca de aparatos e...

Page 92: ... ATLINKS USA Inc podría ser motivo de anulación de la autoridad del usuario para operar este producto Para recibir instrucciones sobre cómo obtener servicios de mantenimiento por favor consulte la garantía incluida en esta Guía o llame a Información para el Usuario 1 800 448 0329 O envíe sus preguntas a ATLINKS USA Inc Gerente Servicio al Consumidor P O Box 1976 Indianápolis IN 46206 Adjunte su re...

Page 93: ...ra Hacer Pedidos de Accesorios 44 Funciones del Identificador de Llamadas Caller ID 26 G Garantía Limitada 47 I Identificador de Llamada en Espera 31 Idioma 11 Indicaciones Importantes para la Instalación 9 Indicador de Carga en Uso 17 Indicador de Mensajes 32 Información de Interferencias 2 Información Importante para la Instalación 8 Información sobre la Aprobación de Equipo 2 Introducción 5 L L...

Page 94: ...elefónica Externa Durante una LLamada 21 Para Recibir y Almacenar Archivos del Identificador de Llamadas 27 Para Revisar Cambiar o Borrar Números Almacenado 24 Para Revisar el Anuncio 32 Para Revisar los Archivos de Llamadas 27 Para Salir 20 ParaTener Acceso al Sistema Contestador con el Auricular Inalámbrico 35 Para Tener Acceso al Sistema Contestador desde Otra Localizacion 36 ParaTransferir Arc...

Page 95: ...s Estados Unidos Desastres naturales por ejemplo y sin limitarse a ellos daños por relámpagos Registro del Producto Por favor llene y envíe por correo la Tarjeta de Registro del Producto que se embarcó con su producto Hará más fácil que hagamos contacto con usted si fuera necesario No se requiere la devolución de la tarjeta para tener la cobertura de la garantía Limitaciones sobre la Garantía LA G...

Page 96: ...Modelo 25859 55908580 Rev 1 E S 04 39 Impreso en China ...

Reviews: