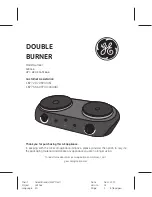
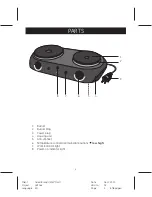

Client:
Select Brands (Wal*Mart)
Project:
169166
Language: EN
Date:
06.11.2007
Version:
03
Page:
6
(of
8
pages)
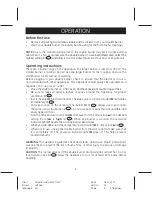
OPERATION
Before first use
•
Remove all packaging materials, labels and/or stickers from your double burner.
•
Clean your double burner thoroughly before using for the first time (
Cleaning
).
NOTE:
Due to the manufacturing process, the double burner may emit a slight burning
odor when it is first activat
ed. Use the double burner in a well-ventilated area, select the
highest setting (
ill.
e
), and allow it to sit for a few min
utes without any cooking utensils.
Operating instructions
There are 2 burner rings on the appliance. The larger burner is rated at 1000 W. The
smaller burner is rated at 500 W. Use the larger burner for fast cooking, and use the
small burner for simmering or warming.
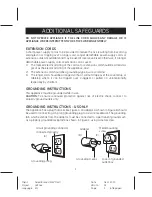
Before plugging in your double burner, check to ensure that the electrical circuit is
not overloaded with other appliances. This appliance should always be operated on a
separate 120 V ~60 hz, AC outlet.
•
Place the double burner on a fl
at, even, and heat-resistant countertop surface.
•
Be sure to leave at least 5 inches of s
pace around the appliance for proper
ventilation
(
ill.
a ).
•
Insert the plug
(3)
into the wall outlet. The blue power-on indicator light
(8)
illuminates
immediately
(
ill.
b ).
•
Put a pot or pan on the center of one burner
(1)
(
ill.
c ). Always use a pot or pan
the same size as the burner
(
ill.
j
). Do not use pots or pans that are unstable and
easily tipped (ill. h+k).
•
Turn the temperature control dial
(6)
clockwise from the off position to the desired
setting (from
low
to
high
)
(
ill.
e ). When one burner is working, the red work
indicator light
(7)
beside the working burner illuminates.
•
When you are done,
turn the temperature control dial
(6)
to off position
(
ill.
d ).
•
When not in use, unplug the double burner from the wall outlet to make sure that
it is completely off. The power-on indicator light
(8)
goes off. This helps prevent
accidental burns.
WARNING:
This appliance generates heat and steam during use. Proper precautions
must be taken to prevent the risk of burns, fires, or other injury to persons or damage
to property.
CAUTION:
The metal surfaces of the double burner and pots/pans will get hot. Do not
touch while in use
(
ill.
i ). Allow the appliance to cool for at least 30 minutes before
handling.
6