


6
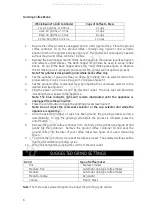
Grinding Coffee Beans:
Whole Beans To Add to Grinder
Cups of Coffee to Brew
2 tsp, 10 grams, or 0.35 oz.
2 cups
4 tsp, 20 grams, or 0.7 oz.
4 cups
8 tsp, 40 grams, or 1.4 oz.
8 cups
12 tsp, 60 grams, or 2.1 oz.
12 cups
1.
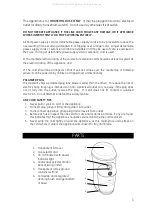
Be sure the coffee grinder is unplugged and on a flat, level surface. Place the ground
coffee container lid on the ground coffee container (see figure 1) and correctly
position them in the grinder body (see figure 2). The grinder will not properly operate
without the ground coffee container in place.
2.
Remove the bean hopper lid and fill the bean hopper to the desired level (see figure 3
and reference chart above). The bean hopper lid can also be used to scoop coffee
beans. Do not fill the bean hopper above the “max” marking (see figure 4). Replace
the lid, making sure it is properly positioned or the grinder will not operate properly.
Note: This grinder is designed to grind whole bean coffee only.
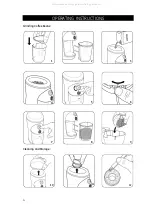
3.
Set the quantity of ground coffee you desire by rotating the cup selector dial to the
proper setting: 2 cups, 4 cups, 8 cups or 12 cups (see figure 5).
4.
Set the ground coffee coarseness level by adjusting the coarseness selector to the
desired level (see figure 6).
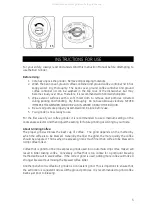
5.
Plug the power cord into a 120V AC electrical outlet. The blue light will illuminate
indicating there is power to the appliance.
Note: The blue indicator light will remain illuminated until the appliance is
unplugged from the wall outlet.
6.
Press the on/off button to begin the grinding process (see figure 7).
Note: Do not adjust the coarseness selector or the cup selector dial while the
appliance is operating.
7.
Once the selected number of cups has been ground, the grinding process will stop
automatically. To stop the grinding cycle before the process is complete, press the
on/off button.
8.
Remove the ground coffee container from the body of the grinder (see figure 8) and
gently tap the container. Remove the ground coffee container lid and pour the
ground coffee into the filter of your coffee maker (see figure 9) or use a measuring
spoon.
9.
To run another grinding cycle, repeat the above process. The selected settings will be
retained for additional grinding cycles.
10.
When finished grinding unplug the cord from the wall outlet.
SUGGESTED GRIND SETTINGS
Grind
Type of coffee maker
Fine
Espresso maker
Medium-Fine
Automatic drip type coffee maker
Medium
Automatic drip type coffee maker
Medium-Coarse
Percolator
Coarse
French Press
Note:
The more cups selected to grind, the longer the grinding cycle will run.
All manuals and user guides at all-guides.com
all-guides.com


