background image

1

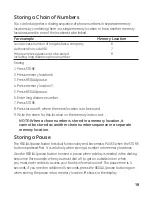
Storing a Chain of Numbers

You can link together a dialing sequence of phone numbers in separate memory 
locations by combining them in a single memory location or have another memory 
location stored in one of the locations to be linked.

For example 

  Memory Location

Local access number of long distance company. 


6

Authorization code (ID). 


7

Where entire sequence is to be stored  


8

including long distance phone number.

Storing
1. Press STORE.
2. Press memory location 6.
3. Press REDIAL/pause.
4. Press memory location 7.
5. Press REDIAL/pause.
6. Enter long distance number.
7. Press STORE.
8. Press location 8, where the entire location is to be stored.
9. Write the name for this location on the memory index card.

NOTE: When a chain number is stored in a memory location, it 

cannot be stored as another chain number sequence in a separate 

memory location.

Storing a Pause

The REDIAL/pause button has dual functionality and becomes a PAUSE when the STORE 
button is pressed first. It is valid only when storing a number into memory locations. 
Use the REDIAL/pause button to insert a pause when a delay is needed in the dialing 
sequence (for example, when you must dial a 9 to get an outside line or when 
you must enter codes to access your bank’s information line). The pause time is 4 
seconds, if you need an additional 4 seconds, press the REDIAL/pause button again 
when storing the pause into a memory location. 

P

 shows in the display.

Summary of Contents for 16017970

Page 1: ...Model 29484 Two Line Home Office Speakerphone User s Guide ...

Page 2: ...See installation instructions for details Notes This equipment may not be used on coin service provided by the telephone company Party lines are subject to state tariffs and therefore you may not be able to use your own telephone equipment if you are on a party line Check with your local telephone company Notice must be given to the telephone company upon permanent disconnection of your telephone ...

Page 3: ...not occur in a particular installation Privacy of Communications may not be ensured when using this product If this equipment does cause harmful interference to radio or television reception which can be determined by turning the equipment off and on the user is encouraged to try to correct the interference by one or more of the following measures Reorient or relocate the receiving antenna that is...

Page 4: ...eadset 12 Mute 12 Hold 12 Placing a Call on Hold 13 Releasing a Call on Hold 13 Flash 13 Pause 13 Temporary Tone 13 Redial 14 Using One Touch Redial 14 Volume 14 Adjusting the Ringer Volume 14 Adjusting the Handset Volume 14 Adjusting the Speakerphone Volume 14 Adjusting the Headset Volume 15 Conference Calls 15 Connecting and Conferencing 15 Disconnecting One Party 15 Disconnecting Both Parties 1...

Page 5: ...GE INSIDE THE PRODUCT CAUTION TO REDUCE THE RISK OF ELECTRIC SHOCK DO NOT REMOVE COVER OR BACK NO USER SERVICEABLE PARTS INSIDE REFER SERVICING TO QUALIFIED SERVICE PERSONNEL THE EXCLAMATION POINT WITHIN THE TRIANGLE IS A WARNING SIGN ALERTING YOU OF IMPORTANT INSTRUCTIONS ACCOMPANYING THE PRODUCT CAUTION Connecting an Optional Headset 23 Troubleshooting Guide 24 General Product Care 25 Service 26...

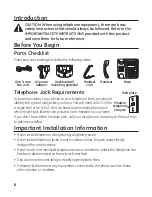
Page 6: ...terminals unless the telephone line has been disconnected at the network interface Use caution when installing or modifying telephone lines Temporarily disconnect any equipment connected to the phone such as faxes other phones or modems Introduction CAUTION When using telephone equipment there are basic safety instructions that should always be followed Refer to the IMPORTANT SAFETY INSTRUCTIONS p...

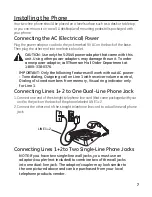
Page 7: ...atures will work without AC power Tone dialing Outgoing call on Line 1 with receiver volume control Dialing of stored numbers from memory Visual ring indicator only for Line 1 Connecting Lines 1 2 to One Dual Line Phone Jack 1 Connect one end of the straight telephone line cord that came packaged with your unit to the jack on the back of the phone labeled LINE 1 2 2 Connect the other end of the st...

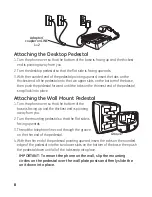
Page 8: ...all Mount Pedestal 1 Turn the phone over so that the bottom of the base is facing up and the thickest end is pointing away from you 2 Turn the mounting pedestal so that the flat side is facing upwards 3 Thread the telephone line cord through the groove on the thin end of the pedestal 4 With the thin end of the pedestal pointing upward insert the tabs on the rounded edge of the pedestal into the tw...

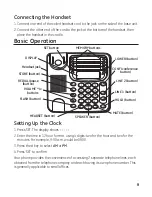
Page 9: ...n FLASH button VOLUME v buttons REDIAL pause button STORE button DISPLAY SET button LOWER button CONF conference button LINE 2 button LINE 1 button HOLD button MUTE button MEMORY buttons Headset jack Setting Up the Clock 1 Press SET The display shows 2 Enter the time in 12 hour format using 4 digits two for the hour and two for the minutes For example 9 00 a m would be 0900 3 Press the key to sele...

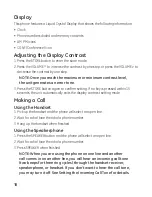
Page 10: ...in 15 seconds the unit automatically exits the display contrast setting mode Making a Call Using the Handset 1 Pick up the handset and the phone will select an open line 2 Wait for a dial tone then dial a phone number 3 Hang up the handset when finished Using the Speakerphone 1 Press the SPEAKER button and the phone will select an open line 2 Wait for a dial tone then dial a phone number 3 Press S...

Page 11: ...n to speak through the headset The HEADSET indicator stays lit 4 Press the HEADSET button again to drop the call The headset indicator blinks 5 If headset is not used frequently press HEADSET button again to turn off the headset mode The HEADSET indicator turns off NOTE If the headset is not connected an error tone is heard when the HEADSET button is pressed NOTE During headset mode if the headset...

Page 12: ...ween Using the Speakerphone Handset and Headset To switch to the speakerphone press SPEAKER The speakerphone indicator turns on To switch to the handset pick up the handset The speakerphone or headset turns off To switch to the headset press HEADSET The headset indicator turns on Mute Use the MUTE button to interrupt a phone conversation to talk privately with someone else in the room A conversati...

Page 13: ... break in the dialing sequence press the REDIAL pause button at the desired point in the number while storing a number in memory Press REDIAL pause again if an additional pause is needed The pause is helpful when accessing custom calling services such as telebanking and long distance Temporary Tone If you have pulse rotary service and want to access customer calling services that require tone dial...

Page 14: ...ndependently with the VOLUME and VOLUME v buttons Your telephone comes with predetermined settings which can be adjusted to individual taste You will hear an error tone when the maximum or minimum volume level is reached During volume adjustment a dashed line icon shows in the display Adjusting the Ringer Volume Press the VOLUME or v button while in on hook mode NOTE To turn the ringer off on or c...

Page 15: ...e then press the CONF button The CONF icon shows in the display 4 Begin speaking to both parties NOTE To put both parties on hold press the HOLD button NOTE To speak to one party individually press the HOLD button then press the line of the party to whom you want to speak the second part remains on hold If the speakerphone indicator is off and you are using the speakerphone press the SPEAKER butto...

Page 16: ...op using the speakerphone Likewise when you are using the headset or handset press the speakerphone button and place the handset in the cradle to switch to the speakerphone NOTE Only one way conversation is possible in speakerphone mode When you are speaking you are transmitting When you are listening you are receiving The speakerphone automatically switches between transmitting and receiving depe...

Page 17: ...ou are transmitting When you are listening you are receiving You can t do both at the same time The phone automatically switches between transmitting and receiving depending on the level of the voice or the room noise detected by the speakerphone microphone Receiving a Call When the phone rings the corresponding line s indicator flashes rapidly 1 Press the SPEAKER button The speakerphone comes on ...

Page 18: ...n lower memory press the LOWER button The red indicator stays on Press the memory location button where you want to store the number 5 For future reference you may want to write the name or number of the party you have stored in this location in the corresponding space on the memory index card 6 Repeat steps 1 5 for any additional numbers you want to store up to a total of 16 7 To cancel the stori...

Page 19: ...e entire location is to be stored 9 Write the name for this location on the memory index card NOTE When a chain number is stored in a memory location it cannot be stored as another chain number sequence in a separate memory location Storing a Pause The REDIAL pause button has dual functionality and becomes a PAUSE when the STORE button is pressed first It is valid only when storing a number into m...

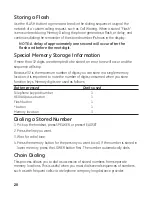
Page 20: ...you can store in a single memory location it is important to note the number of digits consumed when you store function keys Memory digits are used as follows Button pressed Digits used Telephone keypad number 1 REDIAL pause button 1 Flash button 1 button 1 Memory location 3 Dialing a Stored Number 1 Pick up the handset press SPEAKER or press HEADSET 2 Press the line you want 3 Wait for a dial ton...

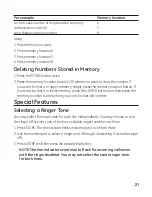
Page 21: ... it in lower memory press the LOWER button and then press the memory location button where you want to clear the number Special Features Selecting a Ringer Tone You may select the ringer tone for each line independently You may choose to turn the ringer off or select one of the four available ringer tones for each line 1 Press STORE The red indicator blinks indicating unit is in Store Mode 2 Use t...

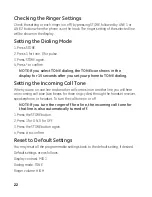
Page 22: ...ing the Incoming Call Tone When you are on one line and another call comes in on another line you will hear an incoming call tone two beeps for three ring cycles through the handset receiver speakerphone or headset To turn the call tone on or off NOTE If you turn the ringer off for a line the incoming call tone for that line is also automatically turned off 1 Press the STORE button 2 Press 1 for O...

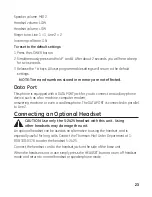
Page 23: ... auxiliary phone device such as a fax machine computer modem answering machine or even a cordless phone The DATA PORT is connected in parallel to Line 2 Connecting an Optional Headset CAUTION Use only the 5 2425 headset with this unit Using other headsets may damage the unit An optional headset can be used as an alternative to using the handset and is especially useful for long calls Contact the T...

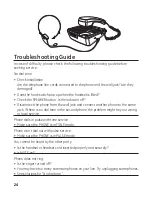
Page 24: ...e wall jack and connect another phone to the same jack If there is no dial tone in the second phone the problem might be your wiring or local service Phone dials in pulse with tone service Make sure the PHONE is in TONE mode Phone won t dial out with pulse service Make sure the PHONE is in PULSE mode You cannot be heard by the other party Is the handset or headset cord inserted properly and secure...

Page 25: ...ng and looking good follow these guidelines Avoid putting the phone near heating appliances and devices that generate electrical noise for example motors or fluorescent lamps DO NOT expose to direct sunlight or moisture Avoid dropping the handset as well as other rough treatment to the phone Clean the phone with a soft cloth Never use a strong cleaning agent or abrasive powder because this will da...

Page 26: ... Thomson Inc Manager Consumer Relations PO Box 1976 Indianapolis IN 46206 1976 Attach your sales receipt to the booklet for future reference or jot down the date this product was purchased or received as a gift This information will be valuable if service should be required during the warranty period Purchase date ________________________________________________________ Name of store _____________...

Page 27: ...Calls 15 Connecting and Conferencing 15 Connecting an Optional Headset 23 Connecting Lines 1 2 to One Dual Line Phone Jack 7 Connecting Lines 1 2 to Two Single Line Phone Jacks 7 Connecting the AC Electrical Power 7 Connecting the Handset 9 D Data Port 23 Deleting Numbers Stored in Memory 21 Dialing a Stored Number 20 Disconnecting Both Parties 15 Disconnecting One Party 15 Display 10 E Equipment ...

Page 28: ...ting a Ringer Tone 21 Service 26 Setting the Dialing Mode 22 Setting the Incoming Call Tone 22 Setting Up the Clock 9 Speakerphone Operation 16 Special Features 21 Special Memory Storage Information 20 Storing a Chain of Numbers 19 Storing a Flash 20 Storing a Number 18 Storing a Pause 19 Switching Between Using the Speakerphone 12 T Telephone Jack Requirements 6 Temporary Tone 13 Troubleshooting ...

Page 29: ...presented to obtain warranty service For rental firms proof of first rental is also required Also print your name and address and a description of the defect Send via standard UPS or its equivalent to Thomson Inc 11721 B Alameda Ave Socorro Texas 79927 Pay any charges billed to you by the Exchange Center for service not covered by the warranty Insure your shipment for loss or damage Thomson Inc ac...

Page 30: ...ising out of any breach of any express or implied warranty on this product This disclaimer of warranties and limited warranty are governed by the laws of the state of Indiana Except to the extent prohibited by applicable law any implied warranty of merchantability or fitness for a particular purpose on this product is limited to the applicable warranty period set forth above How state law relates ...

Page 31: ...Modelo 29484 Teléfono con Altavoz de Dos Líneas para Hogar Oficina Guía del Usuario ...

Page 32: ...ste producto Están diseñados para ser conectados a un enchufe modular compatible que también esté en conformidad Para más detalles vea las instrucciones para la instalación NOTAS No se puede usar este equipo con un teléfono de previo pago proveído por la compañía telefónica Las líneas compartidas son sujetas a las tarifas del estado y por eso es posible que Ud no pueda usar su propio equipo telefó...

Page 33: ...to de comunicaciones no puede ser asegurada al usar este producto Si este equipo causa en efecto una interferencia dañosa a la recepción de la radio o de la televisión lo cual puede ser determinado apagando y prendiendo el equipo le animamos a Ud de tratar de corregir la interferencia por medio de una o más de las sugerencias siguientes Cambie la posición o la ubicación de la antena quiere decir l...

Page 34: ...Auricular 10 Utilizando el Altavoz 10 Para Utilizar los Audífonos Opcionales 11 Para Recibir Llamadas Entrantes 11 Utilizando el Auricular 11 Utilizando el Altavoz 11 Para Utilizar los Audífonos Opcionales 12 Para Alternar Entre el Uso del Altavoz Auricular y Audífonos 12 Enmudecedor MUTE 12 En Espera HOLD 12 Para Poner una Llamada en Espera 13 Cómo Liberar una Llamada en Espera 13 Flash 13 Pausa ...

Page 35: ... TRIÁNGULO ES UNA SEÑAL DE ADVERTENCIA ALERTÁNDOLE A UD DE QUE HAY VOLTAJE PELIGROSO DENTRO DEL PRODUCTO CUIDADO PARA REDUCIR EL RIESGO DE UNA SACUDIDA ELÉCTRICA NO QUITE LA CUBIERTA O PARTE POSTERIOR NO USE PARTES DE REPUESTO DENTRO CONSULTE A ALGUNA PERSONA CALIFICADA DEL SERVICIO DE REPARACIONES EL SIGNO DE EXCLAMACIÓN DENTRO DEL TRIÁNGULO ES UNA SEÑAL DE A D V E R T E N C I A ALTERTÁNDOLE A UD...

Page 36: ...sted debe identificar el tipo de enchufe s de pared que usted tiene Usted necesitará un enchufe tipo modular RJ11 para línea sencilla o un RJ14C para dos líneas que puede parecerse al enchufe ilustrado aquí instalado en su hogar Si usted no tiene ninguno de estos enchufes usted puede llamar a su compañía telefónica local para enterarse de cómo puede obtener que se le instale uno Información Import...

Page 37: ...abajarán sin corriente AC Marcado por tono Llamadas salientes en la Línea 1 con el control de volumen del recibidor Marcado de números almacenados en la memoria Indicador visual de timbre únicamente para la línea 1 Para Conectar las Líneas 1 2 en Un Enchufe Doble de Pared 1 Conecte un extremo del cable telefónico liso que vino empacado con su aparato al enchufe localizado en la parte posterior del...

Page 38: ...o de cabeza de manera que la parte de debajo de la base quede mirando hacia arriba y el extremo más ancho esté del lado contrario a usted 2 Gire el pedestal para montaje de manera que el lado plano quede mirando hacia arriba 3 Enhebre el cable de la línea telefónica en la ranura localizada en el extremo delgado del pedestal 4 Con el extremo delgado del pedestal apuntando hacia arriba introduzca la...

Page 39: ...a marcar pausa STORE Botón para almacenar Pantalla SET Botón para confirmar Botón LOWER CONF Botón para conferencia LINE 2 Botón de la Línea 2 HOLD Botón para espera MUTE Botón enmudecedor MEMORY Botón para memoria Clavija del Audífono Para Programar el Reloj 1 Oprima el botón SET La pantalla muestra 2 Inscriba la hora en formato de 12 horas utilizando 4 dígitos dos para la hora y dos para los min...

Page 40: ...a modalidad de programación del contraste de la pantalla Para Hacer una Llamada Utilizando el Auricular 1 Levante el auricular y el teléfono seleccionará una línea abierta 2 Espere al tono de marcar y después marque el número telefónico 3 Cuelgue el auricular cuando haya terminado Utilizando el Altavoz 1 Oprima el botón SPEAKER y el teléfono seleccionará una línea abierta 2 Espere al tono de marca...

Page 41: ...prima un botón de línea para hablar a través de los audífonos El indicador HEADSET permanece iluminado 4 Oprima nuevamente el botón HEADSET para cortar la llamada El indicador HEADSET parpadea 5 Si los audífonos no se usan frecuentemente oprima nuevamente el botón HEADSET para desactivar la modalidad de audífonos El indicador HEADSET se apaga NOTA Si los audífonos no están conectados se escucha un...

Page 42: ...lar y Audífonos Para cambiar a altavoz oprima el botón SPEAKER El indicador del altavoz se ilumina Para cambiar al auricular levante el auricular El indicador del altavoz o de los audífonos se apaga Para cambiar a audífonos oprima el botón HEADSET El indicador de los audífonos se ilumina Enmudecedor MUTE Utilice el botón MUTE para interrumpir una conversación telefónica y hablar en privado con otr...

Page 43: ...marcado oprima el botón REDIAL pause en el punto deseado del número mientras almacena un número en la memoria Oprima nuevamente el botón REDIAL pause si una pausa adicional es necesaria La pausa es útil cuando usted tiene acceso a los servicio al cliente como transacciones bancarias o servicios de larga distancia Tono Temporal Si usted tiene servicio de pulso rotatorio y quiere tener acceso a los ...

Page 44: ...nos con los botones VOLUME y v Su teléfono viene con programaciones predeterminadas que pueden ser ajustadas para indicar su gusto individual Usted escuchará un tono de error cuando el volumen máximo o mínimo ha sido alcanzado Durante el ajuste del volumen un símbolo de línea punteada aparece en la pantalla Para Ajustar el Volumen del Timbre Oprima el botón VOLUME o v mientras el auricular está co...

Page 45: ...a en la otra línea y después oprima el botón CONF El símbolo de CONF aparece en la pantalla 4 Empiece a hablar con las dos personas NOTA Para poner a ambas personas en espera oprima el botón HOLD NOTA Para hablar con una persona individualmente oprima el botón HOLD después oprima la línea de la persona con quien usted quiera hablar la segunda persona permanece en espera Si el indicador del altavoz...

Page 46: ...os o levante el auricular para dejar de usar el altavoz Igualmente cuando usted está utilizando los audífonos o el auricular oprima el botón de altavoz y coloque el auricular sobre la base para cambiar al altavoz NOTA Únicamente una conversación unilateral es posible en la modalidad de altavoz Cuando usted esté hablando usted está transmitiendo Cuando usted está escuchando está recibiendo El altav...

Page 47: ...d de altavoz Cuando usted esté hablando usted está transmitiendo Cuando usted está escuchando está recibiendo El altavoz automáticamente cambia entre transmisión y recepción dependiendo del nivel de volumen de su voz o el ruido de la habitación que capta el micrófono del altavoz Para Recibir una Llamada Cuando el teléfono timbra el indicador correspondiente a esa línea parpadea rápidamente 1 Oprim...

Page 48: ...inado Después oprima el botón de la localización de memoria en donde usted quiera almacenar el número 5 Para futura referencia usted puede escribir el nombre y número de la persona cuyo número usted ha almacenado en esa localización en el espacio correspondiente en la tarjeta del registro de memoria 6 Repita los pasos 1 5 para cualquier número adicional que usted quiera almacenar hasta un total de...

Page 49: ...mbre para esta localización en la tarjeta de registro de memoria NOTA Cuando un número en cadena es almacenado en una localización de memoria no puede ser almacenado como otra secuencia de números en otra localización de memoria Para Almacenar una Pausa El botón REDIAL pause tiene una doble función y se vuelve el botón de pausa pause cuando el botón STORE ha sido oprimido primero Esto es válido ún...

Page 50: ...ación de memoria es importante que se fije en el número de dígitos que se usan cuando usted utiliza las teclas de funciones Los dígitos de memoria se utilizan de la siguiente manera Botón oprimido Dígitos utilizados Número del teclado en el teléfono 1 Botón REDIAL pause 1 Botón FLASH 1 Botón 1 Localización de memoria 3 Para Marcar un Número Almacenado 1 Levante el auricular u oprima el botón SPEAK...

Page 51: ...moria Si usted quiere eliminarlo en la memoria baja oprima el botón LOWER y después oprima el botón de la localización de memoria en donde usted quiera eliminar el número Funciones Especiales Para Programar los Tonos de Timbrado Usted puede programar el tono del timbre para cada línea independientemente Usted puede elegir apagar el timbre o seleccionar uno de los cuatro timbres disponibles para ca...

Page 52: ...Entrante Cuando usted esté utilizando el teléfono en una línea y otra llamada entre en otra línea usted escuchará un tono de llamada entrante dos tonos durante tres ciclos de timbres a través del recibidor del auricular del altavoz o de los audífonos Para activar o desactivar el tono de llamada entrante NOTA Si usted desactiva el timbre en una línea el tono del indicador para llamadas entrantes se...

Page 53: ...iliar del teléfono como una máquina de fax un modem de computadora una máquina contestadora o un teléfono inalámbrico La terminal de datos DATA PORT está conectada en paralelo con la Línea 2 Para Conectar Audífonos Opcionales CUIDADO Utilice únicamente los audífonos 5 2425 que vienen incluidos con este aparato El uso de otros audífonos puede resultar en daño al aparato Unos audífonos opcionales pu...

Page 54: ...fono al mismo enchufe Si no hay tono de marcar en el segundo teléfono el problema puede estar en su cableado o su servicio local El teléfono marca en pulso cuando está en modalidad de tono Asegúrese de que TELÉFONO esté en modalidad de TONO El teléfono no marca hacia afuera cuando está en modalidad de pulso Asegúrese de que TELÉFONO esté en modalidad de PULSO A usted no le escucha la otra persona ...

Page 55: ... su teléfono funcionando bien y con buena apariencia observe las siguientes pautas Evite poner el teléfono cerca de calentadores calefactores de ambiente y dispositivos que generen interferencia eléctrica ejemplo motores o lámparas fluorescentes No lo exponga a la luz solar directa o a la humedad No deje caer la extensión móvil y no maltrate el teléfono Limpie el teléfono con un trapo suave Nunca ...

Page 56: ...servicios de mantenimiento por favor consulte la garantía incluida en esta Guía o llame a Información para el Usuario 1 800 448 0329 O envíe sus preguntas a Thomson Inc Manager Consumer Relations PO Box 1976 Indianapolis IN 46206 1976 Adjunte su recibo al folleto para futura referencia o anote la fecha en la que se compró o recibió este producto como regalo Esta información será valiosa si se lleg...

Page 57: ...nterferencias 3 Información Importante para la Instalación 6 Información para Almacenaje de Memoria Especial 20 Información sobre la Aprobación de Equipo 2 Introducción 6 L Lista de Partes 6 Llamadas en Conferencia 15 M Memoria 18 O Operación Básica 9 Operación del Altavoz 16 P Pantalla 10 Para Ajustar el Contraste de la Pantalla 10 Para Ajustar el Volumen del Altavoz 14 Para Ajustar el Volumen de...

Page 58: ...a Persona 15 Para Hacer una Llamada 10 Para Instalar el Pedestal Sobre la Pared 8 Para Instalar el Pedestal sobre la Superficie Plana 8 Para Instalar el Teléfono 7 Para Marcar en Cadena 20 Para Marcar un Número Almacenado 20 Para Poner una Llamada en Espera 13 Para Programar el Reloj 9 Para Programar el Tono de la Llamada Entrante 22 Para Programar la Modalidad para Marcar 22 Para Recibir Llamadas...

Page 59: ...damiento se requiere como evidencia el primer contrato de renta También escriba claramente su nombre dirección y la descripción del defecto Mande vía UPS o un servicio de paquetería equivalente a Thomson Inc 11721 B Alameda Ave Socorro Texas 79927 Pague cualquier cargo que le facture el Centro de Intercambio por servicio que no esté cubierto por garantía Asegure su empaque para prevenir pérdida o ...

Page 60: ...EL INCUMPLIMIENTO DE CUALQUIER GARANTÍA IMPLÍCITA O EXPRESA DE ESTE PRODUCTO LA INVALIDEZ DE LAS GARANTÍAS O LAS GARANTÍAS LIMITADAS ESTÁN REGLAMENTADAS POR LAS LEYES DEL ESTADO DE INDIANA EXCEPTO POR EL ALCANCE ESTABLECIDO POR LAS LEYES APLICABLES CUALQUIER GARANTÍA IMPLÍCITA DE MERCADO O DE SALUD PARA CUALQUIER PROPÓSITO EN ESTE PRODUCTO ES LIMITADA AL PERÍODO DE GARANTÍA ESPECIFICADO ANTERIORME...

Reviews: