background image

Refrigerator Location

Clearances

Do not install refrigerator where

Do install it on a floor strong

Allow the following clearances for

temperature will go below 60°F.

enough to support a fully loaded

ease of installation and proper air

because it will not run often

refrigerator.

circulation.

enough to maintain proper

The location of your refrigerator is

Sides .................................3/4”

temperatures.

important. Avoid locating it next to

Top. . . . . . . . . . . . . . . . . . . . . . . . . . . . . . . . . . . . . . . 1“

a range, a heating vent or where the

Back . . . . . . . . . . . . . . . . . . . . . . . . . . . . . . . . . . . . . 1“

sun will shine directly on it.

Rollers and Leveling Legs

Leveling legs near each front
corner of the refrigerator are
adjustable. They firmly position
the refrigerator and prevent it from
moving when the doors are opened.
Leveling legs should be set so the
front of the refrigerator is raised
iust 

 that the doors close

Rollers  next   the leveling legs
allow you to move the refrigerator
away from the wall for cleaning.

.

Turn the legs counterclockwise until
the weight of the refrigerator is
transferred from them to the rollers.

After rolling the refrigerator back


 opened about halfway.

Turn the leveling legs clockwise

into place, turn the legs clockwise
until the 


 bear the 

to raise the refrigerator,

 the 

counterclockwise to lower it.

Water Supply to Icemaker 

(on some models)

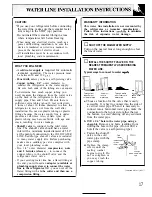
If your refrigerator has an icemaker, or if you plan to add an icemaker later,
the icemaker will have to be connected to a cold water line. There should be
sufficient tubing for the icemaker from the cold water supply to allow
moving the refrigerator out from the wall several feet (approximately   feet
of 1/4” copper tubing in three 10-inch diameter coils). A water supply kit is
available at extra cost from your GE dealer.

Preparing to Move

Disconnect the power cord from the wall outlet,
remove all food and clean and dry the interior.

Secure all loose items such as grille, shelves, storage
drawers and ice trays by taping them securely in place
to prevent damage, and raise the leveling legs.

Be sure the refrigerator stays in an upright position
during actual moving and in the van. The refrigerator
must be secured in the van to prevent movement.
Protect the outside of the refrigerator with a blanket.

Preparing for Vacation

For extended vacations or absences, shut off power
to the refrigerator, turn the temperature control to the
OFF position, and clean the interior with baking soda
solution of one tablespoon of baking soda to one quart
of water. Wipe dry. To prevent odors, leave an open
box of baking soda in refrigerator. 

 the doors open.

For shorter vacations, remove perishable foods and
leave the controls at regular settings. However, if
room temperature is expected to drop below 
follow same instructions as for extended vacations.

If you have an icemaker, set it to the STOP position and

be sure to shut off the water supply to the refrigerator.

11

1

Summary of Contents for 14

Page 1: ...11 CareandCleaning Cleaning Outside andlnsi de 9 Light Bulb Replacement 10 GE Appliances Problem Solver 19 20 More questions call GEAnswerCenter 8iM626 2000 Preparation Clearances H v_ 11 Door Swing O...

Page 2: ...ortant Avoid Q Keep foods covered to reduce moisture buildup locating it next to your range a heating vent or inside the refrigerator where the sun will shine directly on it Close the doors as soon as...

Page 3: ...ave thawed if they still contain ice crystals or if they are still cold below 40 F Thawed ground meats poultry or fish that have any off odor or off color should not be refrozen and should not be eate...

Page 4: ...select desired shelf height With shelf front raised 1A I slightly hook the bracket s top lug 1 p into the track then lower the shelf 1 Tilt up onto the support Note The shelf to the right of the track...

Page 5: ...o the right and take it out To replace the step shelf 1 With shelf tilted as shown fit left ends of shelf into holes in cabinet wall 2 Lift left side of shelf slightly swing shelf up fit right ends of...

Page 6: ...ichokes Cherries Peas green Asparagus Corn s Plums Beets Currants c Radishes topped Greens Rhubarb c Blueberries leafy c Spinach Carrots s Lettuce Tomatoes Celery Parsley ripe As in any refrigerated s...

Page 7: ...nd taste stale and will shrink Empty the ice storage bin periodically and wash it in lukewarm water If this is your first icemaker you ll hear occasional sounds that may be unfamiliar They are normal...

Page 8: ...s of produce Covering vegetables with a moist towel helps maintain crispness As a further aid to freshness prepackaged vegetables can be stored in their original wrapping Unfrozen meats fish and poult...

Page 9: ...and baking soda solution about a tablespoon of baking soda to a quart of water This both cleans and neutralizes odors Rinse thoroughly with water and wipe dry Other parts of the refrigerator including...

Page 10: ...tilt it and take it out To replace the glass cover 1 Lower the frame until it rests on the supports at each side and back 2 Replace the glass cover pushing its rear edge firmly into the rear frame cha...

Page 11: ...ker or if you plan to add an icemaker later the icemaker will have to be connected to a cold water line There should be sufficient tubing for the icemaker from the cold water supply to allow moving th...

Page 12: ...power cord this is not done the adapter ground terminal is very likely to break with repeated use Should the adapter ground terminal break DO NOT USE the appliance until a proper ground has again been...

Page 13: ...o it straight up to free the hinge pin from the socket in the top of the door and set it aside along with its screws d Remove tape tilt the door w away from the cabinet and carefully lift the door to...

Page 14: ...shim glued to it on the left front corner of the cabinet but do not tighten the screws at this time REVERSE THE DOOR HANDLES on some models 1 Transfer the fi esh food door handle to the right L To rem...

Page 15: ...he door and insert it into the handle screw hole on the left side d Transfer the door stop as shown at left e Attach the handle to the right edge of the door with screws at top and bottom using bottom...

Page 16: ...magnet in the gasket will contact the cabinet surface being careful not to dislodge the gasket E REPLACE THE BASE GRILLE on some models a Pull the plastic filler up and off D n the base grille and rei...

Page 17: ...upply kits Before purchasing make sure a saddle type valve complies with your local plumbing codes Two 1 4 outer diameter compression nuts and 2 ferrules sleeves to connect the copper tubing to the sh...

Page 18: ...POWER CORD INTO A GROUNDED ELECTRICAL OUTLET a Turn the main water supply on and flush out the tubing until the water is clear b Shut the water off at the water valve after about one quart of water h...

Page 19: ...set too cold Grille and condenser need cleaning Temperature control starts and stops motor to maintain even temperatures If refrigerator vibrates more than likely it is not resting solidly on the floo...

Page 20: ...cted Freezer compartment too warm Water shutoff valve connecting refrigerator to home water line may be clogged Door may have been left ajar Turn temperature control to colder setting Old cubes need t...

Page 21: ...z o N...

Page 22: ...NOTES...

Page 23: ...ee of charge call 800 62 2000 Special Needs Service Contracts 800 626 2224 You can ha e the secure feeling that 1E h nsumer Sert ice will still be t l ere after our ww rant expires Purchase a E contr...

Page 24: ...CARES 800 432 2737 WHAT IS NOT COVERED Service trips to your home to teach you how to use the product Read your Use and Care material If you then have any questions about operating the product please...

Reviews: