background image

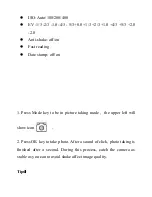
ISO: Auto/100/200/400

EV -1/3 -2/3 -1.0 -4/3 - 5/3+0.0 +1/3 +2/3 +1.0 +4/3 +5/3 +2.0 

-2.0

Anti-shake: off/on 

Fast reading

Date stamp: off/on

1. Press Mode key to be in picture taking mode

the upper left will 

show icon

2. Press OK key to take photo. After a sound of click, photo taking is 

finished  after  a   second.   During  this  process,   catch   the   camera   as 

stable as you can to avoid shake affect image quality.

Tips

Summary of Contents for HDDVR202

Page 1: ......

Page 2: ...les can be transferred by HDMI to a high definition LCD TV and realize picture perfect playback Product Features 120 degree Ultra High definition wide angle lens 1280 720P HD resolution MJPEG compress...

Page 3: ...1 Power key 2 Card slot 3 OK key 4 AV OUT interface 5 Reset 6 HDMI 7 USB interface 8 Screen 9 Horn 10 Menu Key 11 Up key 12 Down key 13 Mode key 14 MIC 15 IR light 16 Lens 17 Bracket slot...

Page 4: ...ery is full the red light turns off 2 USB charging connect the DVR with computer via a USB cable When it is shut down it can also be charged When charging the indicator light is red Once battery is fu...

Page 5: ...he original documents inside can not be read 3 If Micro SD is incompatible with the device please retry to insert the Micro SD 4 It supports Maximum 32GB Micro SD Operation guide 1 Turn on the device...

Page 6: ...he video or photographic mode press menu button once then press the up down key enter the system set up option Resolution 720P 1280 720 WVGA 848 480 VGA640 480 Motion Detection off on Audio off on Dat...

Page 7: ...ime disappear During the process of video recording up key can be used as the shortcut key of sound and down key work as SOS emergency lock key Photographing and Menu Settings Shooting mode single 2 s...

Page 8: ...ast reading Date stamp off on 1 Press Mode key to be in picture taking mode the upper left will show icon 2 Press OK key to take photo After a sound of click photo taking is finished after a second Du...

Page 9: ...y file type you can only browse the video file when the file type is video and can only view the pictures when the file type is picture 2 Delete and Protection In the playback mode press the Menu key...

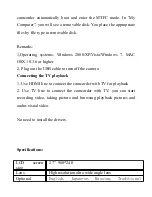
Page 10: ...2 Plug out the USB cable to turn off the camera Connecting the TV playback 1 Use HDMI line to connect the camcorder with TV for playback 2 Use TV line to connect the camcorder with TV you can start re...

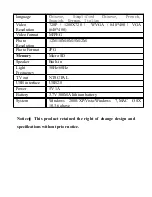
Page 11: ...o Resolution 12M 10M 8M 5M 2M Photo Format JPG Memory Micro SD Speaker Built in Light Frequency 50Hz 60Hz TV out NTSC PAL USB interface USB2 0 Power 5V 1A Battery 3 7V 300MA lithium battery System Win...

Reviews: