background image

www.gateway.com

27

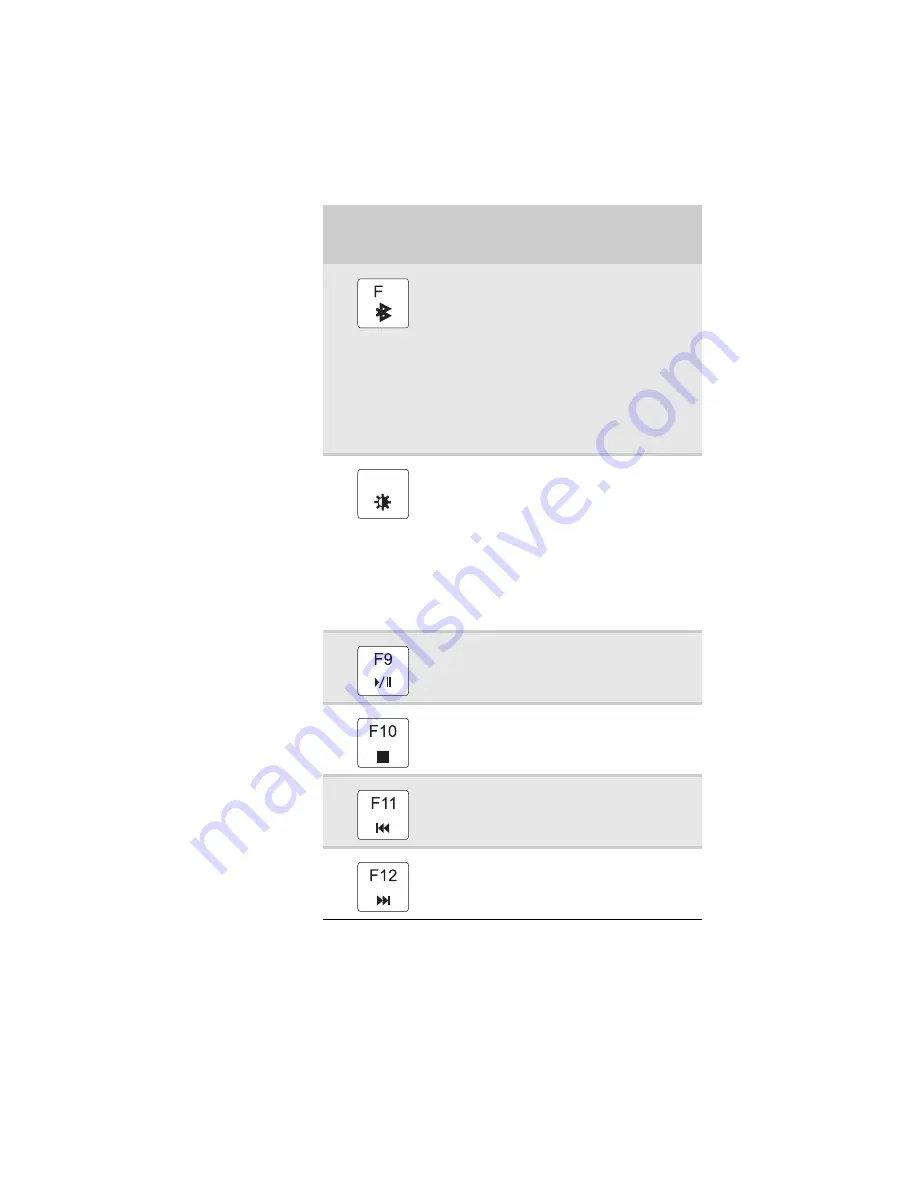
Turn the optional Bluetooth radio on or off.

Warning:

 Radio frequency wireless 

communication can interfere with 
equipment on commercial aircraft. Current 
aviation regulations require wireless devices 
to be turned off while traveling in an 
airplane. Bluetooth communication devices 
are examples of devices that provide 
wireless communication.

Important:

 The wireless network switch 

must be in the ON position for this button to 
work. For more information, see 

“Front” on 

page 6

.

Increase the LCD panel brightness above the 
normal brightest setting. Use this feature in 
bright lighting situations, such as outside in 
bright sunlight.
Press a second time to decrease the 
brightness below the normal lowest 
brightness setting. Use this feature in dim 
lighting situations.
Press a third time to return the display to the 
normal brightness setting.

Important:

 Using this feature will affect 

battery performance.

Play or pause the CD or DVD.

Stop playing the CD or DVD.

Skip back one CD track or DVD chapter.

Skip ahead one CD track or DVD chapter.

Press and hold 

F

N

, then press 

this system key...

To...

6

F8

-

+

Summary of Contents for P-172S

Page 1: ......

Page 2: ......

Page 3: ...pter 3 Setting Up and Getting Started 13 Working safely and comfortably 14 Reducing eye strain 14 Setting up your computer desk and chair 15 Sitting at your notebook 15 Avoiding discomfort and injury from repetitive strain 15 Connecting the AC adapter 16 Protecting from power source problems 18 Connecting to a broadband modem or network 18 Connecting the optional dial up modem 19 Starting your not...

Page 4: ...less radio on or off 45 IEEE 802 11 wireless network radio 46 Bluetooth radio 47 Chapter 4 Using Drives and Accessories 49 Using the DVD drive 50 Identifying drive types 50 Using a DVD drive 51 Setting up an optional RAID 52 About RAID 52 RAID 0 for performance 52 RAID 1 for security 53 Preparing your notebook for RAID 54 Configuring RAID 54 Getting help 57 Using an eSATA external SATA hard drive ...

Page 5: ...ving battery power 71 Using alternate power sources 72 Changing power modes 72 Changing notebook power settings 74 Changing the power plan 74 Changing advanced settings 75 Chapter 6 Traveling with Your Notebook 77 Packing your notebook 78 Traveling by air 78 Dial up modem 78 Radio frequency wireless connections 79 Files 79 Security 80 Power 81 Additional tips 81 Chapter 7 Maintaining Your Notebook...

Page 6: ...ge 102 Adding or replacing memory modules 103 Replacing a hard drive kit 106 Chapter 9 Troubleshooting 111 Safety guidelines 112 First steps 112 Troubleshooting 113 Audio 113 Battery 113 CD drives 113 Diskette drive external 113 Display 114 DVD drives 115 Ethernet 117 Express Cards 117 File management 117 Fingerprint reader 118 Hard drive 118 Internet 119 Keyboard 120 Media Center 121 Memory 124 M...

Page 7: ...www gateway com v Power 133 Printer 134 Sound 135 Status indicators 135 Touchpad 136 Video 136 Telephone support 136 Before calling Gateway Customer Care 136 Appendix A Legal Information 139 Index 149 ...

Page 8: ...Contents vi ...

Page 9: ...CHAPTER1 1 About This Reference About this guide Accessing your online User Guide Gateway contact information Microsoft Certificate of Authenticity For more information ...

Page 10: ...the following topics Help and technical support Using and customizing Windows and other software Using the Internet Protecting your files Playing and recording media Networking To access your online User Guide Click Start All Programs then click Gateway Documentation Gateway contact information Contacting Gateway Customer Care Your Setup Guide contains information about contacting Gateway Customer...

Page 11: ...f your notebook includes the product key code for your operating system For more information For more information about your notebook visit Gateway s Support page at www gateway com or the Web address shown on your notebook s label The Support page also has links to additional Gateway documentation and detailed specifications ...

Page 12: ...CHAPTER 1 About This Reference 4 ...

Page 13: ...CHAPTER2 5 Checking Out Your Notebook Front Left Right Back Bottom Keyboard area LCD panel ...

Page 14: ... charge is very low LCD panel release latch Press to open the LCD panel Wireless network switch Turn the optional IEEE 802 11 wireless network radio and optional Bluetooth radio on or off For more information see Wireless Ethernet Networking in your online User Guide Warning Radio frequency wireless communicationcaninterferewithequipmenton commercialaircraft Currentaviationregulations require wire...

Page 15: ...our skin Caution Do not block or insert objects into these slots If these slots are blocked your notebook may overheat resulting in unexpected shutdown or permanent damage to the notebook Caution Provide adequate space around your notebook so air vents are not obstructed Do not use the notebook on a bed sofa rug or other similar surface DVD drive Insert CDs or DVDs into this drive For more informa...

Page 16: ...slot For more information see Using an Express Card on page 59 Headphone jack Plug amplified speakers or headphones into this jack The built in speakers are turned off when speakers or headphones are plugged into this jack Microphone jack Plug a microphone into this jack The built in microphone is turned off while an external microphone is connected USB port Plug a USB device such as a diskette dr...

Page 17: ...ning Do not work with the notebook resting on your lap If the air vents are blocked the notebook may become hot enough to harm your skin Caution Do not block or insert objects into these slots If these slots are blocked your notebook may overheat resulting in unexpected shutdown or permanent damage to the notebook Caution Provide adequate space around your notebook so air vents are not obstructed ...

Page 18: ...lugged into AC power Battery lock Slide to unlock the battery For more information see Changing the battery on page 69 Customer Care label Includes the Customer Care contact information For more information see Gateway contact information on page 2 Hard drive bay The hard drive s is are located in this bay For more information see Setting up an optional RAID on page 52 and Replacing a hard drive k...

Page 19: ...e power button for Sleep Resume mode For more information on configuring the power button mode see Changing advanced settings on page 75 Multimedia panel optional Use to control playback of CDs and DVDs The panel includes a capacitive touch volume control For more information see Using the optional multimedia panel on page 38 Touchpad Provides all the functionality of a mouse For more information ...

Page 20: ...cators on page 23 Component Icon Description Microphone optional Use to talk through when making Voice over Internet Protocol VoIP calls Important The optional microphone is only available when purchased with the optional webcam Webcam optional Use to let others see who they are communicating with when making VoIP calls For more information see Using the optional webcam on page 39 Webcam status in...

Page 21: ...and modem or network Starting your notebook Turning off your notebook Restarting rebooting your notebook Using the status indicators Using the keyboard Using the optional fingerprint reader Using the EZ Pad touchpad Using the optional multimedia panel Using the optional webcam Adjusting the brightness Adjusting the volume Turning your wireless radio on or off ...

Page 22: ...book on a rigid hard surface and make sure that you keep the ventilation openings on the sides clear Reducing eye strain Sunlight or bright indoor lighting should not reflect on the screen or shine directly into your eyes Position the computer desk and screen so you can avoid glare on your screen and light shining directly into your eyes Reduce glare by installing shades or curtains on windows and...

Page 23: ...your shoulders relax while you type Adjust the chairheight adjustthe forward tilt of the seat or use a footrest to distribute your weight evenly on the chair and relieve pressure on the back of your thighs Adjust the back of the chair so it supports the lower curve of your spine You can use a pillow or cushion to provide extra back support Sitting at your notebook Avoid bending arching or angling ...

Page 24: ...s that can cause serious injury or death Contact Gateway about returning defective AC adapters Caution Make sure that you use the AC adapter that came with your notebook or one of the same type purchased from Gateway Replace the power cord if it becomes damaged The replacement cord must be of the same type and voltage rating as the original cord or your notebook may be damaged Important If the bat...

Page 25: ...plug it back in Press FN F1 to toggle the status lights on and off Make sure the power cord is firmly attached to the AC adapter Plug the power cord into a different wall outlet 4 When you finish using your notebook for the first time turn off your notebook and leave your notebook connected to AC power until the battery charge indicator turns blue Important Ifthe battery charge indicator does nott...

Page 26: ...onnect to a cable or DSL modem or to a wired Ethernet network To connect to a cable or DSL modem or to a wired Ethernet network 1 Insert one end of the network cable into the network jack on your notebook 2 Insert the other end of the network cable into a cable modem DSL modem or Ethernet network jack Warning High voltages can enter your notebook through both the power cord and the modem connectio...

Page 27: ...h on the front of your notebook then lift the LCD panel Warning To reduce the risk of fire use only No 26 AWG or larger for example No 24 AWG UL listed or CSA certified telecommunication line cord for your dial up modem connection Important The modem will not work with digital or PBX telephone lines Warning Do not work with the notebook resting on your lap If the air vents are blocked the notebook...

Page 28: ...nd speakers 5 To open the main menu click Start From that menu you can run programs and search for files For more information on using Windows see Using Windows and Customizing Windows in your online User Guide Tip For more information about changing the power button mode see Changing advanced settings on page 75 Tip For more information about connecting peripheral devices see Installing a printer...

Page 29: ...on your notebook after it has been turned completely off Hibernate mode is an alternative to Sleep mode In Hibernate mode your notebook is turned completely off When you wake your notebook from Hibernate mode however the programs that were running when your notebook entered Hibernate mode are running just as you left them To put your notebook to sleep Click Start then click power The notebook save...

Page 30: ...er The Windows Task Manager dialog box opens 3 Click the program that is not responding 4 Click End Task 5 Click X in the top right corner of the Windows Task Manager dialog box To restart your notebook Click Start click the arrow next to the lock icon then click Restart The notebook turns off then turns on again Important If for some reason you cannot use the Shut Down option in Windows to turn o...

Page 31: ...s on Indicator Icon Description Wireless network LED on Optional wireless IEEE 802 11 radio is turned on LED off Optional wireless IEEE 802 11 radio is turned off Caps lock LED on Caps lock is turned on LED off Caps lock is turned off Num lock LED on Numeric keypad is turned on LED off Numeric keypad is turned off DVD drive LED on Drive is in use LED off Drive is not in use Hard drive LED blinking...

Page 32: ...p You can attach an external keyboard to the notebook using a USB port You do not need to shut down the notebook to connect a USB keyboard Key type Icon Description Function keys Press these keys labeled F1 to F12 toperform actions inprograms For example pressing F1 may open help Each program uses different function keys for different purposes See the program documentation to find out more about t...

Page 33: ...the FN key in combination with a colored system key to perform a specific action Windows key Press this key to open the Windows Start menu This key can also be used in combination with other keys to open utilities like F Search utility R Run utility and E Computer window Application key Press this key for quick access to shortcut menus and help assistants in Windows Arrow keys Press these keys to ...

Page 34: ...ial aircraft Current aviationregulations requirewirelessdevices to be turned off while traveling in an airplane IEEE 802 11communicationdevices are examples of devices that provide wireless communication Important The wireless network switch must be in the ON position for this button to work For more information see Front on page 6 Enter Sleep mode or Hybrid Sleep mode Press the power button to le...

Page 35: ...or more information see Front on page 6 Increase the LCD panel brightness above the normal brightest setting Use this feature in bright lighting situations such as outside in bright sunlight Press a second time to decrease the brightness below the normal lowest brightness setting Use this feature in dim lighting situations Press a third time to return the display to the normal brightness setting I...

Page 36: ...ay Increase volume For more information see Adjusting the volume on page 43 Decrease volume For more information see Adjusting the volume on page 43 Mute the sound Press the key combination again to restore the sound For more information see Adjusting the volume on page 43 Press and hold FN then press this system key To ...

Page 37: ... A safe or folder for storing encrypted files that only a user with a matching fingerprint can access Boot level security that requires a fingerprint authentication before the system will boot to Windows Scrolling so you can use the fingerprint reader in place of the touchpad Running the TouchStrip Tutorial Before using the fingerprint reader the first time you should run the TouchStrip Tutorial w...

Page 38: ...een opens 2 Click Next The Finish screen opens 3 Select one of the following options then click Next Enrollment to the biometric device Select this option to save your fingerprint to memory in the fingerprint reader Use this option to prevent unauthorized use of your notebook even if the hard drive has been removed Enrollment to the hard disk Select this option to save your fingerprint to the hard...

Page 39: ...Strip Tutorial runs After you have completed the tutorial the Enrollment screen appears OR If you do not want to run the TouchStrip Tutorial click to uncheck the Run interactive tutorial check box then click Next The Enrollment screen appears 5 Click the button above the finger you are enrolling A new box appears with three empty circles in it ...

Page 40: ...Backup password box type the same password in the Retype password box then click Next 9 Click Finish Using the Fingerprint Control Center The Fingerprint Control Center lets the administrator of the notebook control how the fingerprint reader is used You can Add new fingerprints to the database Edit or delete fingerprints from the database Modify how fingerprints are used for logging onto the note...

Page 41: ... for user so you can make changes to the settings 3 Click the yellow arrow in front of an option then click the option or setting you want to change Using the password bank The password bank stores registrations to your favorite secure Web sites so that you can access them without having to re enter your username and password each time you want to log into the site Tip The password bank also works...

Page 42: ...ck on the dialog box or Web site sign in box To log on to a registered Web site 1 Swipe your already enrolled finger over the sensor The fingerprint reader menu opens 2 Click Registered Sites then click the Web site you want to log onto 3 Your Internet browser opens and automatically logs you onto the Web site Using the fingerprint reader features For more information about the fingerprint reader ...

Page 43: ...buttons and a scroll zone When you move your finger on the touchpad the pointer arrow on the screen moves in the same direction You can use the scroll zone to scroll through documents Use of the scroll zone may vary from program to program Touchpad Left button Right button Scroll zone ...

Page 44: ...by using the touchpad buttons You can change this feature to allow tapping on the touchpad to simulate clicking the left button For more information see Changing the mouse touchpad or pointing device settings in your online User Guide To Do this Move the pointeronthe screen Move your finger around on the touchpad If you run out of space and need to move the pointer farther lift your finger move it...

Page 45: ...Quickly press and release the right button once This action is called right clicking Move an object on the screen Position the pointer over the object Press the left button and holdit down then use the touchpad tomove drag the object to the appropriate part of the screen Release the buttonto dropthe object where you want it To Do this ...

Page 46: ...nt You cannot use this button if you are logged on as a guest InstantonAudio Opens MediaCenter WindowsVistaHome Premium or Windows Vista Ultimate or Windows Media Player Windows Vista Home Basic Instant on Video Opens MediaCenter Windows VistaHome Premium or Windows Vista Ultimate or the DVD player program Windows Vista Home Basic Play or pause the CD or DVD Stop playing the CD or DVD Skip back on...

Page 47: ...justing the volume on page 43 Capacitive volume control Swipe your finger on the volume sensor strip to change the volume To increase volume move from the towards the To decrease volume move from the towards the Tip You can start swiping at any point on the strip The duration of the swipe determines the amount of the change At the end of this swipe if you keep your finger on the strip the volume c...

Page 48: ...s Button Icon Description Start camera Turns on the camera and opens the preview screen Effects Adds a decoration or border to your picture Properties Modifies properties such as zoom backlight compensation brightness and contrast Settings Selects the position of the toolbar or modifies the picture video or audio settings Help Opens online help Important If you do not see the toolbar the Auto Hide...

Page 49: ...www gateway com 41 2 Click Start camera The Camera Assistant opens ...

Page 50: ...ording Functions Change a setting or access online help Resolution Change the size of the picture Mute Turn audio capture on or off Effects Add a decoration or border to your picture Tip For more information about using the webcam click in the Camera Assistant Toolbar or click Functions then click Help in the Camera Assistant Tip For more information about using the webcam while using an Internet ...

Page 51: ... 26 OR Click Start All Programs Accessories then click Windows Mobility Center The Windows Mobility Center window opens Slide the Brightness control to the desired screen brightness Adjusting the volume You can use the volume control to adjust the overall volume of your notebook Tip For more information about the Windows Mobility Center see Using the Windows Mobility Center in your online User Gui...

Page 52: ...e information see Using the optional multimedia panel on page 38 OR Click Start All Programs Accessories then click Windows Mobility Center The Windows Mobility Center window opens Slide the Volume control to the desired volume level To adjust the volume from Windows 1 Click Volume on the taskbar The volume control slider opens 2 Click and drag the slider up to increase volume and down to decrease...

Page 53: ... on commercial aircraft Current aviation regulations require wireless devices to be turned off while traveling in an airplane IEEE 802 11 and Bluetooth communication devices are examples of devices that provide wireless communication Warning In environments where the risk of interference to other devices or services is harmful or perceived as harmful the option to use a wireless device may be rest...

Page 54: ...ns on For the location of the wireless status indicator see Using the status indicators on page 23 OR Click Start All Programs Accessories then click Windows Mobility Center When the Windows Mobility Center window opens click Turn wireless on To turn the wireless IEEE 802 11 radio off Press FN F2 The wireless status indicator turns off For the location of the wireless status indicator see Using th...

Page 55: ...ition to disable both IEEE 802 11 and Bluetooth For the location of the wireless network switch see Front on page 6 Bluetooth radio Your notebook may have a Bluetooth radio for communicating with another Bluetooth device such as a printer scanner camera MP3 player headphone keyboard or mouse To turn the Bluetooth radio on 1 Enable the Bluetooth radio by sliding the wireless network switch to the O...

Page 56: ...uetooth radio Slide the wireless network switch to the OFF position to disable both IEEE 802 11 and Bluetooth For the location of the wireless network switch see Front on page 6 Tip For more information about using your notebook on a Bluetooth Personal Area Network see Bluetooth Networking in your online User Guide Help For more information about Bluetooth click Start then click Help and Support T...

Page 57: ...ves and Accessories Using the DVD drive Setting up an optional RAID Using the memory card reader Using an Express Card Installing a printer or other peripheral device Viewing the display on a projector monitor or television ...

Page 58: ...udio CDs playing DVDs accessing data and recording music and data to recordable CDs You cannot use this drive to create DVDs Multi format double layer DVD RW drive Installing programs playing audio CDs playing DVDs accessing data recording music and data to CD R or CD RW discs and recording video and data to DVD R DVD R DVD RW DVD RW or double layer DVD R or DVD R discs Note To use the double laye...

Page 59: ...at help control DVD title exports and help reduce illegal disc distribution To be able to play a prerecorded DVD the disc s regional code and your DVD drive s regional code must match The regional code on your DVD drive is determined by your notebook s delivery address The regional code for the United States and Canada is 1 The regional code for Mexico is 4 Your DVD drive s regional code must matc...

Page 60: ...ves have limitations on how fast they can read and write files If half a file is stored on one RAID 0 drive and the other half on another RAID 0 drive each drive only has to read half of the file So the entire file is accessed by the notebook up to twice as fast If the entire file happens to be stored on only one of the drives the file is accessed at the same speed as if it were on a standard hard...

Page 61: ...ar and frequent backups are critical Another drawback is that RAID 0 treats each hard drive as if it has the storage capacity of the smallest drive in the array So if you have two drives 300 GB and 200 GB in a RAID 0 array your notebook only recognizes 400 GB total capacity RAID 1 for security RAID 1 maintains a complete copy of all files on each physical hard drive in the array Maintaining simult...

Page 62: ...operating system Configuring RAID Enabling RAID If you ordered your notebook with a RAID configuration from the factory RAID is already enabled and you can skip this procedure However if your notebook came without a RAID configuration and you set up RAID yourself you must enable RAID before your notebook can use it To enable RAID on your notebook 1 Start or restart your notebook 2 As soon as your ...

Page 63: ...The Matrix Storage Manager opens 3 Highlight 1 Create RAID Volume then press ENTER The Create Volume menu opens 4 Change the following settings Name Type a volume name up to 16 characters or use the default name then press ENTER RAID Level Press or to select the RAID level then press ENTER Select Disks Press or to highlight drives press the spacebar to select mark with a green triangle each drive ...

Page 64: ...tes all files on that volume including operating system files To delete a RAID volume 1 Start or restart your notebook During startup the RAID option screen appears 2 While the RAID option screen is open press CTRL I The Matrix Storage Manager opens 3 Highlight 2 Delete RAID Volume then press ENTER The Delete Volume menu opens 4 Press or to highlight the RAID volume you want to delete then press D...

Page 65: ...a green triangle each drive you want to reset then press ENTER A warning message appears 5 Type Y to confirm the drive reset Getting help For more information on RAID concepts configuration and maintenance search for RAID FAQ information on the Gateway Technical Support Web site www gateway com and the Intel Support Downloads Web site support intel com Using an eSATA external SATA hard drive To co...

Page 66: ...d types The memory card reader supports Memory Stick Memory Stick Pro MultiMediaCard Secure Digital Mini Secure Digital RS MultiMediaCard and xD Picture Card Inserting a memory card To insert a memory card Insert the memory card into the memory card slot with the label facing up and the arrow on the label pointing towards the notebook Important For more information about using your eSATA hard driv...

Page 67: ...to restart your notebook when changing most cards because your notebook supports hot swapping Hot swapping means that you can insert an Express Card while your notebook is running If your Express Card does not work after hot swapping see the Express Card manufacturer s documentation for further information To insert an Express Card Push the card firmly into the Express Card slot label side up unti...

Page 68: ...to connect peripheral devices such as printers scanners and digital cameras to your notebook USB ports support plug and play and hot swapping which means that your notebook will usually recognize such a device whenever you plug it into the appropriate port When you use a USB device for the first time your notebook will prompt you to install any software the device needs After doing this you can di...

Page 69: ...aUSB port on your notebook Connecting an IEEE 1394 device Your notebook may have a 4 pin IEEE 1394 port also known as a Firewire or i Link port for connecting devices such as a video camera Important USB devices may have special installation instructions See your USB device s installation guide Important For more information about using the USB port on your device see your device s documentation I...

Page 70: ...television to your monitor VGA or optional HDMI port Your notebook supports simultaneous LCD and external display Simultaneous display letsyou control a presentation from your notebook at the same time as you face your audience To use a projector monitor or television 1 Turn off your notebook 2 If you are using the VGA port connect one end of the VGA cable to the monitor projector or television OR...

Page 71: ...gnizes the new hardware and the New Display Detected dialog box opens 6 Select the options for the projector monitor or television then click OK 7 Press FN F4 to switch between viewing the display on the LCD panel viewing the display on the projector monitor or television and viewing the display on both the LCD panel and the projector monitor or television Important If a monitor projector or telev...

Page 72: ...Accessories then click Windows Mobility Center The Windows Mobility Center window opens 2 Click Change display settings The Display Settings dialog box opens 3 Click monitor 2 4 Adjust properties such as Resolution or Colors if necessary 5 To use the monitor projector or television as a mirror duplicate of the notebook display both displays have the same content click to deselect the check box for...

Page 73: ...k 7 Click OK Using the projector or monitor for a presentation You can configure your notebook so the settings are correct each time you give a presentation To use a projector monitor or television for a presentation 1 Click Start All Programs Accessories then click Windows Mobility Center The Windows Mobility Center window opens 2 Click Change presentation settings The Presentation Settings dialo...

Page 74: ...ust properties such as Turn off screen saver and Set the volume to if necessary 4 Click OK 5 Click Turn on to turn on the presentation settings When you are finished giving the presentation click Turn off to return to your standard notebook settings ...

Page 75: ...CHAPTER5 67 Managing Power Monitoring the battery charge Recharging the battery Changing the battery Recalibrating the battery Extending battery life Changing notebook power settings ...

Page 76: ...ent losing any unsaved work To monitor the battery charge Move the mouse pointer over the power cord icon or battery icon in the taskbar A message appears showing the remaining battery time and the current power plan Wait for a Low Battery warning message to appear Look at the battery charge status indicator If your battery charge indicator displays what looks like an inaccurate charge you may nee...

Page 77: ...lock to the locked position 7 Turn your notebook over 8 Open the LCD panel Warning Danger of explosion if battery is incorrectly replaced Replaceonly with abatteryspecificallymanufacturedforyour Gatewaynotebook Discard used batteries according to local hazardous material regulations The battery used in this device may present a fire or chemical burn hazard if mishandled Do not disassemble heat abo...

Page 78: ...ng the spacebar 5 Open the Exit menu highlight Exit Saving Changes then press ENTER 6 Select Yes then press ENTER The battery recalibration process begins and a screen opens showing you the progress The entire process takes several hours When the recalibration has finished the message Press Esc key to exit appears 7 Press ESC The battery charge indicator now displays an accurate battery charge Imp...

Page 79: ...g battery power To conserve power while using the battery to power your notebook Turn off wireless networking and Bluetooth Dim the display as low as is comfortable Disconnect all external devices like IEEE 1394 and USB devices Remove Express Cards when you do not need them Many Express Cards use a small amount of power while inserted even if they are not being used Select the Power saver power pl...

Page 80: ...r outlet or an automobile cigarette lighter use an airplane automobile power adapter or power inverter Save the battery for times when you cannot use a power adapter To find AC power outlets in airports look for them next to support pillars in large areas such as boarding gates and under banks of telephones Changing power modes You can use the following power modes to lengthen the life of your not...

Page 81: ...urrent memory thus reducing startup time You must turn on Hybrid Sleep mode to use it For more information see Changing advanced settings on page 75 Using power saving modes Always save your work before using Sleep mode In Sleep mode your notebook reduces or turns off the power to most devices except memory However the information in memory is not saved to the hard drive If power is interrupted th...

Page 82: ...lan Three power plans are pre defined for you Balanced This is the default power plan which balances performance and battery life Power saver This power plan sacrifices performance in order to extend battery life Use this plan if you will be away from AC power outlets for an extended period of time Your programs may run slower than you are accustomed to under the other two power plans High perform...

Page 83: ...n different power saving modes to the power button and Sleep system key You can also select which power saving mode is activated when you close the LCD panel To change advanced power management settings 1 Click Start All Programs Accessories then click Windows Mobility Center The Windows Mobility Center window opens Help For more information about changing the power plan click Start then click Hel...

Page 84: ... are using The Change settings for the plan window opens 2 Click Change advanced power settings The Power Options dialog box opens 3 Click the in front of Sleep then click the in front of Allow hybrid sleep 4 Change the values to On for On battery and Plugged in Help For more information about changing the power management settings click Start then click Help and Support Type the keyword power man...

Page 85: ...CHAPTER6 77 Traveling with Your Notebook Packing your notebook Traveling by air Dial up modem Radio frequency wireless connections Files Security Power Additional tips ...

Page 86: ...s you to start your notebook Have your notebook hand inspected or sent through the X ray scanner but never carry it through the metal detector Turn off you notebook for takeoff and landing Turn off all wireless devices while in the aircraft Dial up modem Take a telephone cord to connect the modem to telephone jacks If you are traveling internationally take telephone jack adapters or an acoustic ha...

Page 87: ...ion devices are examples of devices which use wireless to communicate Files Copy your working files from your desktop computer to your notebook before you travel If you need to access your desktop computer files from your notebook while traveling set up your desktop computer for remote access Contact your network administrator for more information about remote access Take extra recordable media fo...

Page 88: ...ng the BIOS utility To create a startup password 1 Restart your notebook As soon as you see a startup screen press F2 The BIOS Setup utility opens 2 Open the Security menu highlight Set Supervisor Password then press ENTER and follow the instructions You must set the supervisor password in order to set the user startup password 3 Highlight Set User Password then press ENTER and followthe instructi...

Page 89: ...from your notebook avoid using the battery whenever possible monitor the battery charge and use the most efficient power management settings For information on conserving battery power using alternate power sources and monitoring the battery charge see Managing Power on page 67 Additional tips If you plan to use several USB peripheral devices take a portable USB hub to provide additional USB ports...

Page 90: ...y travel assistance if your notebook is lost or damaged Take your recovery discs in case you need to install an additional driver or software Tip You can create a Drivers and Applications Recovery disc using the Gateway Recovery Center For more information see Preparing for software and device driver recovery on page 89 ...

Page 91: ...CHAPTER7 83 Maintaining Your Notebook Caring for your notebook Cleaning your notebook Maintaining the battery Cleaning CDs or DVDs Overclocking the processor Recovering your system ...

Page 92: ...nty As a general rule your notebook is safest at temperatures that are comfortable for you Keep all liquids away from your notebook When spilled onto notebook components almost any liquid can result in expensive repairs that are not covered under a standard warranty Avoid dusty or dirty work environments Dust and dirt can clog the internal mechanisms and can lead to permanent damage to the noteboo...

Page 93: ...raw like extension to remove dust and lint trapped under the keys If you spill liquid on the keyboard turn off your notebook and turn the notebook upside down Let the liquid drain then let the keyboard dry before trying to use it again If the keyboard does not work after it dries you may need to replace it A replacement keyboard may not be covered by your warranty Cleaning the notebook screen Use ...

Page 94: ...ge becomesincreasingly less accurate and in some cases will cut off the device prematurely Using the right charger is important By now you probably know that each kind of battery has its own technology its own rate of charge and so on Charging lithium batteries correctly is one way to extend their life and to avoid damage Storing batteries Do not charge up the battery then store it away A stored b...

Page 95: ... its clock speed operating speed can be increased overclocked beyond the default processor speed Overclocking may result in system instability To change the clock speed of your processor 1 Restart your notebook As soon as you see a startup screen press F2 The BIOS Setup utility opens 2 Select the Advanced menu then select Extreme CPU Speed 3 Press the space bar to change the speed of the CPU 4 Pre...

Page 96: ... problem may be solved by returning your system to a previous state when everything was working correctly For instructions see Using Microsoft System Restore on page 94 If nothing else has solved the problem and you want to return your system to factory condition see Recovering your system to its factory condition on page 97 If you upgrade or exchange your hard drive or if your hard drive is compl...

Page 97: ...he Windows DVD or install a new hard drive you need to recover your pre installed software and drivers using a set of software and driver recovery discs Because these discs do not come with your notebook you should create your own set You should create a set of discs for recovering your pre installed software and device drivers in case you need to use them later for a complete system recovery Your...

Page 98: ...lick Applications and drivers external media then click Next The What would you like to do dialog box opens 3 Click Create system recovery discs then click Next 4 Insert a blank recordable disc into the recordable disc drive then click Next If an AutoPlay dialog box opens click the x in the upper right corner to close it A dialog box opens that tells you the number of blank discs you need to creat...

Page 99: ...very Center then click Gateway Recovery Center The Gateway Recovery Center opens Important Use a permanent marker to label each disc Software and Driver Recovery along with a short description of which notebook the discs are for If you are recording multiple discs as you remove each disc from the drive use the marker to label each disc 1 of x 2 of x 3 of x and so on Tip After a recovery disc is cr...

Page 100: ...er software that was pre installed click Programs then click Application recovery OR To recover device drivers that were pre installed click Hardware then click Device driver recovery 3 Click the software or driver you want to recover then click Next ...

Page 101: ...r the software or driver you need to recover try another disc To recover software and drivers using recovery discs 1 Insert a software and driver recovery disc into the CD or DVD drive If an AutoPlay dialog box appears click Run Grc_Vista exe If an AutoPlay dialog box does not appear and Gateway Recovery Center does not start open Computer and double click the file Grc_Vista exe on the disc The Ga...

Page 102: ...ant to recover 3 Click Next 4 If the software or driver is not shown on the list and you have a multiple disc set of recovery discs close Gateway Recovery Center and try another disc Using Microsoft System Restore Microsoft System Restore periodically takes snapshots of your system settings and saves them as restore points In most cases of hard to resolve software problems you can return to one of...

Page 103: ...ore using Microsoft System Restore 1 Click Start Control Panel System and Maintenance then click Backup and Restore Center The Backup and Restore Center opens 2 On the left side of the window click Repair Windows using System Restore then click Next The Choose a restore point dialog box opens Help For more information about using Microsoft System Restore click Start then click Help and Support Typ...

Page 104: ...nt To manually create a restore point 1 Click Start Control Panel System and Maintenance then click Backup and Restore Center The Backup and Restore Center opens 2 On the left side of the window click Create a restore point or change settings then click Next The System Properties dialog box opens to the System Protection tab 3 Click Create The Create a restore point dialog box opens 4 Type a descr...

Page 105: ...tedly press F8 until the Recovery Options screen opens If Windows starts to load instead restart the notebook and try again 3 Press the arrow keys on your keyboard to select Repair Your Computer then press ENTER Gateway System Recovery starts and the System Recovery Options dialog box opens 4 Select a language and keyboard layout then click Next 5 Click the User name box to select a Windows user a...

Page 106: ...ng your system using the Windows DVD If you install a new hard drive or completely re format your original hard drive you must recover your system using the Windows Vista operating system DVD You also need to recover your notebook s pre installed software and device drivers To completely re install Windows 1 If you can still run Windows back up your personal files and create a set of software and ...

Page 107: ...eys to select the drive containing the Windows DVD then press ENTER and followthe on screen instructions 5 After Windows is completely re installed use the software and driver recovery discs you created to recover your notebook s pre installed software and device drivers For instructions see Recovering pre installed software and drivers using recovery discs on page 93 ...

Page 108: ...CHAPTER 7 Maintaining Your Notebook 100 ...

Page 109: ...CHAPTER8 101 Upgrading Your Notebook Preventing static electricity discharge Adding or replacing memory modules Replacing a hard drive kit ...

Page 110: ...ction Always hold components by their edges Avoid touching the edge connectors Never slide components over any surface Wear a grounding wrist strap available at most electronics stores and attach it to a bare metal part of your workbench or other grounded connection Touch a bare metal surface on your workbench or other grounded object Warning To avoid exposure to dangerous electrical voltages and ...

Page 111: ... static electricity discharge on page 102 2 Turn off your notebook 3 Disconnect the AC adapter modem cable and network cable 4 Disconnect all peripheral devices connected to the notebook and remove any Express and memory cards 5 Turn your notebook over so the bottom is facing up then remove the battery For more information see Changing the battery on page 69 Important Use only memory modules desig...

Page 112: ... notch to lift the memory bay cover then remove it Be careful not to break off the tabs located on the end of the cover opposite the thumb notch 8 If you are removing a module gently press outward on the clip at each end of the memory module until the module tilts upward Screw Screw Screw Screw Screw Thumb notch Clip Clip ...

Page 113: ...n only be inserted in one direction If the module does not fit make sure that the notch in the module lines up with the tab in the memory bay 11 Replace the memory bay cover then tighten the cover screws 12 Insert the battery then turn your notebook over 13 Connect the power adapter modem cable and network cable 14 Reconnect all peripheral devices and replace any Express and memory cards ...

Page 114: ...drivers using recovery discs on page 93 2 Back up any data you want to transfer to the new hard drive For more information see Backing up files in your online User Guide 3 Follow the guidelines under Preventing static electricity discharge on page 102 4 Turn off your notebook 5 Disconnect the AC adapter modem cable and network cable 6 Disconnect all peripheral devices connected to the notebook and...

Page 115: ...ation see Changing the battery on page 69 8 Loosen the hard drive bay cover screws these screws cannot be removed 9 Use the thumb notch to lift the hard drive bay cover then remove it Be careful not to break off the tabs located on the end of the cover opposite the thumb notch Screw Screw Screw Screw Thumb notch ...

Page 116: ...ng the plastic tab slide the old hard drive then remove it 11 If your new hard drive already includes the hard drive bracket go to step 16 OR If you need to move the hard drive bracket from your old hard drive to your new hard drive go to step 12 ...

Page 117: ... 12 Remove the screws that secure the hard drive to the hard drive bracket 13 Remove the bracket from the old drive 14 Insert the new drive label side up onto the bracket so the screw holes line up Screw Screw Screw Screw ...

Page 118: ... was the C drive go to step 21 to install Windows OR If your notebook does not use RAID and the drive you replaced was not the C drive complete any instructions that came with your drive regarding partitioning and formatting the drive then go to step 23 21 Turn on your notebook open the DVD drive insert the Windows DVD close the DVD drive then restart your notebook 22 When the prompt Press any key...

Page 119: ...CHAPTER9 111 Troubleshooting Safety guidelines First steps Troubleshooting Telephone support ...

Page 120: ...If you have problems with your notebook try these things first Make sure that the AC power adapter is connected to your notebook and an AC outlet and that the AC outlet is supplying power Make sure that the power cord is firmly connected to the AC power adapter If you use a power strip or surge protector make sure that it is turned on Warning Do not try to troubleshoot your problem if power cords ...

Page 121: ...iagnosing and fixing the problem If you added or removed peripheral devices review the installation procedures you performed and make sure that you followed each instruction If an error occurs in a program see the program s printed documentation or the online help Troubleshooting Troubleshooting topics are listed in alphabetical order Audio Audio troubleshooting is covered under Sound on page 135 ...

Page 122: ...ed try using the diskette again For instructions on running Error checking see Checking the hard drive for errors in your online User Guide You see a Non system disk NTLDR is missing or Disk error error message Eject the diskette from the diskette drive then press ENTER Make sure that the diskette you are using is IBM compatible The diskette drive status indicator is lit continuously Remove the di...

Page 123: ...ntact Gateway Customer Care to identify whether a repair or replacement is justified based on the number of pixels affected The display is blank Adjust the brightness using the system keys or Windows Mobility Center For more information about adjusting the brightness see Adjusting the brightness on page 43 Make sure the notebook is not in Sleep or Hibernate mode Press the power button The notebook...

Page 124: ...instructions on how to adjust the volume control in Windows see Adjusting the volume on page 43 Make sure that Mute controls are turned off If you are using the built in speakers make sure that nothing is plugged into the headphone jack on the notebook For the location of the headphone jack see Right on page 8 If you are using powered speakers make sure that they are plugged in and turned on Clean...

Page 125: ...thernet troubleshooting is covered under Networks wired on page 129 Express Cards You installed an Express Card and now your notebook is having problems Make sure that you have correctly installed required software for the Express Card For more information see your Express Card s documentation File management A file was accidentally deleted Recover the file from the Recycle Bin by following the in...

Page 126: ...line User Guide Empty the Recycle Bin by right clicking the Recycle Bin icon then clicking Empty Recycle Bin Save your files to another drive If the hard drive is full copy any files not regularly used to backup media then delete them from the hard drive You see a Data error message This may be the result of a defective area on the hard drive To fix hard drive problems run the Error checking progr...

Page 127: ... the modem cable is plugged into the modem jack and not the Ethernet network jack For the location of your modem jack see Back on page 9 OR If you are using a cable or DSL modem make sure that the modem cable is plugged into the Ethernet network jack and not the modem jack For the location of your network jack see Right on page 8 Make sure that you do not have a problem with your modem For more in...

Page 128: ... The condition of the Internet computers to which you connect and the number of users accessing those computers The complexity of graphics and multimedia on Web pages Having multiple Web browsers open performing multiple downloads and having multiple programs open on your notebook People are sending you e mail messages but you have not received any mail Click the receive button in your e mail prog...

Page 129: ...available only on Windows Vista Home Premium and Windows Vista Ultimate versions To view Media Center troubleshooting information that is not covered in this section go to the Gateway support Web Site at www gateway com The Media Center video display looks bad on your TV Many factors such as the display type quality of the video source type of connection used quality ofvideo cables display device ...

Page 130: ...nect your notebook to a stereo system to hear sound Quality of video cables Poor quality or the incorrect type of video cables can cause problems and affect the video quality Gateway recommends using high quality video cables that can be purchased from Gateway Screen resolution By default the notebook uses a screen resolution optimized for the LCD screen Many older TVs cannot display this high of ...

Page 131: ...is interlaced method to display the picture on the screen a standard interlaced analog TV will most likely flicker when displaying thin lines and small text An interlaced video display device will produce a lower quality display especially when viewing and using the notebook functions Progressive scan video displays a video frame with one pass of sequential scan lines A progressive scan TV display...

Page 132: ... Media Player 9 or later and the Windows patch Q810243 Update You want to know whether you can play recorded videos on your home DVD player Yes you can DVDs recorded with the Media Center can be played on a home DVD player Memory You see a Memory error message Make sure that the memory module is inserted correctly in the memory bay slot For more information about installing memory see Adding or re...

Page 133: ...For the location of your modem jack see Back on page 9 Make sure that your notebook is connected to the telephone line and the telephone line has a dial tone Make sure that the modem cable is less than 6 feet 1 8 meters long Remove any line splitters or surge protectors from your telephone line then check for a dial tone by plugging a working telephone into the telephone wall jack If you have addi...

Page 134: ... common problem that can cause the modem to connect at a slower rate abort downloads or even disconnect The faster the modem the less line noise it can tolerate and still work correctly Listen to the line using your telephone Dial a single number such as 1 When the dial tone stops listen for line noise Wiggle the modem cable to see if that makes a difference Make sure that the connectors are free ...

Page 135: ...our ISP may not support 48K uploads Your fax communications program only sends and receives faxes at 14 400 bps when you have a 56K modem Current fax technology only supports a maximum send and receive rate of 14 400 bps The modem is not recognized by your notebook Make sure that the line connected to the modem is working and plugged into the appropriate port on your notebook For the location of y...

Page 136: ...ion between the two modems that establishes connection speeds and communication protocols You may hear unusual handshaking sounds when the modems first connect If the handshaking sounds are too loud you can turn down the modem volume To turn down the modem volume 1 Click Start then click Control Panel The Control Panel window opens 2 Click Hardware and Sound 3 Click Phone and Modem Options The Pho...

Page 137: ...gged into a powered electrical outlet and turned on Make sure that the router is plugged into a powered electrical outlet and turned on Most routers have lights that indicate they are working For more information see the documentation that came with your router Make sure that all computers on your network have the same workgroup name Make sure that all computers are using the same Subnet Mask If y...

Page 138: ...cation between your Internet Service Provider and your modem and between your modem and your access point If you previously accessed the Internet through a dial up modem Internet Explorer may not be set up to access the Internet through a network Remove the dial up connection in the Internet Options in Internet Explorer You cannot connect to your home network If your notebook is a member of a doma...

Page 139: ...al strength To check the signal strength 1 Click Start right click Network then click Properties The Networkand SharingCenterwindow opens 2 Click View status for the network connection The Wireless Network Connection Status dialog box opens The meter shows the signal strength for wireless networking on your computer if other computers with the same network name are within range of your computer Yo...

Page 140: ...not be set up to access the Internet through a network Remove the dial up connection in the Internet Options in Internet Explorer You cannot see other computers on your network Your notebook may not have the same workgroup name as the other computers on your network For more information see Naming the computers and workgroup in your online User Guide If your notebook was previously connected direc...

Page 141: ... is connected securely to an electricaloutlet turned on and working correctly To test the outlet plug a working device such as a lamp into the outlet and turn it on Make sure that the AC power adapter cables are free from cuts or damage Replace any damaged cables Your notebook is not working on battery power Check the power management settings For more information about using power management sett...

Page 142: ...have selected it in the printer setup To set a default printer 1 Click Start then click Control Panel The Control Panel window opens 2 Click Hardware and Sound 3 Click Printers 4 Right click the name of the printer you want to be the default printer then click Set as Default Printer Reinstall the printer driver See the guide that came with your printer for instructions on installing the printer dr...

Page 143: ...adding paper Sound You are not getting sound from the built in speakers Make sure that headphones are not plugged into the headphone jack Make sure that the volume control on your notebook is turned up For more information about using your volume control see Adjusting the volume on page 43 Make sure that the Windows volume control is turned up For instructions on how to adjust the volume control i...

Page 144: ...adjust the touchpad settings see Changing mouse touchpad or pointing device settings in your online User Guide Video The projector or monitor is not working Make sure that you have pressed FN F4 to activate the external monitor option Make sure that the monitor is turned on and that the video cable is connected correctly Telephone support Before calling Gateway Customer Care If you have a technica...

Page 145: ...alnumber and order number available along with a detailed description of your problem including the exact text of any error messages and the steps you have taken Make sure that your notebook is nearby at the time of your call The technician may have you follow troubleshooting steps The label on the bottom of your notebook includes the Gateway Customer Care telephone number For more information see...

Page 146: ...CHAPTER 9 Troubleshooting 138 ...

Page 147: ...APPENDIXA 139 Legal Information Important safety information Regulatory compliance statements Environmental information Notices ...

Page 148: ...with this notebook make sure that the total ampere rating on the products plugged into the extension cord does not exceed the extension cord ampere rating If your notebook is fitted with a TV Tuner cable or satellite receiver card make sure that the antenna or cable system is electrically grounded to provide some protection against voltage surges and buildup of static charges Careduringuse Do not ...

Page 149: ...commercial aircraft Current aviation regulations require wireless devices to be turned off while traveling in an airplane IEEE 802 11 also known as wireless Ethernet or WiFi wireless Internet and Bluetooth communication devices are examples of devices that provide wireless communication Warning In environments where the risk of interference to other devices or services is harmful or perceived as h...

Page 150: ...doors is prohibited Some circumstances require restrictions on wireless devices United States of America FederalCommunicationsCommission FCC Intentional emitterperFCCPart 15 Lowpower Radio transmittertypedevices radio frequency RF wirelesscommunication devices operating in the 2 4 GHz band and or 5 15 5 35 GHz band may be present embedded in your notebook system This section is only applicable if ...

Page 151: ...r television reception However there is no guarantee that interference will not occur in a particular installation If this equipment does cause interferenceto radioandtelevisionreception whichcanbedeterminedby turning theequipment offandon theuserisencouragedtotrytocorrecttheinterferencebyoneormoreofthefollowing measures Reorient or relocate the receiving antenna Increase the separation between th...

Page 152: ...acilities equipment operations or procedures that could affect the operation of this equipment If this happens the telephone company will provide advance notice in order for you to make necessary modifications to maintain uninterrupted service This equipment cannotbeusedontelephonecompany providedcoinservice Connection to party line service is subject to state tariffs Contact the state public util...

Page 153: ...from digital apparatus as set out in the radio interference regulations of Industry Canada Le présent appareil numérique n émet pas de bruits radioélectriques dépassant les limites applicables aux appareils numériques de Classe B prescrites dans le règlement sur le brouillage radioélectrique édicté par Industrie Canada TelecommunicationsperIndustryCanadaCS 03 for productsfittedwithanIC compliantmo...

Page 154: ...tion that the electrical ground connections of the power utility telephone lines and internal metallic water pipe system if present are connected together This precaution may be particularly important in rural areas The Ringer Equivalence Number REN assigned to each terminal device provides an indication ofthemaximumnumberofterminals allowed tobeconnected toatelephoneinterface The termination on a...

Page 155: ...ecoverable recyclable andreusable Youcandoyourpartfortheenvironmentbyfollowingthesesimplesteps When your electrical or electronic equipment is no longer useful to you take it back to your local or regional waste collection administration for recycling In some cases your end of life product may be traded in for credit towards the purchase of new Gateway equipment Call Gateway to see if this program...

Page 156: ...ibility of such damages In the interest of continued product development Gateway reserves the right to make improvements in this manual and the products it describes at any time without notices or obligation TrademarkAcknowledgments Gateway and the Black and White Spot Design are trademarks or registered trademarks of Gateway Inc in the U S and other countries Intel Intel Inside logo and Pentium a...

Page 157: ...y 69 calibrating 86 changing 69 charge indicator 6 68 charge status 68 charging 16 68 conserving power 71 extending life 86 fuel gauges 86 icons 68 installing 69 latch 10 life span 86 locating 10 managing power 71 maximizing performance 71 monitoring charge 68 recalibrating 70 recharging 16 68 release latch 10 replacing 69 storing 86 troubleshooting 133 bays battery 69 hard drive 10 memory 10 103 ...

Page 158: ... 3 changing battery 68 cleaning audio CD 87 case 85 CD 87 DVD 87 keyboard 85 LCD panel 85 notebook exterior 84 screen 85 clicking 36 clock speed 87 closing unresponsive program 22 connecting AC adapter 16 cable modem 18 dial up modem 19 DSL modem 18 external keyboard 24 external monitor 62 IEEE 1394 device 61 keyboard 24 mouse 36 printer 60 projector 62 scanner 60 television 62 to wired Ethernet 1...

Page 159: ... 113 display brightness 43 switching 26 troubleshooting 114 display properties adjusting 64 documentation User Guide 2 double clicking 36 dragging 37 drivers recovery discs 90 93 re installing 88 89 drives DVD 50 DVD CD RW 7 50 DVD RW 7 50 hard drive 10 106 HD DVD 50 identifying drive types 50 multi format DVD RW 7 50 replacing hard drive 106 status indicators 23 troubleshooting 113 115 118 types ...

Page 160: ...password bank 33 troubleshooting 118 tutorial 29 using 29 Firewire port 8 Fn key 25 26 folders opening 36 function keys 24 G Gateway contact information 2 model number 2 serial number 2 Support 3 Gateway Recovery Center re installing drivers 91 re installing programs 91 re installing software 91 H hard drive bay 10 indicator 23 installing 106 replacing 106 troubleshooting 118 HDMI TV out jack 9 HD...

Page 161: ...function 24 Hybrid Sleep 26 LCD brightness 28 LCD CRT 26 navigation 25 numeric keypad 25 Sleep 26 system 24 system key combinations 26 toggle display 26 Windows 25 wireless Ethernet 26 L labels Microsoft Certificate of Authenticity 3 model number 2 serial number 2 latch battery 10 LCD panel release 6 LCD panel cleaning 85 release latch 6 switching display 26 troubleshooting 114 LCD CRT system key ...

Page 162: ...sting volume 43 using DVD drive 50 multimedia panel 11 38 mute button 28 39 muting sound 28 39 43 N navigation keys 25 network troubleshooting 129 131 network jack 8 18 networking turning off Bluetooth 47 turning off wireless Ethernet 45 turning on Bluetooth 47 turning on wireless Ethernet 45 NTSC PAL jack 62 Num Lock status indicator 23 system key 25 numeric keypad status indicator 23 using 25 O ...

Page 163: ...134 USB port 7 8 processor overclocking 87 programs closing unresponsive 22 opening 36 recovery discs 90 93 re installing 88 89 projector adding 62 color quality 64 port 9 screen resolution 64 troubleshooting 136 using 26 65 Properties button 40 R radio approval authorities 79 radio frequency wireless connections 79 RAID configuring 54 creating volume 54 deleting volume 56 enabling 54 help informa...

Page 164: ...s 140 guidelines for troubleshooting 112 posture 15 reducing eye strain 14 setting up computer 15 sitting at computer 15 static electricity 102 scanner installing 60 USB port 7 8 screen resolution 64 troubleshooting 114 136 screen objects getting information 37 moving 37 selecting 36 scroll zone 35 security startup password 80 while travelling 80 security features Kensington cable lock 7 serial nu...

Page 165: ...upler 78 line protector 78 line tester 78 telephone support 136 television HDMI out jack 9 62 playing DVD on 62 viewing display on 62 touchpad buttons 35 36 clicking 36 double clicking 36 dragging screen objects 37 locating 11 moving pointer 35 36 moving screen objects 37 opening files folders and programs 36 opening shortcut menu 37 right clicking 37 scroll zone 35 selecting screen objects 36 tro...

Page 166: ...port 7 8 user password 80 V VGA port 9 63 video HDMI out jack 9 monitor port 9 projector port 9 troubleshooting 136 VGA port 9 video camera connecting 57 61 62 volume adjusting 28 43 adjusting modem 128 controls 43 muting 28 39 43 system keys 28 troubleshooting 135 W waking up notebook 21 webcam 12 39 Webcam status indicator 12 Windows key 25 Product Key Code 3 Windows Hotstart 38 Windows Media Pl...

Page 167: ......

Page 168: ...MAN GODZILLA FX HW REF R1 5 08 ...

Reviews: