background image

36

TABLE OF CONTENTS

Important Safeguards .............................................................................. 39

General Safety Instructions .................................................................. 39
Important Safeguards for Electrical Appliances ....................................... 42
High Temperature – Risk of Burns .......................................................... 43

Technical Specifications ........................................................................... 44
Knowing Your New Glass Tea Kettle ......................................................... 45
Properties of Your New Glass Tea Kettle .................................................... 46

Programmed Sequences and Acoustic Signals ........................................ 46
Waiting Function .............................................................................. 47
Keep Warm Function ........................................................................ 47
Recommended Usage of the Programs .................................................. 49
Energy Saving Mode ......................................................................... 49
Dry Boil Protection ............................................................................. 50

Before First Use ...................................................................................... 50
Operation ............................................................................................. 51

Preparing the Appliance for Operation ................................................. 52
Making Tea ..................................................................................... 53

Skipping Over Some Steeping Time ............................................... 55

Heating Clear Water ........................................................................ 56

Heating Water to a Selected Temperature ....................................... 56
Heating Water to the Boil ............................................................. 56

Adding Water during Operation ......................................................... 58

We attach a certain importance to your safety. Thus, we ask you to read all provided 

instructions and information in this booklet carefully and completely, before you start 

running the appliance. This will help you to know all functions and properties of 

your new appliance. We especially ask you to adhere strictly to the safety infor-

mation mentioned in these instructions.

Summary of Contents for 42434

Page 1: ...Bedienungsanleitung vor Gebrauch unbedingt lesen Modell und Zubehöränderungen vorbehalten Nur für den Hausgebrauch DESIGN TEA AROMA PLUS Art Nr 42434 Design Tea Aroma Plus BEDIENUNGSANLEITUNG ...

Page 2: ...utz 16 Vor der ersten Verwendung 17 Bedienung 18 Das Gerät zum Betrieb vorbereiten 19 Tee kochen 20 Die Brühzeit verkürzen 23 Klares Wasser erhitzen 23 Wasser bis zu einer ausgewählten Temperatur erwärmen 23 Wasser zum Kochen erhitzen 23 Wasser während des Betriebes nachfüllen 25 Wir legen viel Wert auf Ihre Sicherheit Deshalb bitten wir Sie alle Hinweise und Anleitungen die mit dem Gerät geliefer...

Page 3: ...roblemen 25 Pflege und Reinigung 29 Den Kessel und die Basis reinigen 29 Den Kessel entkalken 30 Aufbewahrung 31 Entsorgungshinweise 32 Information und Service 32 Gewährleistung Garantie 33 Verwendung im Haushalt 33 ...

Page 4: ... kochen Zahlreiche Programme unterstützen Sie bei der Auswahl der optimalen Temperatur für verschiedene Teesorten und bei der Einhaltung der richtigen Brühzeit Durch den Kessel aus klarem Glas können Sie dabei die Farbe des Tees ohne Umstände auf einen Blick erkennen und beurteilen Bitte lesen Sie diese Bedienungsanleitung sorgfältig durch Sie können am schnells ten alle Vorteile Ihres neuen Teeko...

Page 5: ...durchgeführt werden siehe Gewährleistung Garantie Fragen zum Gerät beantwortet Gastroback GmbH Gewerbestr 20 D 21279 Hollenstedt Telefon 04165 22250 ALLGEMEINE HINWEISE ZUR SICHERHEIT Dieses Gerät ist nur für den Betrieb in Innenräumen und für die Ver wendung im Haushalt vorgesehen Verwenden und lagern Sie das Gerät nicht im Freien oder in feuchten oder nassen Bereichen Ver wenden Sie das Gerät ni...

Page 6: ...es Kessels herunter Gießen Sie das Wasser immer lang sam in die Mitte Niemals den Glaskessel verwenden wenn das Glas gesprungen oder gesplittert ist oder die Kanten angeschlagen sind Auch kleinste Glassplitter können schwerste Verletzungen verursachen wenn sie in Lebensmittel oder Getränke gelangen Die Arbeitsfläche muss ausreichend groß gut zugänglich fest hori zontal eben sauber trocken und best...

Page 7: ...auf oder in die Nähe von starken Wärmequellen und heißen Oberflächen bringen Bei spiel Heizung Ofen Feuer Niemals die Bauteile und Zubehöre des Gerätes mit externen Wärmequellen Beispiel Kochplatte Mikrowelle Stövchen heizen Niemals die Bauteile des Gerätes für andere Geräte oder für Zwecke verwenden die in diesem Heft nicht beschrieben sind Wenden Sie bei der Arbeit mit dem Gerät niemals Gewalt a...

Page 8: ...nigung verwenden Niemals die Bauteile des Gerätes in der Geschirrspül maschine reinigen Entkalken Sie den Kessel regelmäßig abhängig von der Verwendung und der Härte des verwendeten Wassers Eine starke Verkalkung des Kessels führt zu einem erhöhten Energieverbrauch und kann im Extrem fall das Gerät beschädigen siehe Pflege und Reinigung VORSICHTSMASSNAHMEN BEIM UMGANG MIT ELEKTRIZITÄT Das Gerät wi...

Page 9: ...Elektrizität zu vermeiden Behandeln Sie das Netzkabel stets sorgsam Niemals das Gerät über ein Netzkabel stellen Halten Sie das Netzkabel fern von heißen Oberflächen und scharfen Kanten Lassen Sie das Netzkabel nicht über die Kante der Arbeitsfläche herunterhängen Sorgen Sie dafür dass niemand das Gerät am Netzkabel herunterziehen kann Nie mals am Netzkabel ziehen oder reißen oder das Netzkabel kn...

Page 10: ...hren Nehmen Sie den Kessel immer von der Basis herunter wenn Sie ihn füllen oder den Inhalt ausgießen Nehmen Sie zum Füllen immer den Deckel ab HOHE TEMPERATUREN VERBRENNUNGSGEFAHR WARNUNG Der Teekocher ist mit elektrischen Heizelementen ausgerü stet und erhitzt Trinkwasser Das Gerät kann deshalb bei unsachgemäßer Handhabung schwere Verbrühungen und Verbrennungen verursachen Halten Sie den Kessel ...

Page 11: ...sel zu stark kippen könnte das Wasser neben der Gießtülle auslaufen Halten Sie den Deckel während des Betriebes und wenn das Wasser im Kessel kocht oder noch sehr heiß ist immer geschlossen um Ver brühungen am Dampf zu vermeiden TECHNISCHE DATEN Modell Art Nr 42434 Design Tea Aroma Plus Stromversorgung 220 240V Wechselstrom 50 60Hz 16A Leistungsaufnahme max 1400W Länge des Netzkabels ca 90cm Gewic...

Page 12: ...TASTE Mit dieser Taste aktivieren Sie das Programm das am Auswahlknopf eingestellt ist 7 LEDS DER ZEITANZEIGE Beim Start der Brühzeit oder Warmhaltezeit leuchten alle LEDs auf und verlöschen der Reihe nach wieder bis die vorprogrammierte Zeit abgelaufen ist 8 START STOP TASTE Damit starten Sie das ausgewählte Programm oder brechen das Programm ab 9 PROGRAMMTASTEN Mit diesen Tasten wählen Sie eines...

Page 13: ...e das laufende Programm zuerst abbrechen Durch den Glaskessel haben Sie während der Brühzeit Zeit zum Ziehen lassen immer die optimale Kontrolle über das Quellen der Zutaten und die Farbe des Tees ohne den Deckel öffnen zu müssen PROGRAMMABLAUF UND SIGNALE Für die Auswahl des gewünschten Programms stehen 4 Tasten zur Schnellauswahl der am häufigsten verwendeten Programme zur Verfügung Außerdem kön...

Page 14: ...t Water unterschei det sich etwas von den Teeprogrammen Bei diesem Programm ist keine Brühzeit programmiert Sobald das Wasser kocht schaltet das Gerät mit dem akustischen Signal automatisch in die Warmhaltefunktion weiter siehe Warmhaltefunktion WARTEFUNKTION Wenn eines der Teeprogramme läuft dann schaltet das Gerät nach dem Erreichen der eingestellten Temperatur automatisch in die Wartefunktion e...

Page 15: ... nehmen ohne die Warmhaltefunktion abzubrechen Nach ca 20 Sekunden ertönt zur Erinnerung ein Signalton Wenn Sie den Kessel wieder auf die Basis zurückstellen dann blinkt die Start Stop Taste Drücken Sie kurz auf die Start Stop Taste wenn Sie die Warmhaltefunktion fortsetzen wollen Andernfalls läuft die Warmhaltezeit weiter ohne dass die Temperatur im Kessel eingehalten wird und Ihr Wasser Tee kühl...

Page 16: ... und Südamerika typisch sind ENERGIESPAR MODUS Wenn das Gerät länger als 5 Minuten untätig an die Stromversorgung angeschlos sen ist und Sie in dieser Zeit keine Tasten drücken dann schaltet sich das Gerät auto matisch AUS und alle Tasten werden dunkel um einen unnötigen Energieverbrauch zu vermeiden Sie sollten das Gerät dennoch nicht unnötig an die Stromversorgung angeschlossen lassen Drücken Si...

Page 17: ...ckdose bevor Sie das Gerät reinigen und wenn Sie das Gerät nicht benutzen Niemals den Kessel oder die Basis in der Geschirrspülmaschine reinigen Niemals das Gerät Basis und Kessel oder das Netzkabel in Wasser oder andere Flüssigkeiten stellen oder tauchen oder Flüssigkeiten darüber gießen Nehmen Sie den Kessel zum Füllen von der Basis herunter Verwenden Sie keine aggressiven Reiniger oder Scheuerm...

Page 18: ...ntlich ausgeschüttet oder umgestoßen wird wenn der Inhalt heiß ist Die Außenseiten des Kessels und der Deckel können beim Betrieb heiß werden Berühren Sie Kessel und Deckel während des Betriebes und einige Zeit danach nur an den Griffen Auch bei geschlossenem Deckel kann während des Betriebes und einige Zeit danach heißer Dampf entweichen Niemals während des Betriebes und einige Zeit danach irgend...

Page 19: ...asser aus dem Kessel spritzen Entkalken Sie den Kessel regelmäßig siehe Pflege und Reinigung Wichtig Verschließen Sie den Kessel zum Betrieb des Gerätes immer mit dem Deckelring und Deckel Bei geöffnetem Deckel können die Temperaturregelung und Abschaltautomatik aufgrund der hohen Wärmeverluste nicht richtig arbeiten und das Gerät verbraucht unnötig viel Energie Wichtig Wenn Sie die Warmhaltefunkt...

Page 20: ...el kochen Dafür können Sie Teebeutel oder das Teesieb des Gerätes verwenden Hinweis Wenn Sie zuvor eine andere Teesorte im Kessel zubereitet haben dann sollten Sie den Kessel sorgfältig auswaschen um eine Geschmacksbeeinträchtigung zu vermei den siehe Pflege und Reinigung Das gilt besonders wenn Sie zwischendurch eine sehr aromatische Teesorte aufgebrüht haben Beispiel Minze oder Früchtetee Sie kö...

Page 21: ...für jeweils 500ml Wasser WARNUNG Wenn Sie bei hohen Wassertemperaturen arbeiten dann kön nen heißer Dampf und Kondenswasser unter dem Deckel austreten Dies gilt beson ders beim Abnehmen des Deckels Außerdem kann der Deckel heiß sein Fassen Sie den Deckel nur am Griff an und achten Sie darauf sich am Dampf und Kon denswasser nicht zu verbrühen 4 Sobald die Signaltöne erklingen und die ausgewählte T...

Page 22: ...sse Tee auszugießen Die Warmhaltefunktion wird dadurch nicht abgebrochen Die Heizung wird jedoch abgeschaltet Wenn Sie den Kessel danach wieder auf die Basis stellen blinkt die Start Stop Taste siehe Warmhaltefunktion Drücken Sie die Start Stop Taste kurz um die Warmhaltefunktion fortzusetzen Andern falls kühlt der Tee ab Wichtig Wenn Sie Tee ausgegossen haben und den Rest mit der Warmhaltefunk ti...

Page 23: ...emperaturen erhitzen und bis zu 30 Minuten warm halten Arbeiten Sie dazu einfach nach obiger Anleitung siehe Tee kochen Hängen Sie dabei aber das Teesieb nicht in den Kessel ein Wenn Sie das Wasser länger als 10 Minuten warm halten wollen siehe Warte funktion dann können Sie bei den Teeprogrammen nach dem ersten akustischen Signal eingestellte Temperatur ist erreicht die Brühzeit überspringen und ...

Page 24: ... 100 C Hot Water Heißes Wasser um das Pro gramm für kochendes Wasser auszuwählen Die Taste leuchtet auf 3 Drücken Sie kurz die Start Stop Taste Der Kessel beginnt sofort zu heizen Wenn das Wasser kocht 100 C dann ertönt ein akustisches Signal und das Gerät schaltet sofort zur Warmhalte Funktion weiter WARNUNG Kochendes Wasser heißes Kondenswasser und heißer Dampf können starke Verbrühungen und Sac...

Page 25: ...as Wasser auf keinen Fall an den Rändern des Kessels herunter laufen 3 Verriegeln Sie den Deckel im Deckelring Der Kessel heizt des Wasser wieder auf die eingestellte Temperatur Das laufende Programm läuft normal weiter HILFE BEI PROBLEMEN Sollten während der Arbeit mit dem Gerät Probleme auftreten dann finden Sie hier Lösungen Problem Ursache Die Lösung des Problem Zwischen Deckelring und Kessel ...

Page 26: ...ecker aus der Steckdose leeren Sie den Kessel aus und lassen Sie den Kessel mindestens 30 Minuten lang abkühlen siehe Trockengehschutz Füllen Sie dann mindestens 0 5 Liter 500ml kaltes Wasser in den Kessel und versuchen Sie es erneut Eine Fehlfunktion ist auf getreten Ziehen Sie den Netzstecker aus der Steckdose und lassen Sie das Gerät auf Raumtemperatur abkühlen Versuchen Sie es danach erneut Da...

Page 27: ... kommen Bereiten Sie den Kessel zum Betrieb vor wie im Kapitel Vor der ersten Verwendung beschrieben wird Wenn das Problem dadurch nicht behoben wird dann füllen Sie den Kessel mit 1200ml Wasser und geben Sie 2 Teelöffel Soda dazu Bringen Sie das Wasser mit dem Programm 100 C Hot Water zum Kochen und gießen Sie es danach weg Reinigen Sie den Kessel dann sorgfältig Sie haben das Wasser zu lange im ...

Page 28: ...r vollständig ab um eine Überhitzung zu vermeiden Überprüfen Sie das Netzkabel auf Beschädigungen Verformung oder Verfär bung Die elektrischen Anschlüsse im Boden des Kessels oder in der Basis sind feucht geworden beschädigt oder korrodiert Ziehen Sie sofort den Netzstecker aus der Steckdose Über prüfen Sie den Stecker im Boden des Kessels und die Netz buchse in der Mitte der Basis Beide Teile müs...

Page 29: ...htungen nicht zu beschädigen Verwenden Sie niemals scharfkantige oder harte Gegenstände Bei spiel Messer Schaber Niemals Gewalt anwenden NIEMALS die Teile des Gerätes in der Geschirrspülmaschine reinigen Abhängig von der Wasserhärte des verwendeten Wassers und der Benutzung über ziehen sich die Innenseiten des Kessels nach einiger Zeit mit einer grauen bis sand farbigen Kalkschicht oder mit braune...

Page 30: ...er Entkalker enthält spezielle Pflegemittel die perfekt auf die Geräte von Gastroback abgestimmt sind und dadurch eine lange Lebensdauer und korrekte Funktionsweise unterstützen WARNUNG Niemals die Dämpfe von Entkalkungsmitteln einatmen um Verletzungen der Atemwege zu vermeiden Sorgen Sie während des Entkalkens immer für eine gute Belüftung 1 Mischen Sie eine Entkalkerlösung Wenn Sie den GASTROBAC...

Page 31: ...s am Netzkabel halten um sie zu bewegen Nehmen Sie den Kessel immer von der Basis herunter um das Gerät zu bewegen damit die Bauteile nicht herunterfallen Glas kann leicht brechen Behandeln Sie den Kessel immer mit besonderer Vorsicht um den Glaskörper nicht zu beschädigen Niemals das Netzkabel knicken quetschen oder verknoten Niemals am Netzkabel ziehen oder reißen Lassen Sie das Netzkabel nicht ...

Page 32: ... Gemeinde Fragen Sie ihre Gemeindeverwaltung nach den Standorten der Sammelstellen Wenn elektrische Geräte unkontrolliert entsorgt werden können wäh rend der Müllverbrennung oder Verwitterung gefährliche Stoffe in die Luft und ins Grundwasser und damit in die Nahrungskette gelangen und die Flora und Fauna auf Jahre vergiftet werden Wenn Sie das Gerät durch ein neues ersetzen ist der Verkäufer gese...

Page 33: ...tten Gastroback Produkte an folgende Anschrift zu senden GASTROBACK GmbH Gewerbestr 20 21279 Hollenstedt Kunden anderer Länder Bitte kontaktieren Sie Ihren Händler Bitte haben Sie dafür Verständnis dass unfreie Sendungen nicht angenommen werden können Einsendung von Geräten Bitte verpacken Sie das Gerät transportsicher ohne Zubehör und legen Sie den Garantiebeleg sowie eine kurze Fehlerbeschreibun...

Page 34: ......

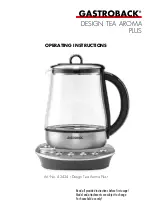
Page 35: ...Read all provided instructions before first usage Model and attachments are subject to change For household use only DESIGN TEA AROMA PLUS Art No 42434 Design Tea Aroma Plus OPERATING INSTRUCTIONS ...

Page 36: ...ction 50 Before First Use 50 Operation 51 Preparing the Appliance for Operation 52 Making Tea 53 Skipping Over Some Steeping Time 55 Heating Clear Water 56 Heating Water to a Selected Temperature 56 Heating Water to the Boil 56 Adding Water during Operation 58 We attach a certain importance to your safety Thus we ask you to read all provided instructions and information in this booklet carefully a...

Page 37: ...37 Solving Problems 59 Care and Cleaning 62 Cleaning the Power base and Kettle 62 De Scaling the Kettle 63 Storage 64 Notes for Disposal 65 Information And Service 65 Warranty 66 Household Use 66 ...

Page 38: ...designated tea filter or common tea bags Various pre set programs for several types of tea support you in selecting and keeping the correct temperature and steeping time Due to the glass kettle you can monitor the steeping process at a glance thus getting the desired results easily The information in this booklet will easily and quickly inform you on the helpful bene fits of your new glass kettle ...

Page 39: ...manufacturer or damaged in any way may result in injuries to persons and or damage DO NOT leave the appliance switched on and or the power base connected to the power supply uselessly Unplug the appliance when it is not in use Check the entire appliance regularly for proper operation e g check for distortion cracks leaks corroded pins of the electrical connec tors Do not operate the appliance when...

Page 40: ... hot water Do not operate the appli ance under overhanging boards and drop lights or near any delicate objects e g curtains to avoid damage due to hot steam and water overheating and fire Do not place any clothes or tissue or other foreign objects under or on the appliance during operation to avoid risk of fire electric shock and overheating Do not place any hard and or heavy objects on or in the ...

Page 41: ...es and damage due to fire electric shock and high temperatures We recommend to use clear tap water or bottled water with low mineral content Avoid using de mineralized water or mineral water Do not heat any highly alcoholic liquids e g grog mulled wine via the appliance or pour any inflammable liquids into the kettle to avoid explosion and fire To avoid overheating before operation always fill a s...

Page 42: ... ensure that safe operation is possible Do not use any desk top multi socket outlet external timer remote control systems or extension cord The power outlet must always be easily accessible so that it would be possible to unplug the appliance immediately in case of any malfunction or danger The pins of the power plug and the power connectors in the power base and bottom of the kettle must be smoot...

Page 43: ...fer to the instructions in chapter Solving Problems Do not place the power base or kettle in an automatic dishwasher Do not place the power base on a metal surface or in a large bowl or tray for operation If water is spilled or runs out and accumulates there would be severe risk of short cut electric shock and fire A cordless water kettle should NOT be filled while standing on its power base Alway...

Page 44: ...he water has stopped boiling and then pour carefully to avoid spilling If the kettle is tilted too much the water could run out besides the spout and getting spilled Keep the lid closed during operation and when the water is boiling or still very hot to avoid scalding caused by hot steam TECHNICAL SPECIFICATIONS Model Art No 42434 Design Tea Aroma Plus Power supply 220 240V AC 50 60Hz 16A Power co...

Page 45: ... 6 SELECTION BUTTON Press the central button to activate the current selection of the selection dial 7 RUNTIME LEDS With the steeping time or the keep warm time starting these LEDs will be illuminated and go out one after the other while the appropriate time is running 8 START STOP BUTTON Press here to start or cancel operation 9 PROGRAM BUTTONS For quick selection of boiling water or a tea progra...

Page 46: ... for the colour at a glance without opening the lid PROGRAMMED SEQUENCES AND ACOUSTIC SIGNALS When selecting the desired program you can use 4 buttons for a quick selection of frequently used applications 5 additional programs are available via the selection dial Easy Select Each program is operated according to pre programmed values for the water temperature and steeping times In standby mode onl...

Page 47: ...e appropriate signal is given The selected program button flashes and the waiting time starts running Use this time for placing your tea leaves tea filter or tea bag into the kettle For stopping the wai ting function and starting the steeping time you need to press the flashing program button Otherwise after waiting 2 minutes the acoustic signal for temperature is reached will be repeated as a rem...

Page 48: ...ction As a reminder after approx 20 seconds a signal sounds If you replace the kettle the Start Stop button flashes To re assume heating via the keep warm function press the flashing Start Stop button shortly Otherwise the heating elements do not operate and your water tea is cooling down although the keep warm time is running on If you do not wish to keep the tea water warm any longer or the fill...

Page 49: ...ic tea types Gunpowder minted Moroc can tea Infusion herbs fruits 90 C 5 minutes Frequently used types of herbs camomile mint fennel lemon balm dried fruit Rooibos DARJEELING 95 C 4 minutes Earl Grey Assam dark tea types Pu Erh mix tures typically consumed in Turkey Russia Sri Lanka Iran Africa South America ENERGY SAVING MODE When in standby mode and without any entries for more than 5 minutes th...

Page 50: ... into your food or beverages Thus do not use glass parts again when there are any cracks or edges are chipped Do not pour cold water into the hot kettle Always let the kettle cool down before filling it again For operation always completely unwind the power cord to avoid hazard due to overheating fire and electric shock Always unplug the appliance before cleaning it and when it is not in use Do no...

Page 51: ... these parts are broken cracked or chipped in any way Hot water and steam could case severe scalds Always ensure not to spill hot water Always ensure that the kettle will not fall or fall over while it is containing hot water During operation and some time thereafter only touch the kettle and lid by the handles as the exterior of the kettle and the lid may be hot Even with the lid closed hot steam...

Page 52: ...h energy loss Important When using the keep warm function and pouring some water tea always ensure that the filling level in the kettle did not drop below the MIN filling level 500ml before placing the kettle back onto the power base and re assu ming keep warm operation see Keep Warm Function PREPARING THE APPLIANCE FOR OPERATION 1 Completely unwind the power cord and place the power base on the d...

Page 53: ... immediately and the button of the recently used program will be illuminated If the appliance is idle for more than 5 minutes the kettle will shut off completely and all buttons will get dark Press any button if you wish to switch on the appliance We recommend to hold a coaster or small dish at hand for placing the tea bag or tea filter on it after steeping To reduce energy consumption do not leav...

Page 54: ...ntil it settles down in the appropriate groove of the lid ring Replace the lid 5 Press the flashing button of the active tea program The runtime LEDs illuminate and go out one by one while the steeping time is running Important If you do not press the button the signal will be repeated after 20 seconds as a reminder The appliance will keep the programmed temperature for approx 10 minutes in total ...

Page 55: ...s The appliance returns to standby mode immediately 9 When removing the kettle from the power base after steeping to pour some tea you may re assume keep warm operation For this ensure that at least 500ml tea are still left in the kettle Re place the kettle on the power base and SHORTLY press the Start Stop button After the maximum keep warm time 30 minutes elapsed the appliance switches back to s...

Page 56: ...is reached wait until the first acoustic signal the steeping time may be started has been given 2 Then for switching the appliance to the keep warm function immediately hold the flashing button pressed until the signals sounded Heating Water to the Boil The program 100 C Hot water is somewhat different to the tea programs With this program running after the set temperature is reached and the water...

Page 57: ...hot condensate and hot steam may cause severe scalds and damage Before pouring always wait until the water stops boiling Pour carefully and slowly to avoid splashing and spilling Beware of hot steam Avoid removing the lid set for pouring 3 Remove the kettle from the power base and if required wait a moment until the water stops boiling Carefully pour the water With the lid set installed correctly ...

Page 58: ...r run down at the side walls of the kettle when the kettle is hot When adding water during operation always pour the water slowly into the middle of the kettle Otherwise the glass could crack Please observe the maximum filling level 1200ml 1 Remove the lid from the lid ring 2 Pour the required amount of water slowly into the middle of the kettle without letting the cold water run down at the side ...

Page 59: ...nning ent ries are blocked Cancel any running program hold the Start Stop button pressed until the signal sounds Then try again The temperature of the selected program is set below or equal to the current tempe rature within the kettle Leave the kettle cool down or select a higher temperature Alternatively you may carefully and slowly pour some cold water in the middle of the kettle see Adding Wat...

Page 60: ...it is filled The kettle is leaking Immediately unplug the appliance and wipe dry the appli ance completely Then check the kettle for leakage Do not use the appliance if the kettle is leaking The water has an unpleasant taste This may happen on new appliances or appliances that are used only rarely Prepare the appliance for usage as described in chapter Before First Use If the problem persists fill...

Page 61: ...heating Check the power cord for any damage e g discolouration deformation The power socket in the centre of the power base or the pins at the bottom of the kettle are polluted damp damaged or cor roded Immediately unplug the appliance Check the power con nection at the bottom of the kettle and the power socket of the power base for moisture discolouration distortion or corrosion Do not use the ap...

Page 62: ...e DO NOT clean any part of the appliance in an automatic dishwasher Depending on the water hardness and the usage the interior of the kettle gets coa ted with grey or sand coloured scale or brown residues of tea To keep the appli ance always ready for use and to avoid damage to the heating elements you should remove these residues and de scale the kettle in time see De Scaling the Kettle However d...

Page 63: ...rnatively mix 400ml white vinegar with 800ml of water 2 Fill the descaling solution in the kettle Close the kettle via the lid ring and lid see Operation Preparing the Appliance for Operation Simply leave the kettle stand for at least 1 hour 3 To assist de scaling if the interior of the kettle is coated with large amounts of scale You may warm up the solution to the lowest possible temperature pro...

Page 64: ...or squeezed Do not let the plug or power cord hang down Do not place any hard or heavy objects on or in the appliance or any part of it Do not use any parts or accessories of the appliance for any other appliance or any other purpose than described in this booklet Please store the appliance on a frost free clean and dry place where it is protected against excessive load e g mechanical or electric ...

Page 65: ...n land fills dumps or refuse incineration hazardous substances can leak into the ground water or can be emitted into air thus getting into the food chain and damaging your health and well being as well as poisoning flora and fauna When replacing old appliances with new once the vendor is legally obligated to take back your old appliance for disposal at least for free of charge INFORMATION AND SERV...

Page 66: ...wing address Gastroback GmbH Gewerbestr 20 D 21279 Hollenstedt Germany Customers from other countries Please contact your dealer Please agree that we cannot bear the charge of receipt Submission of appliances Please ensure packing the appliance ready for shipment without accessories Add the sales slip and a short fault description The processing time after receipt of the defective appliance will b...

Page 67: ...67 ...

Page 68: ...GASTROBACK GmbH Gewerbestraße 20 21279 Hollenstedt Germany Telefon 49 0 4165 2225 0 Telefax 49 0 4165 2225 29 info gastroback de www gastroback de 20180724 ...

Reviews: