background image

TEST FIRING THE APPLIANCE

Test fire appliance, following the lighting instructions on. Leak test all gas connections with soapy water. Soap 
bubbles indicate gas leakage. DO NOT use a match to test for gas leaks.

WARNING: White smoke may appear around the burner during the first minute of the initial firing.

TROUBLE SHOOTING

Problem 

Possible Causes

Pilot will not light

•  Gas valve may be OFF


•  LPG cylinder empty


•  Air in supply system


•  Loose connection

Warning:

 Improper installation, adjustment, alteration, service or maintenance can cause injury or property damage. 

Any modifications or adjustments made to product without prior authority from the manufacturer will void any warranty 
claims. Read the installation, operating and maintenance instructions thoroughly before installing or servicing this 
equipment.

Solution

•  Turn the gas valve ON
•  Refill LPG cylinder
•  Purge air from lines
•  Check all fittings

Pilot will not stay on

•  Debris around pilot


•  Loose connection


•  Lack of gas pressure


•  Gas leak in line

•  Clean dirty area
•  Tighten connection
•  LPG cylinder is near empty
•  Check connections with soapy 

     water solution

Pilot will not light

•  Gas pressure is low


•  Control knob not ON


•  Pilot light assembly bent or not 

     in correct location


•  LPG cylinder is near empty
•  Turn knob to ON
•  Contact service agent

OFF 

LIGHT 

LOW 

HIGH 

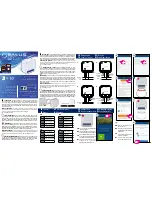
LIGHTING INSTRUCTIONS

Warning:

 White smoke may appear round the burner head 

during the first minutes of initial firing.

1.  Check and ensure that an AA battery
      is inside the ignition chamber and 
 

has power. Ensure the anode (+) 


faces outside.

2.   Ensure that the control knob is OFF. 
 

Slowly open the gas cylinder valve.

3.   Push in and turn the control knob 
 

anti-clockwise to LIGHT position for 


30 seconds whilst simultaneously


pushing the igniter several times 


until the pilot flame ignites. Check for pilot flame through  


glass tube. If the pilot flame does not ignite immediately,  


turn control knob to OFF and wait 2 minutes between  


ignition attempts for gas to dissipate.

4.   If the pilot is alight, keep 
 

control knob pressed for 15


seconds then turn the control 


knob to ‘LOW’.

5.   For maximum heat turn 
 

control knob to ‘HIGH’.

6.   To turn heater off, turn control 
 

knob to ‘OFF’.

7.   Turn off the valve on the gas cylinder and disconnect  


the cylinder.

Note: if the burner flames goes out accidentally, turn off 

the appliance and wait at least 5 minutes to let the gas 
dissipate before relighting. Repeat steps 2 – 4.

Allow at least one minute to purge air through to pilot after
connection to a new cylinder.

Note:

 If the appliance cannot be adjusted to perform correctly it should not be used until serviced by a qualified person.

13

TEST FIRING THE APPLIANCE

LIGHTING INSTRUCTIONS

STEP 13

Ensure cylinder valve is in its full off position. Check 
for any damage to either the cylinder connection or 
the hose. NEVER attempt to use damaged equipment. 
Attach the regulator and hose to your gas cylinder. 
Tighten the nut to a positive stop by hand.

STEP 14

Turn on the gas cylinder ensuring that the control knob 
on the outdoor heater is turned OFF at this point.
DO NOT ATTEMPT TO LIGHT THE HEATER!!.

STEP 15

Use a solution of soapy water (dishwashing liquid and 
water is fine). Brush it on or use a spray bottle as 
shown in the drawing. Ensure the connections have a 
good coating.

STEP 16a

If the connection is leaking, bubbles will start to grow 
in the soapy solution. If this happens shut off the gas 
supply at the cylinder. 

STEP 16b

Tighten the connections using a crescent then repeat 
steps 14-15.  

STEP 16c

The connection is gas tight when no bubbles grow 
around the gas connection.

ASSEMBLY INSTRUCTIONS

Summary of Contents for GM124-015

Page 1: ... Important The installer or seller must leave these instructions with the consumer IMPORTANT Retain these instructions for future use 3948 05 14 FOR OUTDOOR USE ONLY OPERATES ON LPG ULPG The glass tube will be extremely hot when it is working so never try to touch it and keep children away Turn off the appliance immediately if it starts raining and never use it while it is raining as the glass tub...

Page 2: ...hould be checked for leaks utilising a soap solution Never use a flame for this purpose d The flame pattern at the burner should be visually checked whenever the appliance is operated If flames extend beyond surface of the burner or black soot is accumulating on the burner or reflector the appliance should be turned off immediately The appliance should not be operated again until the unit is servi...

Page 3: ...LPG ULPG Consumption 42 MJ h Operating Pressure 2 75 kPa Injector Size 1 95 mm Any modification to the appliance not described in the installation instructions may compromise the safety of this appliance Special concern is as follows 1 DO NOT bypass thermocouple safety burner 2 DO NOT operate appliance without the guards Clothing or other flammable materials should not be hung from the appliance o...

Page 4: ...nce from Combustible Surfaces Combustible materials are considered to be wood compressed paper plant fibres plastic or other materials that are capable of being ignited and burned 600mm Cylinder housing 540mm Burner head 4 650mm 800mm 2310mm Glass Tube ...

Page 5: ...ive stop by hand 4 Open cylinder valve fully If a leak can be heard at either end of the hose turn cylinder off and tighten joint Wait 5 minutes before re testing and use a soapy water solution to check the joint If bubbles appear the connection will need to be re tightened Refer to page 10 for more detailed instructions on connecting the appliance to the cylinder Disconnecting 1 Ensure the burner...

Page 6: ...Handle 1 Q Knob with Chain 1 Attach to the Front Panel R Wheel 2 S Bottom Plate 1 T Screws M6X10 8 Fasten the Wheels to the Bottom Plate U Screws M5X10 Round 18 Fasten the Upper Middle and Bottom Plate to the Aluminum Tubes V Screws M5X10 Flat 12 Fasten the Side Panels and Control Box W Battery 1 Optional part X Stability Ring Attach to Base ...

Page 7: ...d screwdriver 1 adjustable spanner STEP 1 Attach the wheels R into the bottom plate S using the screws M6X10 T STEP 2 Mount the stability ring X to the base of the heater STEP 3 Attach the bottom plate S into the aluminum tubes C with screws M5X10 round U ...

Page 8: ...s M5X10 round U STEP 5 Use three side bolts with wing nuts F to pre attach into the flame screen E then connect the upper plate D and flame screen E with three side bolts with screw nuts G STEP 6 Attach the whole upper plate with flame screen into the aluminum tubes C with screws M5X10 round U ...

Page 9: ...rough the bolts then tighten the shield with wing nuts F STEP 8 Put the rubber ring J into the middle plate hole then insert the glass tube I into the heater by holding the base in one hand top in the other and insert the tube underneath the upper plate ...

Page 10: ...P 9 Assemble the control box L into the back of the middle plate with screws M5X10 flat V STEP 10 Assemble the handle P into the side panel B O then attach this panel O and other side panel A N in the heater by screws M5X10 flat V ...

Page 11: ...ook in the aluminum tubes then screw the guard fastening pieces H together with matching 3 16 screws on the top of the upper plate to keep the mesh guard and the flame screen firmly in place STEP 12 Screw the knob with the chain Q into the front panel M and attach chain to the control box L ...

Page 12: ...ater is turned OFF at this point DO NOT ATTEMPT TO LIGHT THE HEATER STEP 15 Use a solution of soapy water dishwashing liquid and water is fine Brush it on or use a spray bottle as shown in the drawing Ensure the connections have a good coating STEP 16a If the connection is leaking bubbles will start to grow in the soapy solution If this happens shut off the gas supply at the cylinder STEP 16b Tight...

Page 13: ... is near empty Turn knob to ON Contact service agent OFF LIGHT LOW HIGH LIGHTING INSTRUCTIONS Warning White smoke may appear round the burner head during the first minutes of initial firing 1 Check and ensure that an AA battery is inside the ignition chamber and has power Ensure the anode faces outside 2 Ensure that the control knob is OFF Slowly open the gas cylinder valve 3 Push in and turn the ...

Page 14: ...s on all sides but at least one permanent opening at ground level and no overhead cover see Example 1 Within a partial enclosure that includes an overhead cover and no more than two walls see Example 2 3 Within a partial enclosure that includes an overhead cover and more than two walls the following will apply at least 25 of the total wall area is completely open and at least 30 of the remaining w...

Page 15: ......

Page 16: ......

Reviews: