4
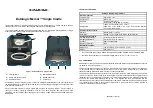
Wireless sensor
1) Temperature
2) Relative humidity
3) LED
4) °C/°F button
5) Broadcast button TX
6) Channel switch
7) Battery compartment cover
COMMISSIONING
Battery installation
Note:
observe the correct battery polarity to prevent damage to the weather station. Use quality
alkaline batteries for the main unit; we recommend using lithium batteries for the wireless
sensor due to their resistance to frost. Do not use rechargeable batteries. Do not expose
the batteries to high temperatures like fire or direct sunlight
Main unit
The main unit can be powered by batteries (short-time display backlight for 15 seconds will be possible) or
by an AC adaptor (permanent display backlight will be possible). If the main unit is powered by an adaptor,
the batteries are not being used, therefore you should remove them to avoid damage to the batteries and to
the main unit. Use only the delivered AC adaptor.
Powering with AC adaptor
1) Connect the AC adaptor plug into the socket on the rear side of the main unit.
2) Connect the other side of the AC adaptor to a mains socket.
Battery power
1) Remove the battery compartment cover on the rear side of the main unit.
2) Insert 2 pcs AA (mini) batteries, observe the correct polarity.
3) Close the battery compartment.
After connection to the power supply, a beep sounds and the wireless sensor signal reception icon
next
to the REMOTE SENSOR number flashes for 3 minutes.
Wireless sensor
1) Remove the battery compartment cover on the rear side of the wireless sensor.
2) Set the required channel using the switch in the battery compartment.
3) Insert 2 pcs AA (mini) batteries – observe the correct polarity.
4) Push the TX button. A beep sounds and the temperature readings from the wireless sensor are
displayed on the main unit display
5) Close the battery compartment.


