Introduction
WARNING
See the
Important Safety and Product Information
guide in the
product box for product warnings and other important
information.
Not all features are available on all models.
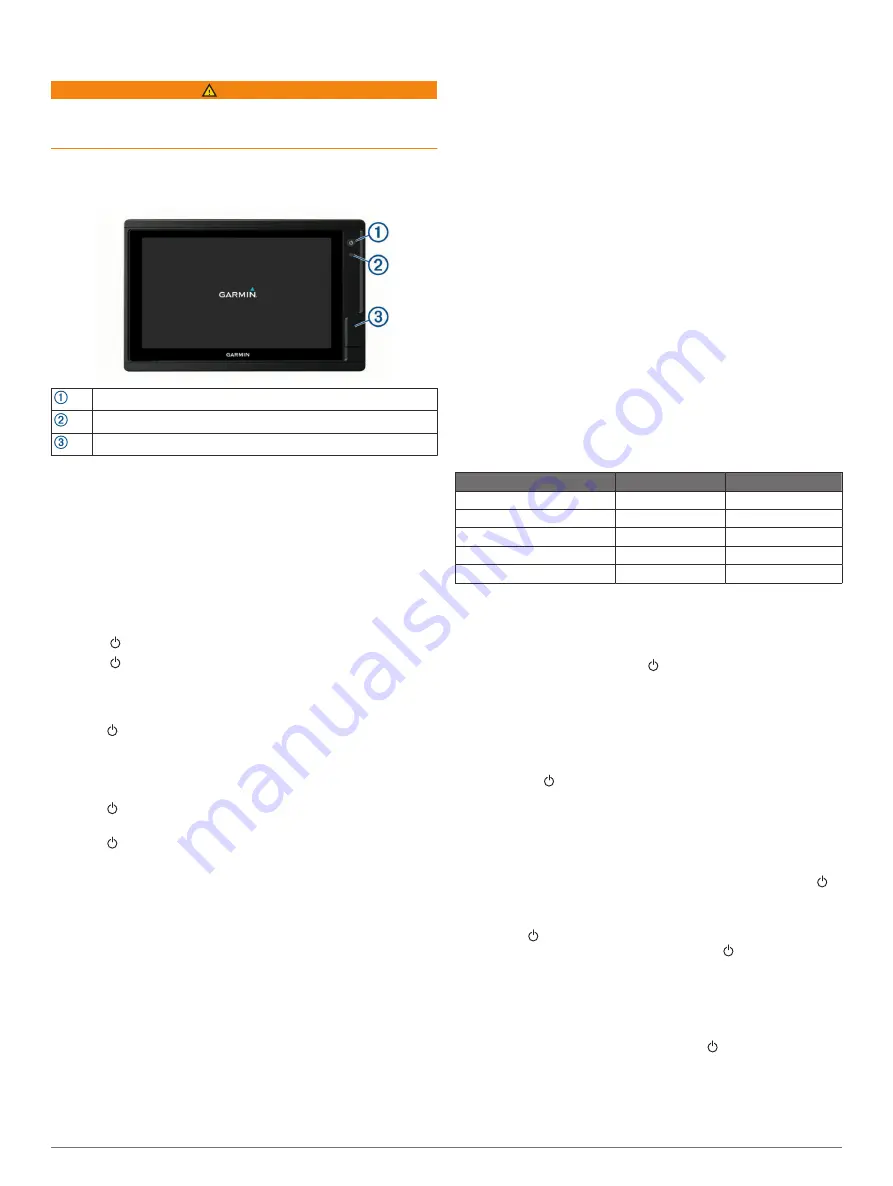
Device Overview
Power key
Automatic backlight sensor
2 microSD
®
memory card slots
Using the Touchscreen
• Tap the screen to select an item.
• Drag or swipe your finger across the screen to pan or scroll.
• Pinch two fingers together to zoom out.
• Spread two fingers apart to zoom in.
Locking and Unlocking the Touchscreen
You can lock the touchscreen to prevent inadvertent screen
touches.
1
Select >
Lock Touchscreen
to lock the screen.
2
Select to unlock the screen.
Tips and Shortcuts
• Press to turn the device on.
• Select
Home
from any screen to return to the Home screen.
• Select
Menu
to access additional settings about that screen.
• Select
Menu
to close the menu when finished.
• Press to open additional options, such as adjusting the
backlight and locking the touchscreen.
• Press and select
Power
to turn the device off.
Garmin
®
Support Center
Go to
for help and information, such as
product manuals, frequently asked questions, videos, software
updates, and customer support.
Customizing the RV Fixed Display
Device
Home Screen
From the home screen, you can access FUSION
®
media and
EmpirBus
™
or other compatible digital switching controls.
• Select Media to access FUSION media controls
• Select EmpirBus to access EmpirBus digital switching
controls
• Select the digital switching icon to access another compatible
digital switching system
Changing the Background Image
1
From the home screen, select
Settings
>
System
>
Sounds
and Display
>
Background
.
2
Select an image.
Customizing the Startup Screen
You can personalize the image that is displayed while the device
is turning on. For the best fit, the image should be 50 MB or less
and conform to the recommended dimensions (
).
1
Insert a memory card that contains the image you want to
use.
2
Select
Settings
>
System
>
Sounds and Display
>
Startup
Image
>
Select Image
.
3
Select the memory card slot.
4
Select the image.
5
Select
Set as Startup Image
.
The new image is shown when turning on the device.
Recommended Startup Image Dimensions
For the best fit for the startup images, use an image that has the
following dimensions, in pixels.
Display resolution
Image width
Image height
WVGA
680
200
WSVGA
880
270
WXGA
1080
350
HD
1240
450
WUXGA
1700
650
Adjusting the Backlight
1
Select
Settings
>
System
>
Display
>
Backlight
.
2
Adjust the backlight.
TIP:
From any screen, press repeatedly to scroll through
the brightness levels. This can be helpful when the
brightness is so low you cannot see the screen.
Adjusting the Color Mode
1
Select
Settings
>
System
>
Sounds and Display
>
Color
Mode
.
TIP:
Select >
Color Mode
from any screen to access the
color settings.
2
Select an option.
Turning On the Device Automatically
You can set the device to turn on automatically when power is
applied. Otherwise, you must turn on the device by pressing .
Select
Settings
>
System
>
Auto Power Up
.
NOTE:
When Auto Power Up is On, and the device is turned
off using , and power is removed and reapplied within less
than two minutes, you may need to press to restart the
device.
Automatically Turning Off the System
You can set the device and the whole system to turn off
automatically after it has been asleep for the selected length of
time. Otherwise, you must press and hold to turn off the
system manually.
1
Select
Settings
>
System
>
Auto Power Off
.
2
Select an option.
Introduction
1


