190-01007-01
GTN 725/750 Maintenance Manual
Rev. 5
Page 5-5
5.4 I/O Chassis Removal and Replacement
CAUTION
The I/O board on the I/O chassis connects to the main board through a 60 pin connector.
Care should be taken to not bend pins when removing or reinstalling the I/O chassis.
NOTE
The I/O board, which is housed in the I/O chassis, is not serviceable. Removal of the I/O
chassis and board from the main chassis is necessary in order to replace the memory
battery and test the battery circuit.
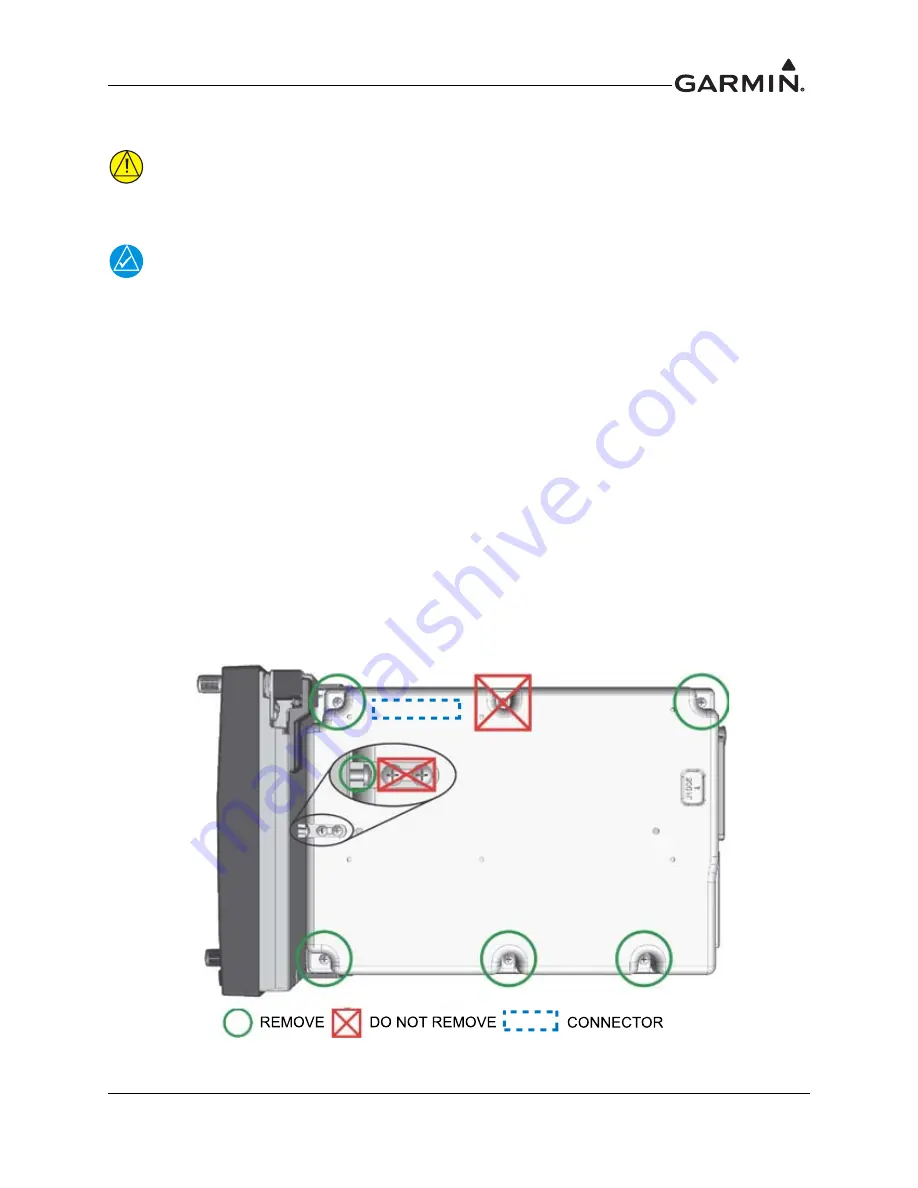
Refer to figure 5-4 while performing the following procedure.
Removal
1. Remove the single 4-40 x 0.25" panhead screw from the display head side of the head/chassis top
brace.
2. Remove the four 4-40 x 1.375" panhead screws from the corners of the I/O chassis and the single
4-40 x 0.375" panhead screw from the left side of the I/O chassis.
3. Remove the I/O chassis from the main chassis.
Replacement
1. Place the I/O chassis on the main chassis.
2. Attach the I/O chassis to the main chassis with four 4-40 x 1.375" panhead screws at the chassis
corners and a single 4-40 x 0.375" panhead screw on the left side.
3. Attach the head/chassis top brace to the display head with a 4-40 x 0.25" panhead screw.
Figure 5-4 I/O Chassis Removal
4-40x0.375"
Screw


