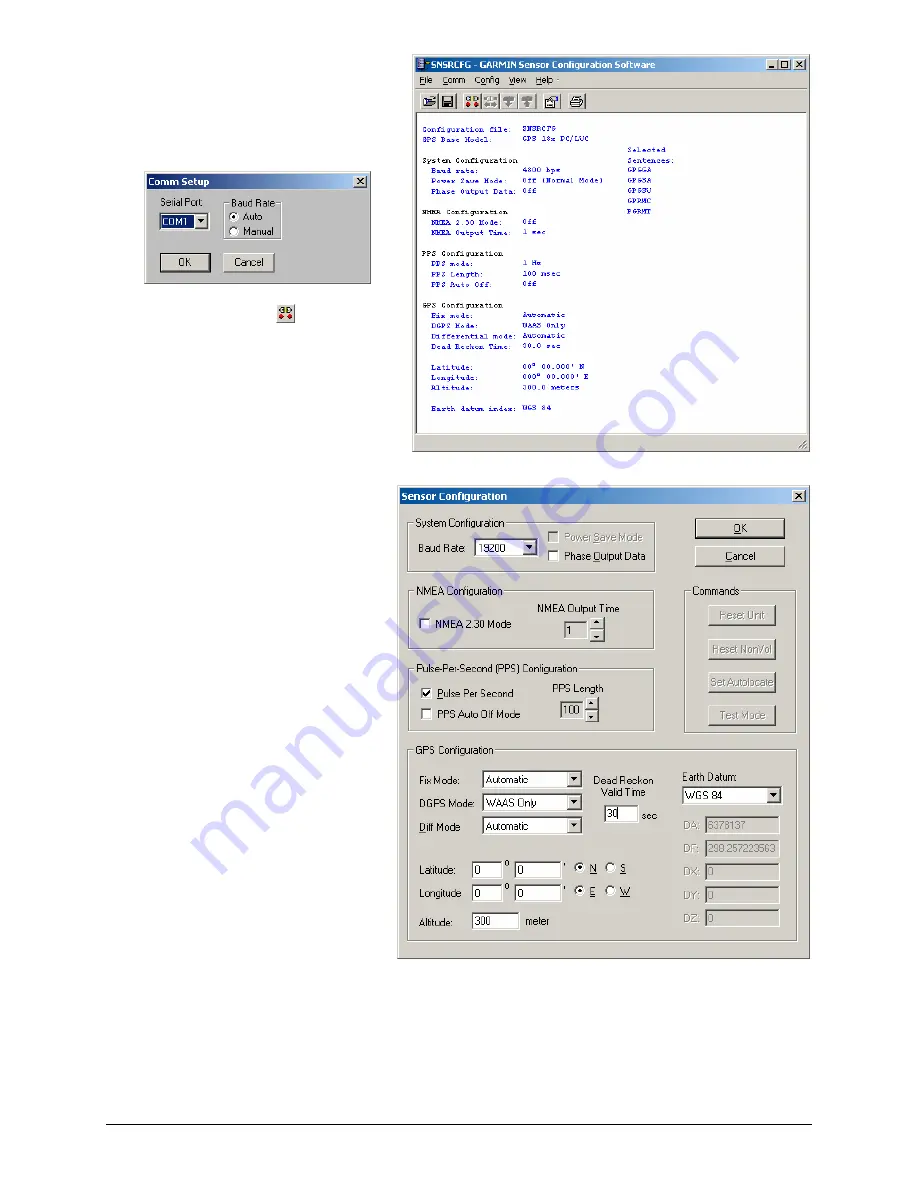
4.
Select the serial port to which the GPS 18x
is connected. Select
Auto
to have the
program automatically determine the baud
rate, or select
Manual
to manually select
the baud rate of the GPS 18x. Click
OK
when done.
5.
Click the Connect icon
, or select
Comm
>
Connect
to connect to the GPS
18x.
6.
To view the current programming of the
GPS 18x, select
Config > Get
Configuration from GPS
(or press the F8
key). The current programming of the GPS
18x is displayed in the window, as shown
on the previous page.
7.
Open the Sensor Configuration Window
by pressing the F6 key or selecting
Config > Sensor Configuration.
8.
Place a check mark in the box next to
“Binary Output Data” to change the GPS
18x to Garmin Mode. The unit will keep
this change in the programming until you
change it again in the software.
Note
: Selecting
Config
>
Switch to
Garmin Mode (
or pressing the F11 key)
only changes the unit to work in Garmin
Mode until power is cycled through the
unit again. For a more permanent
change, refer to step 8 above.
9.
Click
OK
.
10.
When you are ready to upload the
changes into the GPS 18x, select
Config
> Send Configuration to GPS
(or press
the F9 key). The new configuration is
then loaded into the GPS 18x.
11.
You may disconnect and close the
software when finished. The software
configuration can also be saved for
future reference.
Appendix E: Sensor Configuration
for complete information about downloading the Sensor Configuration Software application.
190-00879-08
GPS 18x Technical Specifications
Rev. B
Page 30


