background image

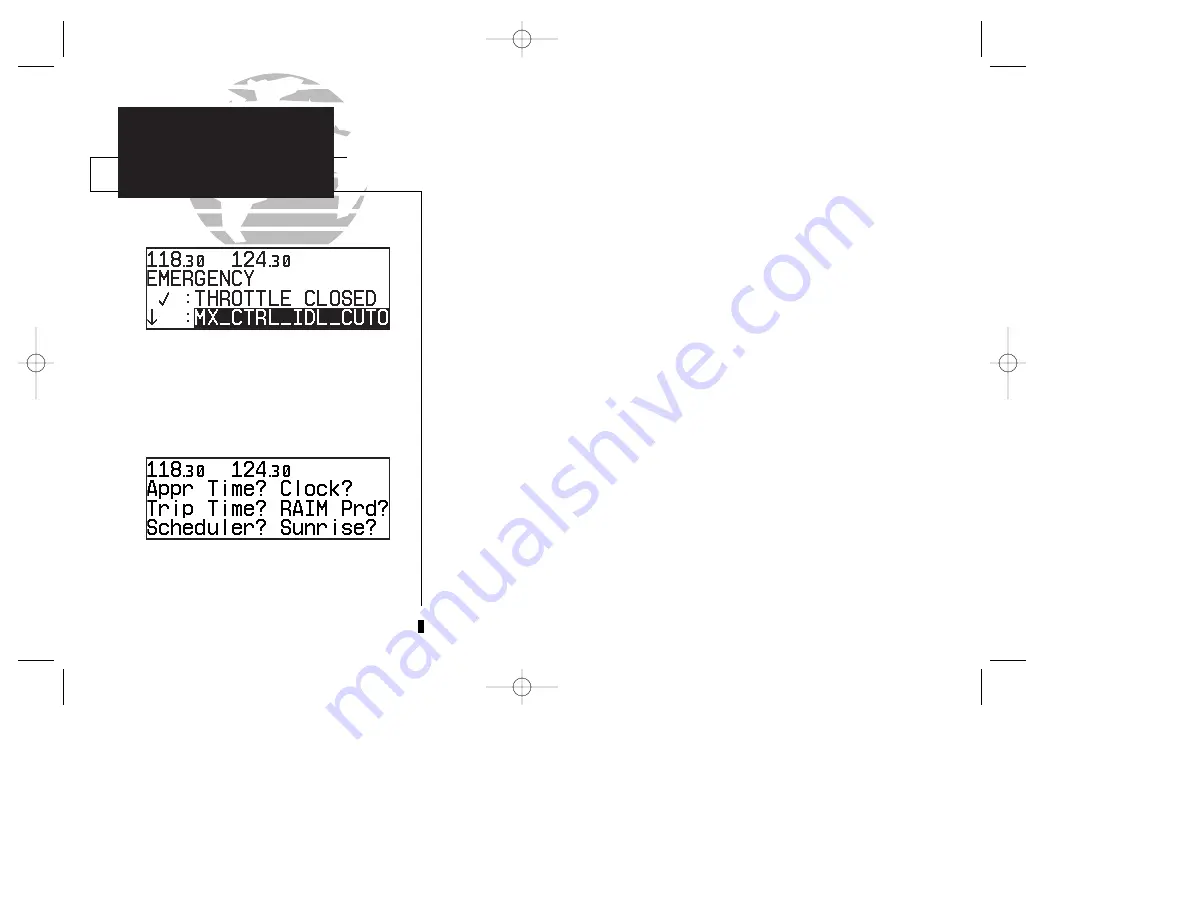
To execute a checklist:

1. Press 

N

and rotate 

O

until NAV Menu 1 is displayed.

2. Press 

C

twice and rotate 

O

until ‘Chklist?’ is highlighted. Press 

E

.

3. Use 

O

to highlight the checklist you would like to see. Press 

E

.

4. Press 

E

to check off list items.

To delete a checklist item or an entire checklist:

1. To delete a checklist item, highlight the desired item and press 

\

, followed by 

E

.

2. To delete an entire checklist, highlight the desired list and press 

\

, followed by 

E

.

The GNC 250XL’s 

NAV Menu 2

provides access to various timer and planning func-

tions, including:

•  

Approach timer

•  

Clock (Date and time)

•  

Trip Timer

•  

RAIM Prediction

•  

Scheduler messages

•  

Sunrise and sunset calculations

The 

approach timer 

acts as either a count up or a count down timer that can be

set or reset at any time.

To activate/change/view the approach timer:

1. Press 

N

and rotate 

O

until NAV Menu 2 is displayed.

2. Press 

C

twice and rotate 

O

until ‘Appr Time?’ is highlighted. Press 

E

.

3. Rotate 

K

to select either ‘Count up’ or ‘Count down’. Press 

E

.

4. Use 

K

and 

O

to set the time from which to begin counting. Press 

E

.

5. Rotate 

O

to select the desired function: ‘Start’, ‘Stop’, or ‘Reset’. Press 

E

to execute. 

28

NAV Menu 2

SECTION

1

NAV KEY

Checklists

Approach Timer

Executing a checklist.

250xl manual 2  7/17/98 1:27 PM  Page 28

Summary of Contents for GNC 250XL

Page 1: ...G N C 2 5 0 X L P i l o t s G u i d e a n d R e f e r e n c e 250xl manual 2 7 17 98 1 26 PM Page i ...

Page 2: ...250xl manual 2 7 17 98 1 26 PM Page ii ...

Page 3: ...for any purpose without the express written permission of GARMIN Information in this document is subject to change without notice GARMIN reserves the right to change or improve their products and to make changes in the content of this material without obligation to notify any person or organization of such changes or improvements March 1997 190 00067 60 Rev A Printed in USA GARMIN GNC 250XL Spell ...

Page 4: ...every 28 days A database information packet is included in your GNC 250XL package Pilots using an out of date database do so entirely at their own risk ii NOTE This device complies with Part 15 of the FCC limits for Class B digital devices This equipment gener ates uses and can radiate radio frequency energy and if not installed and used in accordance with the instruc tions may cause harmful inter...

Page 5: ... If any parts are missing or damaged please see your GARMIN dealer immediately Standard Package GNC 250XL Unit NavData Card GPS Antenna Installation Rack Connectors Pilot s Guide Quick Reference Guide Database Subscription Packet Warranty Registration Card Optional Accessories Remote Battery Pack AC Adapter PC Software Interface Kit User Data Card 28 to 14 volt DC converter iii INTRODUCTION Access...

Page 6: ...free from defects in materials and workmanship for one year from the date of purchase GARMIN International Inc will at its sole option repair or replace any components which fail in normal use Such repairs or replacement will be made at no charge to the customer for parts or labor The customer is how ever responsible for any transportation costs This warranty does not cover failures due to abuse m...

Page 7: ... with the GNC 250XL 33 Using the GNC 250XL s radio Section 3 Waypoint and Database Information W key 37 Finding and using database and waypoint information Section 4 Nearest Waypoints T key 57 Finding nearest waypoints SUAs and FSS ARTCC frequencies Section 5 Direct to D key Route Navigation R key 62 Creating and using routes v INTRODUCTION Table of Contents To quickly and easily locate informatio...

Page 8: ... NavData and User Data Card Use 87 Appendix B Installation and Maintenance of the GNC 250XL 89 Appendix C Simulator 90 Appendix D GNC 250XL Messages and Abbreviations 92 Appendix E Specifications 100 Appendix F Map Datums 101 Appendix G Index 103 vi 250xl manual 2 7 17 98 1 26 PM Page vi ...

Page 9: ...llel offset and closest point of approach functions are also performed using the route key See Section 5 for more route information W The waypoint key is used to view information such as runways frequen cies position and comments on airports VORs NDBs intersections and user waypoints See Section 3 for more waypoint information N The navigation key is used to view navigation and position informatio...

Page 10: ...ndow and enable the pilot to change frequencies Pressing twice will activate the cursor in the GPS window indicated by highlighted characters in a GPS window field It is used to highlight fields for data entry changing information or cycling through available options O The outer knob is used to advance through pages advance the cursor or move through data fields K The inner knob is used to change ...

Page 11: ...ng your GNC 250XL for the first time we recommend that you taxi to a location that is well away from buildings and other aircraft so the unit can collect satellite data without interruption Powering up the GNC 250XL The GNC 250XL s power and volume are controlled using the B power volume knob at the bottom left of the unit Rotating it clockwise will turn the unit on and increase the radio volume A...

Page 12: ... minutes If the unit can only obtain enough satellites for 2D navigation no altitude the unit will use the altitude provided by your altitude encoder if one is connected and working If not you will be prompted to enter the altitude with a Need alt Press NAV message If this message occurs press the N key and use the K and O knobs to enter the altitude shown on your altimeter Press E when finished I...

Page 13: ...ion frequency 1 Press C once to activate the cursor in the comm window 2 Rotate the outer knob O to select the MHz and the inner knob K to select the kHz of the desired frequency To place the standby frequency in the active field press Once you ve entered the active frequency simply repeat steps 1 and 2 to enter the standby frequency After both frequencies have been entered you may elect to keep t...

Page 14: ...ee Section 1 for more information to allow you to configure the unit to your own preferences The default settings are Altitude Your present GPS altitude Present Position Latitude and longitude displayed in degrees minutes Reference Waypoint The bearing and distance to the nearest airport The position page is one of seven pages available under the GNC 250XL s N key CDI page Map page NAVCOM page Pos...

Page 15: ...er position 4 Repeat steps 2 and 3 to spell out the rest of the waypoint identifier 5 Press E to confirm the identifier The direct to confirmation page will appear 6 Press E to confirm the destination Once the direct to destination is confirmed the CDI page will appear with the destination indicated in the lower left hand corner of the screen Your present speed and track over the ground and the di...

Page 16: ... destination based upon your present speed and course in hours and minutes The next page available from the N key is the map page The map page com bines the primary navigation information from the CDI page distance to waypoint ground speed and track with a moving map display The moving map display shows your current position using an airplane symbol or a diamond symbol relative to near by airports...

Page 17: ...d speed and map scale The destination waypoint name and desired track appear on the left side of the page below the communication frequencies The other data fields are located at the corners of the map display as shown in the illustration above and may be removed by pressing 7 Communication frequencies are shown in the top left corner of the map page instead of across the top line as shown on othe...

Page 18: ...ur departure position To view the NAVCOM page from the map page rotate O one stop to the right The NAVCOM page lists your departure and arrival airports on the left side of the page with all the database frequencies listed in a column down the right side of the page To scroll through the list of frequencies simply rotate the inner knob K in the direction of the arrow prompts at the bottom left of ...

Page 19: ...he nearest feature can also be used to quickly find the contact frequency of the nearest airport and enter it in the standby field To view the nine nearest airports 1 Press the T key The nearest airport will be displayed with the range and bearing from your present position along with elevation frequency and runway data 2 To review the rest of the nearest airport list rotate the K knob to the righ...

Page 20: ...t waypoint page To select a nearest waypoint as a direct to destination 1 Press the D key The direct to confirmation page for the selected waypoint will appear 2 Press E to confirm Congratulations You ve now gone through the basic operation of the GNC 250XL We encourage you to experiment with your new GPSCOM to get to know all the advanced navigation features it has to offer If you d like a little...

Page 21: ...pecific instructions will appear and the indicator will flash If you leave the NAV page sequence for another set of pages the last NAV page displayed will appear when you return to the nav sequence 11 SECTION 1 NAV KEY Overview Remember The NAV pages will only display information AFTER the position and navigational information has been calculated from the satellites If you are on the Position page...

Page 22: ...aypoint The TO FROM arrow in the center of the scale indicates whether you are heading to an up arrow the waypoint or if you have passed the waypoint a down arrow The default setting of the CDI scale is 5 0 nm If you are not navigating to a destination the CDI field will display a no actv wpt message and only speed and track data will be available The CDI field is also used to display the GNC 250X...

Page 23: ... the waypoint cts Course to steer to reduce cross track error and re intercept course dtk Desired track the course between the active from and to waypoints trk Track the direction of movement relative to the ground trn Turn the direction and degrees to turn to get back on course The following information can be displayed in the time field eta Estimated Time of Arrival at the active to waypoint ete...

Page 24: ...ions user waypoints and airspace boundaries Note If the GNC 250XL is unable to determine a GPS position the present position symbol will not appear on the map page The top left corner of the page indicates the active and standby communica tions frequencies unlike other GNC250XL screens which display both frequen cies across the top line with the active frequency on top 14 To change the map scale r...

Page 25: ...o increase the map scale and show a larger area 2 Rotate the K knob counterclockwise to decrease the map scale and show a smaller area The autozoom feature will automatically adjust from an en route scale of 300 through each lower scale stopping at a scale of 1 as you approach your destination waypoint The autozoom feature is turned on off from the map setup page described on page 76 The orientati...

Page 26: ...need along your flight path To scroll through the list of frequen cies rotate the inner knob K in the direction of the arrow prompts at the bottom left of the page The frequencies displayed for the departure and arrival airports are listed in the order you are most likely to use them see left with the available frequencies dis played to the right of the airport identifier If you do not have an act...

Page 27: ...O Information contained on these pages is covered in Section 3 To return to the NAVCOM page press N Some frequencies in the NAVCOM page have tags which designate their usage tx transmit only rx receive only pt part time frequency To make any of the frequencies on the NAVCOM page the standby frequency 1 Press C twice to activate the cursor in the GPS window 2 Rotate O until the desired frequency is...

Page 28: ...gation needs The altitude field can display either the present altitude minimum safe altitude MSA or enroute safe altitude ESA MSA is the recommended minimum altitude within a ten mile radius of your present position ESA is the recommended minimum altitude within a ten mile radius of your course on an active route or direct to MSA and ESA altitudes are calculated from information contained in the ...

Page 29: ... bearing from a specific waypoint to be displayed 4 Press C to remove the cursor or If you have selected wpt 5 Rotate O to advance the cursor to highlight the identifier field 6 Use the K and O knobs to enter the identifier name This waypoint identifier can be an airport VOR NDB intersection or user waypoint Press E 7 Press C to confirm the selection This allows the distance and bearing from any w...

Page 30: ...nd rotate O until the satellite status page appears The top line of the status page displays the receiver status and the current posi tion accuracy in DOP or EPE The default setting is DOP The following functions may be displayed in the DOP EPE field dop Dilution of Precision a measure of the satellite geometry quality and relative accuracy of your position with 1 indicating good geometry and 10 i...

Page 31: ...ar when you are receiving DGPS corrections in 3D mode Simulator The GNC 250XL is in simulator mode which should only be used for practice and trip planning Never use simulator mode for actual navigation Poor Cvrg The GNC 250XL cannot acquire sufficient satellites for navi gation Need Alt The GNC 250XL needs altitude in order to start continue navigation Go to the position page and enter the altitu...

Page 32: ...lite s azimuth elevation and other data is also available To view individual satellite information 1 Press N and use O to display the satellite status page 2 Press C twice to activate the cursor in the GPS window 3 Use O to highlight the satellite number you wish to view and press E This will display the satellite data page showing the selected satellite s number elevation angle rise or fall indic...

Page 33: ... manually to calcu late several possible ETEs To use the trip planning function 1 Press N and rotate O until NAV Menu 1 is displayed 2 Press C twice then E to access trip planning 3 Rotate K to select waypoint mode or desired route number and press E 4 For direct to navigation use K and O to enter the to and from waypoints Press E to accept the waypoints To use your present position as a waypoint ...

Page 34: ...s and press E 7 Use K and O to enter the total air temperature tat 8 Press E and the density altitude and true airspeed will be calculated and displayed 9 Press C to remove the cursor If your installation includes components to provide any of the information required on the density altitude page they will be used as the defaults The fuel planning page will display fuel requirements for both direct...

Page 35: ...4 is leg 1 leg 2 leg 3 leg 4 6 Rotate O to advance the cursor to fob or gs depending on which is displayed 7 Use K and O to enter the fuel on board or the ground speed Press E 8 Rotate O back two positions to highlight the fob or gs field again 9 Rotate K to display the other information Press E 10 Use K and O to enter the remaining data Press E 11 Use K and O to enter the flow rate in units per h...

Page 36: ... wind direction and speed and head tail wind will be displayed The VNAV function calculates vertical speed requirements to reach a desired altitude before or after a specified distance from a waypoint This is helpful when you d like to descend to a cer tain altitude near an airport or climb to an altitude before reaching a route or direct to waypoint To calculate vertical navigation parameters 1 P...

Page 37: ...s These checklists can be called up at any time for review and are useful for creating pre flight checklists landing checklists emergency proce dures etc Each name or function can have up to 16 characters each To create a checklist 1 Press N and rotate O until NAV Menu 1 is displayed 2 Press C twice and rotate O until Chklist is highlighted Press E 3 Press C and use O to highlight the checklist yo...

Page 38: ... func tions including Approach timer Clock Date and time Trip Timer RAIM Prediction Scheduler messages Sunrise and sunset calculations The approach timer acts as either a count up or a count down timer that can be set or reset at any time To activate change view the approach timer 1 Press N and rotate O until NAV Menu 2 is displayed 2 Press C twice and rotate O until Appr Time is highlighted Press...

Page 39: ...local time to be displayed in the time fields Press E 4 Use K and O to set the local date Press E 5 Use K and O to set the local time Press E 6 Press C to complete The GNC 250XL s trip timer will automatically keep track of the duration of your current trip and can be configured to run either when the GNC 250XL is on or when your ground speed exceeds a specified value see section 6 To view or rese...

Page 40: ...ss C twice and rotate O to highlight RAIM Prd Press E 3 Rotate O to highlight the field which you would like to change 4 Use K and O to enter the waypoint name or leave it blank to use your current position Press E to accept 5 Use K and O to enter the ETA in hours and minutes in local or UTC time whichever you have selected from the clock display and the day month and year The current date will be...

Page 41: ...s E 4 Rotate O to highlight the message you would like to edit To delete press then E 5 Use K and O to enter the message Press E 6 Use K and O to set the time to elapse before the message is displayed in hours and minutes up to 99 hours and 59 minutes this time is cumulative and counts whenever the GNC 250XL is on in normal operating mode 7 Press E You may edit another scheduled message by repeati...

Page 42: ... date To calculate sunrise and sunset times at a waypoint or at your present location 1 Press N and rotate O until NAV Menu 2 is displayed 2 Press C twice and rotate O to highlight Sunrise Press E 3 Use K and O to enter the waypoint identifier or leave blank to use current position Press E 4 Press E to accept the waypoint information 5 Use K and O to enter the date desired 6 Press E and the sunris...

Page 43: ...ive frequency may not by accessed directly Whenever the cursor is active in the comm window the standby frequency will be highlighted To access the standby frequency press C This allows you to change the megahertz number to the left of the decimal by rotating O and the kilohertz number to the right of the decimal by rotating K If you would like to keep the standby field hot ready for an immediate ...

Page 44: ...ting the standby frequency field the GPS field in use will become splatted or blocked out Once the standby frequency has been entered you may return to data entry by pressing the C key The cursor will return to the active GPS field at the point where data entry was interrupted The GNC 250XL s auto tune feature allows you to quickly select any database frequency in the GPS window as your standby fr...

Page 45: ...L is powered up the automatic squelch will be in the on position allowing only transmissions which are powerful enough for clear broad cast to be received Manual squelch control is not available To override the automatic squelch control 1 Press the Q key Press Q again to return to automatic squelch Whenever the GNC 250XL is transmitting a tx icon will appear between the active and standby frequenc...

Page 46: ...ature provides a quick method of selecting the 121 5 MHz frequency as the active frequency in the event of an in flight emergency The emergency channel select is available whenever the unit is on regardless of GPS or cursor status or loss of the display To automatically tune for emergency transmission 1 Press and hold the key for more than two seconds 36 250xl manual 2 7 17 98 1 27 PM Page 36 ...

Page 47: ...ng the W key and rotating the outer knob until the desired page is displayed or by pressing the W key repeatedly 37 SECTION 3 WPT KEY Overview Please note that your GNC 250XL uses ICAO identifiers for all airports All U S airport identifiers which contain only letters use the prefix K For example Los Angeles International is KLAX under the ICAO standard Other airports such as Otten Memorial 3VS th...

Page 48: ...E or TACAN and weather broadcast indication NDBs Identifier city state country facility name position lat lon frequency and weather broadcast indication Intersections Identifier country position lat lon nearest VOR User Identifier name position lat lon reference waypoint To view the waypoint information for a desired waypoint select the waypoint category from the waypoint menu page To choose a way...

Page 49: ...d rotate O to display the waypoint menu page 2 Press C twice and rotate O to highlight the desired waypoint category 3 Press E to accept the waypoint category 4 Rotate O to highlight the middle field to enter location city OR Rotate O to highlight the bottom field to enter facility name or VOR NDB name 5 Use K and O to enter the location or the name and press C to finish As the information is ente...

Page 50: ...de extensive information through a set of waypoint pages for the selected cate gory The pages available for each waypoint category are presented here in the order they appear on the waypoint menu page airports VORs NDBs intersections and user waypoints Airport Information To scroll through the airport pages 1 Make sure the cursor is not present If it is press C 2 Rotate O in either direction to sc...

Page 51: ...trolled lighting frequencies airport comments allows entry of desired airport by identifier displays user comments for the selected airport The airport identification page displays a selected airport s identifier region and country city state and facility name The identification page is always the first airport page available allowing you to quickly review an airport facility or select another fac...

Page 52: ...0 octane or mogas is available jet Jet A Jet A 1 or Jet A fuel is available av jet Both av gas and jet fuel are available Position In degrees minutes or degrees minutes seconds of latitude and longitude Approach Information displays the airport approaches available no apr No approach is available np apr Non precision approach is available loc Localizer approach is available ils ILS approach is ava...

Page 53: ...affic frequency ctf Common traffic advisory frequency CTAF mf Mandatory frequency oth Other frequencies Frequencies with restriction information dep Departure apr Approach arv Arrival class B cta ICAO control area tma ICAO terminal control area class C trsa Terminal radar service area Receive only frequencies will be followed by an rx indicator while transmit only frequencies will display a tx If ...

Page 54: ... a localizer and or ILS are used on the same runway rotating K will sequence through both sets of information The following descriptions and abbreviations are used on the airport runway page Runway surfaces hard Hard concrete asphalt etc turf Turf grass seal Sealed surface grav Gravel surface dirt Dirt surface soft Unknown soft surface unkn Unknown surface watr Water landing site Runway lighting p...

Page 55: ...fier city or facility name see page 39 on a VOR waypoint page The VOR identification and comments pages are identical in form and function to their airport page counterparts To scroll through the VOR pages 1 Make sure the cursor is not present If it is press C 2 Rotate O in either direction to scroll through the available pages In addition to displaying the VOR frequency magnetic variation and pos...

Page 56: ... Make sure the cursor is not present If it is press C 2 Rotate O in either direction to scroll through the available pages The NDB position page see above displays the selected facility s identifier fre quency and position as well as any weather broadcasts available The NDB comment page will display any user comments for the selected NDB see page 54 for instruc tions on entering user comments 46 N...

Page 57: ...t If it is press C 2 Rotate O to toggle between the available pages The intersection position page displays the selected facility s identifier region and or country latitude and longitude and the identifier distance and bearing to the nearest VOR not necessarily the VOR used to define the intersection The intersection com ment page will display any user comments for the selected intersection see p...

Page 58: ...O User waypoints may be created or modified using the W key After select ing the waypoint identifier as shown on page 39 you will be prompted to enter infor mation if the waypoint is new There are three ways to create a user waypoint s posi tion from the W key 1 Enter the exact position of the new waypoint 2 Reference a known waypoint by range and bearing 3 Enter a range and bearing from your curr...

Page 59: ...to enter the latitude You may select either north or south and enter a latitude up to but not including 90 2 Press E 3 Use K and O to enter the longitude You may select either east or west and enter a longitude up to but not including 180 4 Press E Once the latitude and longitude have been entered the cursor will move to the reference waypoint field where you may enter a reference waypoint to calc...

Page 60: ...ter the distance from the reference waypoint 6 Press E The latitude and longitude will be calculated for the waypoint 7 Press E to confirm the ok prompt and save the waypoint position If you have chosen to create a waypoint at a certain bearing and distance from your current position your current position will be displayed and you will enter the bearing and distance at which you would like the new...

Page 61: ... a sign This will help you differentiate AutoStore waypoints from other user waypoints To change the default name or route of an AutoStore waypoint 1 Rotate O to select the name or route number field 2 Use K and O to enter the name or route number If you do not want to add the way point to a route be sure to keep the route field blank 3 Press E to accept 4 Press E to confirm the ok prompt If the w...

Page 62: ...r It may be an airport VOR NDB intersection or user waypoint Press E 4 Use K and O to enter the radius of the alarm circle Press E If two proximity waypoints are entered and their regions overlap you will be informed with the message Proximity overlap This message will be displayed each time you turn on the GNC 250XL for as long as the overlap remains Warning If you enter the overlap area you will...

Page 63: ...active or stored route or a proximity waypoint To edit rename or delete waypoints the cur sor must highlight the desired waypoint To highlight a waypoint 1 Press C twice and use O to highlight the desired waypoint To edit a highlighted waypoint s position 1 Press Eto obtain the waypoint position page Edit the waypoint position as described on page 49 Note The active to waypoint cannot be edited To...

Page 64: ... and use O to highlight either the second or third line 4 Use K and O to enter the comment 5 Press E to accept and repeat steps 4 and 5 if necessary to enter information on the other line 6 Press C to remove the cursor To view the waypoints with comments list 1 Press W and use O to display the Wpts with comments page 2 Use K to scroll through the list The GNC 250XL will display the waypoints with ...

Page 65: ... duplicate waypoint page for you to choose the desired waypoint The waypoint identifier and number of duplicates will be shown at the top of the page with the waypoint type and region of each duplicate indicated below The way points listed are sorted by the distance from your present position To scroll through additional duplicate waypoints 1 Rotate O with the cursor active or K with the cursor in...

Page 66: ...ed from routes the proximity waypoints list or waypoints with comments page by following the instructions in the appropriate section of this manual The waypoint scanning feature provides a fast way to scan through airports VORs NDBs and intersections in the database by identifier facility name or city Waypoint scanning may be used from any blank identifier field in the GPS window To enter a waypoi...

Page 67: ...t eight nearest airports rotate K You may examine both the communication frequencies and the runway information directly from the nearest airport page You may also place the displayed frequency into the standby field by pressing E from the nearest airport page To view more comm runway information 1 Press C twice and rotate O to highlight the comm field or the runway field 2 Rotate K to scroll thro...

Page 68: ...rts are based on three dimensional data latitude longitude and altitude to avoid nuisance alerts The alert boundaries for controlled air space are also sectorized to provide complete information on any nearby airspace Once you have met one of the described conditions the message annunciator will flash alert ing you of an SUA message To view an SUA message 1 Press the M key 2 Press M again to retur...

Page 69: ... the top right of the page will only be displayed if you are projected to enter the airspace The second line of the SUA alert page displays the name or controlling agency of the SUA along with the type of SUA to which you are being alerted To toggle between the SUA name and controlling agency display 1 Rotate K one stop in either direction If the SUA name or controlling agency is too long to fit o...

Page 70: ...rminal Radar Service Area unsp Unspecified warn Warning The last line on the SUA alert page displays the SUA s controlling airport identifier and the ceiling and floor altitudes for the SUA alert Controlling agency frequencies may be viewed by highlighting the controlling airport identifier with the cursor and pressing E The following are examples of what can appear in the altitude fields Message ...

Page 71: ...ages will still be available from the T key The GNC 250XL also features an altitude buffer which may be set to provide a greater level of protection from penetrating an SUA By specifying an altitude in the buffer you can effectively stretch an SUA s altitude boundaries in both directions This allows the pilot to add an extra margin of prevention around controlled or restricted airspace For instruc...

Page 72: ... waypoint in the route the GNC 250XL s automatic leg sequenc ing and turn anticipation features will automatically select the next waypoint as the active to waypoint and provide smooth steering guidance around the turn If you are not currently navigating a particular route leg e g your starting position is not a route waypoint the GPS will select the appropriate leg as the active route segment 62 ...

Page 73: ...he D key followed by E twice A direct to may also be quickly activated from many pages that display a single waypoint identifier e g the nearest airport page by simply pressing D and E For pages that display a list of waypoints e g the user waypoint list page you must highlight the desired waypoint with the cursor before pressing the D key Once a direct to is activated the GNC 250XL will provide n...

Page 74: ...ur destination with the GNC 250XL s course select feature The course select feature is available from the bottom line of the direct to confirmation page and works like selecting your desired course on a VOR indicator To manually set a course 1 Press the D key The direct to confirmation page will appear 2 Rotate O to place the cursor on the course select field 3 Use K to begin entry of the selected...

Page 75: ...routes 1 19 before it is cancelled overwritten or erased The GNC 250XL s route catalog page is used to create edit delete or copy routes and serves as the main page for a host of functions These include route acti vation determining the closest point of approach and search and rescue operations It also displays a summary of routes currently stored in memory with the departure and arrival route way...

Page 76: ... create new routes and edit existing routes Creating routes before takeoff can help make route operations faster and easier during your flight To create or edit a route from the route catalog page 1 Use K to display the route number you would like to edit 2 Press C twice 3 Use K to select edit Press E The route review page will appear To add a waypoint 4 Rotate O to highlight the first blank waypo...

Page 77: ...laces the selected route into route 0 and overwrites the existing active route To activate a route 1 Press R and use O to display the route catalog page 2 Rotate K to display the route you would like to activate 3 Press C twice and use K to display activate Press E After travelling a route or creating a route with the GNC 250XL s AutoStore feature the route activation field may be used to activate...

Page 78: ...d helps when creating new route waypoints referenced to a NAVAID To calculate the closest point of approach CPA from the route catalog page 1 Use K to display the route you would like to use for the CPA function The route must consist of at least two waypoints and the reference facility must fall between the waypoints of a route leg 2 Press C twice and rotate K to select cpa Press E 3 Use K and O ...

Page 79: ...o enter the initial offset value and R or L 7 Press E three times to accept the operation values and begin navigation After activating a search and rescue you will be informed with an Offset nav in effect message each time you traverse the route offset from the anchor waypoints and the CDI page will guide you along each leg of the ladder pattern Note that bearing and distance information are refer...

Page 80: ...ss C twice and use O to highlight the parallel track value field 4 Use K and O to enter the desired distance and direction R or L from the leg 5 Press E to accept The map page will display the offset route as a solid line and the original route as a dashed line It is important to note that offset navigation is only available on route navigation not direct to navigation When offset navigation is ac...

Page 81: ...tating O left continuously It will also appear whenever a route is activated To scroll through the active route waypoints 1 Rotate K with the cursor inactive or O with the cursor active The active leg identifiers field located at the top left of the page displays the way point identifiers of the route leg you are currently navigating The first waypoint iden tifier displayed is the active from wayp...

Page 82: ...ate K to select the desired setting and press C The active route page may also be used to create a new route or edit the route you are currently navigating and provides a fast method of selecting any route waypoint as your next destination waypoint without modifying the active route If you are editing the active route and want to save it in its original form copy it to an open storage route before...

Page 83: ...ide guidance to the selected waypoint and resume navigating the remainder of the route in sequence once you arrive at the next destina tion waypoint The waypoint sequencing field located at the bottom left of the direct to confirmation page allows you to select manual or automatic waypoint sequencing of route waypoints Setting the selector to the hold setting holds your current active to waypoint ...

Page 84: ... anticipation next desired track and waypoint arrival information to the pilot The GNC 250XL s turn anticipation feature will smooth out the transition between adjacent route legs by providing CDI guidance along a curved path segment This leg transition is based on the aircraft s actual ground speed and the difference between the course angle of the two legs The GNC 250XL will automatically sequen...

Page 85: ...previous page The GNC 250XL s settings submenu is also accessed from the M key To view the settings submenu press and hold M for more than 2 seconds Once the settings submenu has been accessed the following setup pages are available by rotating O with the cursor inactive Map page settings CDI scale settings Nearest airport search Mag var arrival alarm settings Battery saver Display screen settings...

Page 86: ...M then rotate O to select the MAP Setup page 2 Press C twice to highlight the orientation field 3 Rotate K to select trk up dtk up or nrth up The automatic zoom feature will automatically adjust the map display scale dur ing your flight Starting at an en route scale of 300 nautical miles statute miles or kilometers the scale will adjust through each lower scale stopping at a scale of 1 as you appr...

Page 87: ...2 Press C twice and rotate O to highlight apt ident vor ident ndb ident int ident or user ident 3 Rotate K to select the maximum map scale for that waypoint category or select off to disable the waypoint identifiers The boundaries for airspaces that appear on the map display may be enabled or disabled by airspace type As described above for waypoints you select the maxi mum scale at which the airs...

Page 88: ... select the CDI Settings page 2 Press C twice and rotate K to select Auto 5 0 nm 1 0 nm or 0 3 nm 3 Rotate O to highlight ok and press E to approve Note the selected CDI scale will not take effect until approved The scale values represent full scale deflection of the CDI to either side The default setting is 5 0 nm The Auto setting will start the CDI scale at 5 nm en route and gradually ramp down ...

Page 89: ...ed the set distance up to 99 9 units an Arrival at _____ message will be displayed To set the arrival alarm distance 1 Press and hold M and use O to display the Mag Var Arvl Alarm page 2 Press C twice and use O to select the arrival distance field 3 Use K and O to enter the desired distance Press C to finish The nearest airport search settings allow you to define the runway length and surface type...

Page 90: ...ht the display until a key is pressed or a knob is turned To set the display timeout 1 Press and hold M and rotate O to display the Battery saver page 2 Press C twice to activate the cursor 3 Rotate K until the desired value is displayed 0 30 60 or 90 seconds Entering 0 will leave the display on at all times Press C to finish The GNC 250XL features automatic contrast and backlighting control to ad...

Page 91: ...ings page 2 Press C twice and use O to highlight the mode field 3 Rotate K to select pstv ngtv or auto 4 If auto is selected rotate O to highlight the threshold level and use K to select the level at which the display will switch from positive to negative for night time use Note Some experimentation may be necessary to obtain the desired response level The backlight intensity settings control the ...

Page 92: ...minimum To change the trip timer settings 1 Press and hold M and use O to display the trip timer settings page 2 Press C twice to activate the cursor 3 Use K to select either pwr is on or gs exceeds 4 If you choose pwr is on press C to complete 5 If you choose gs exceeds use O to highlight the speed field 6 Enter the speed using K and O 7 Press E to accept and press C to complete 82 SECTION 6 UNIT...

Page 93: ...asure are position degrees minutes and seconds dms hddd mm ss s degrees and minutes dm hddd mm mmm altitude feet ft meters mt vertical speed feet per minute fpm meters per minute mpm meters per second mps nav units nautical miles and knots nm kt statute miles and miles per hour mi mh kilometers and kilometers per hour km kh fuel gallons gl imperial gallons ig kilograms kg pounds lb liters lt press...

Page 94: ...or example if the buffer is set at 500 feet and you are more than 500 feet above or below an SUA you will not be notified with an alert message if you are less than 500 feet above or below an SUA and projected to enter it you will be notified with an alert message The default setting for the altitude buffer is 200 feet To set the warnings or change the altitude buffer 1 Press and hold M and use O ...

Page 95: ...e 2 Press C twice 3 Use O to highlight the current map datum 4 Use K to change the datum 5 Press C to complete To create a user datum 1 Press and hold M and use O to highlight the map datum page 2 Press C twice 3 Use O to highlight Define user datum Press E 4 Enter the five parameters of the map datum using K and O Press E to accept a field The signs of each value should follow the convention WGS8...

Page 96: ...aud rate The I O setup page only provides access to I O channel 2 input output For information on using I O channel 1 please see your GNC 250XL installation manual To change the output settings for I O channel 2 1 Press and hold M and rotate O until the I O setup page is displayed 2 Press C twice and rotate K to select off or plotting for output to an RS 232 device 3 Rotate O to advance the cursor...

Page 97: ...placed within 30 seconds the GNC 250XL will automatically reinitialize You may also reinitialize the unit manually by pressing E An optional user data card can be used to make a backup of user waypoints routes etc and transfer information to another GNC 250XL To save user data to the user data card 1 Install the user data card 2 Rotate O to highlight Save user data Press E to confirm The message S...

Page 98: ... in the database Replacing the data will replace ALL user data with the data from the card Updating the data will not delete unrelated material but will only change what is necessary to use the data received from the user data card 5 Rotate O to select either Replace or Update 6 Press E to begin transferring data to the GNC 250XL The GNC 250XL will now transfer all of the data requested This may t...

Page 99: ...l the GNC 250XL can be removed from the rack 89 The GNC 250XL is built to exacting standards and does not require user maintenance If the faceplate and lens require cleaning use a soft cloth and non abrasive cleaner The user data is maintained by an internal battery with a projected life of 3 to 5 years If the GNC 250XL detects a low memory battery you will be informed with the message Memory batt...

Page 100: ...he welcome page will be replaced by the operating mode page 2 Rotate O to move the cursor over the operating mode field Normal 3 Rotate K to select Simulator and press the E key The cursor will advance to the ok prompt 4 Press E to confirm Once the GNC 250XL has been placed in simulator mode the database confirma tion page will appear showing the operating dates cycle number and database type avai...

Page 101: ...de should never be used for actual navigation During simulator operation you will be able to enter a ground speed from the CDI page and define a course to a destination from the direct to con firmation page Altitude may only be entered by using the VNAV function available from the NAV menu 1 page see page 26 To enter a ground speed from the CDI page 1 Press N and rotate O to display the CDI page 2...

Page 102: ... has been made to modify the position of the active to or active from waypoint The GNC 250XL will not allow the modifications Cannot nav lockd rte An attempt has been made to activate a route containing a locked waypoint The GNC 250XL cannot perform navigation in this situation Cannot ofst goto rte An attempt has been made to engage the offset navigation feature while the GNC 250XL is nav igating ...

Page 103: ...allation configuration memory The unit is not usable and should be taken to an authorized service center Final altitude alert The suggested altitude is within 1000 feet of the final altitude entered on the VNAV Planning page Fuel Air input fail The fuel and or air data input is not available to the GNC 250XL Check the I O settings or fuel air data system installation Inside SUA You have entered a ...

Page 104: ...e GNC 250XL has detected excessive drift in its internal crystal oscillator which may result in longer acquisition time The unit should be taken to an authorized service center immediately Poor GPS coverage The GNC 250XL cannot acquire sufficient satellites necessary to provide navigation Prox alarm press NAV Your craft has penetrated the alarm circle of a proximity waypoint Press NAV to see the b...

Page 105: ... persists the GNC 250XL is unusable and should be taken to an authorized GARMIN service center Remote ENT key stuck The remote ENT key is stuck in the pressed state Check the installation Remote XFR key stuck The remote XFR key is stuck in the pressed state Check the installation ROM failed The GNC 250XL has detected a failure in its permanent memory If this message occurs the unit is unusable and...

Page 106: ...UA within the next 10 minutes SUA near ahead Your position is within two nautical miles of an SUA and your current course will take you inside Timer expired The approach timer has expired User data RX started Data receive operations have started Usr data TX complete Data transmit operations are complete VNAV cancelled The VNAV function has been cancelled due to a change in the active route WGS 84 ...

Page 107: ...a CTAF Common Traffic Advisory Frequency CTF Common Traffic Advisory Frequency CTR Center ARTCC CTS Course To Steer CUM Cumulative DALT Density Altitude DEG Degrees DEP Departure DIS Distance To Waypoint DME Distance Measuring Equipment DOP Dilution of Precision DTK Desired Track ELEV Elevation ENDUR Endurance EPE Estimated Position Error ESA Enroute Safe Altitude ETA Estimated Time of Arrival ETE...

Page 108: ... Hour MI Statute Miles MIC Microphone MIN Minimum MIN Minutes MOA Military Operations Area MPM Meters Per Minute MPS Meters Per Second MSA Minimum Safe Altitude MT Meters MUL Multicom NDB NDB Waypoint NM Nautical Miles NP Non Precision NR Nearest OBS Omni directional Bearing Select Inbound Course Select OTH Other ºC Degrees Celsius ºF Degrees Fahrenheit PC Pilot Controlled POSN Position PRES Barom...

Page 109: ... Airspeed TAT Total Air Temperature TEMP Temperature TMA ICAO Terminal Control Area TRK Track Angle TRN Turn Angle TRSA Terminal Radar Service Area TWR Tower TX Transmit Only U UTC Time UNI Unicom URA User Range Accuracy USER User Waypoint USR User Waypoint UTC Universal Time Coordinated GMT Zulu VN VNAV or Vertical Navigation VNAV Vertical Navigation VOR VOR Waypoint WPT Waypoint WX Weather XFR T...

Page 110: ...attery pack 115V or 230V AC w optional adapter ENVIRONMENTAL Temperature 4 F to 158 F 20 C to 70 C Operating 67 F to 185 F 55 C to 85 C Storage PERFORMANCE Comm 760 channel aviation band 118 136 975 MHz 5 watt minimum transmit power Receiver 12 channel PhaseTrac12 Acquisition Time 45 seconds typical 15 seconds warm start with ephemeris Update Rate 1 per second continuously Accuracy 15 meters 49ft ...

Page 111: ...uay CORREGO ALEGRE Brazil DANISH GI 1934 Denmark DJAKARTA BATAVIA Sumatra Island Indonesia DOS 1968 Gizo Island New Georgia Islands EASTER ISLAND 1967 Easter Island EUROPEAN 1950 Austria Belgium Denmark Finland France Germany Gibraltar Greece Italy Luxembourg Netherlands Norway Portugal Spain Sweden Switzerland EUROPEAN 1979 Austria Finland Netherlands Norway Spain Sweden Switzerland FINLAND HAYFO...

Page 112: ...HAWAIIAN KAUAI Kauai OLD HAWAIIAN MAUI Maui OLD HAWAIIAN MEAN Mean Value OLD HAWAIIAN OAHU Oahu OMAN Oman ORD SRV GRT BRITAIN England Isle of Man Scotland Shetland Islands Wales PICO DE LAS NIEVES Canary Islands PITCAIRN ASTRO 1967 Pitcairn Island PORTUGUESE 1973 Portugal POTSDAM Germany PROV SO AMERICAN 56 Bolivia Chile Colombia Ecuador Guyana Peru Venezuela PROV SO CHILEAN 1963 South Chile PUERT...

Page 113: ...ic zoom 76 AutoStore 51 Auto tune 34 B Battery saver 80 Backlighting 82 C Cautions ii CDI 4 6 12 78 CDI page 4 6 11 13 78 CDI sensitivity setting 12 78 Channel 2 I O 86 Checking GPS coverage 20 21 30 Checklists 27 28 Clear key viii Clock function 29 Closest point of approach CPA 68 Communication features 33 36 Communications pages 33 36 43 Communication frequencies 3 33 Communication window 3 Cont...

Page 114: ...tions 17 43 Fuel planning 24 25 G Going to a nearest airport 57 GPS planning 30 Ground speed 16 Ground track TRK 16 H Hold on a waypoint 74 I Inner knob viii Installation of the GNC 250XL 89 Intersections 38 47 I O Outputs 86 K Key functions vii viii Knob functions vii viii L Locked waypoints 56 M Magnetic variation 79 Map datums 85 101 102 Map display 6 7 Map orientation 15 Map page 6 8 11 14 16 ...

Page 115: ...5 Route comments 65 Route key vii Route navigation 62 Routes 62 74 Runway page 44 Runway surface 44 80 S Satellite acquisition 2 Satellite data page 22 Satellite information 21 22 Satellite status page 2 11 20 22 Scheduler 31 Search and rescue operations 69 Settings submenus 75 Simulator mode 90 Special Use Airspace SUA 58 61 Specifications 100 Standby frequency 3 17 33 Storing user data 87 SUA al...

Page 116: ...ories 38 Waypoint comment list 37 54 Waypoint comments page 54 Waypoint confirmation page 55 Waypoint entry 39 Waypoint holding 73 74 Waypoint identification page 39 Waypoint information 37 56 Waypoint key vii 37 Waypoint list 53 Waypoint menu 37 38 Waypoint scanning 56 Waypoint sequencing 73 74 Waypoints with comments 54 Winds aloft 26 Z Zoom in out 8 15 250xl manual 2 7 17 98 1 33 PM Page 106 ...

Page 117: ...250xl manual 2 7 17 98 1 33 PM Page 107 ...

Page 118: ... 1200 East 151st Street Olathe KS 66062 GARMIN Europe LTD Unit 5 The Quadrangle Abbey Park Industrial Estate Romsey SO51 9AQ UK Web Site Address www garmin com Part No 190 00067 60 Rev A 250xl manual 2 7 17 98 1 33 PM Page 108 ...

Reviews: