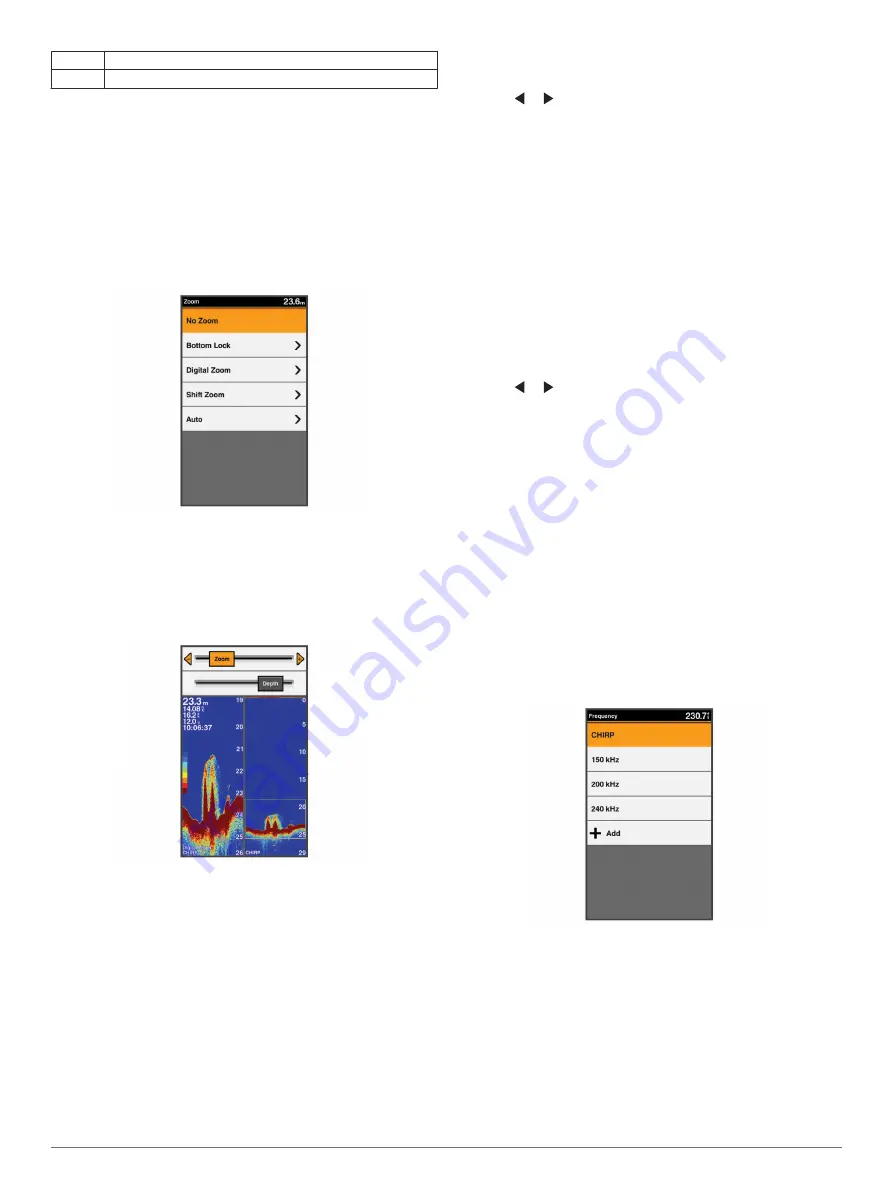
À
Zoomed depth scale
Á
Depth range
Adjusting the Zoom
You can adjust the zoom manually by specifying the span and a
fixed starting depth. For example, when the depth is 15 m and
the starting depth is 5 m, the device displays a magnified area
from 5 to 20 m deep.
You also can allow the device to adjust the zoom automatically
by specifying a span. The device calculates the zoom area from
the bottom of the water. For example, if you select a span of
10 m, the device displays a magnified area from the bottom of
the water to 10 m above the bottom.
1
From a sonar screen, select
RANGE/ZOOM
.
2
Select an option:
• Select
Bottom Lock
to lock the screen to the water
bottom.
• Select
Manual
or
Digital Zoom
to manually set the zoom.
• Select
Auto
to automatically set the zoom.
• Select
Shift Zoom
to manually adjust the zoom.
Locking the Screen to the Water Bottom
You can lock the screen to the water bottom. For example, if you
select a span of 20 meters, the device shows an area from the
water bottom to 20 meters above the bottom. The span appears
on the right side.
1
From a sonar view, select
MENU
>
ZOOM
>
Bottom Lock
.
2
Select a span.
Digital Zoom
Digital zoom magnifies the image after it is captured by sonar.
You can set the zoom manually.
1
From a sonar screen select
RANGE/ZOOM
>
Digital Zoom
.
2
Select the zoom level.
Reducing the Clutter
You can quickly change the settings to reduce noise and clutter
on the sonar screen.
1
From a sonar view, hold
GAIN/CLUTTER
.
2
Select one or more options:
• To adjust the sensitivity to reduce the effects of
interference from nearby sources of noise, select
Interference
.
• To hide sonar returns near the surface of the water, select
Surface Noise
.
• To adjust the time varying gain, which can reduce noise,
select
TVG
.
Pausing the Sonar Display
You can pause the sonar to create a mark or a waypoint.
Select or .
Creating a Mark or Waypoint on a Sonar
Screen Using Your Present Location
1
Pause the sonar.
2
Select an option:
• To create a mark at the cursor, select
MARK/WPT
.
• To create a waypoint at the cursor, hold
MARK/WPT
.
• To create a mark at your boat position, with the cursor
invisible and no menu shown, select
MARK/WPT
.
• To create a waypoint at your boat position, with the cursor
invisible and no menu shown, select
MARK/WPT
.
3
If necessary, edit the mark or waypoint information.
Creating a Waypoint on a Sonar Screen
Using a Different Location
1
Select or to pause the sonar.
2
Using the arrow keys, select a location.
3
Select an option:
• To create a mark, select
MARK
.
• To create a waypoint, hold
MARK
.
4
If necessary, edit the mark or waypoint information.
Sonar Frequencies
NOTE:
The frequencies that are available depend on the
transducer being used.
Adjusting the frequency helps adapt the sonar for your particular
goals and the present depth of the water.
Selecting Frequencies
NOTE:
You cannot adjust the frequency for all sonar views and
transducers.
You can indicate which frequencies appear on the sonar screen.
1
From a sonar view, select
MENU
>
Frequency
.
2
Select a frequency suited to your needs and water depth.
For more information on frequencies, see
Creating a Frequency Preset
NOTE:
Not available with all transducers.
You can create a preset to save a specific sonar frequency,
which allows you to change frequencies quickly.
1
From a sonar view, select
MENU
>
Frequency
.
2
Select
Add
.
3
Enter a frequency.
Sonar
5
Summary of Contents for FF 650 GPS
Page 1: ...FF 650 GPS Owner s Manual ...
Page 23: ......


