background image

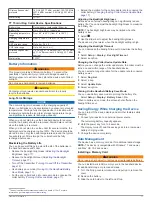
Finding the Dog ID and Track and Control Codes

You can share a dog’s track code so another person can track 

your dog. Also, you can share a dog’s control code so another 

person can track and train your dog.

1

Select 

Dog List

.

2

Select a dog.
The track code and the control code are displayed under the 

dog's name.

VHF Radio Information

This product may be used only on specific radio frequencies, 

which vary depending on the country of use. The handheld 

device and the dog device allow the user to install a different 

antenna. Changing the antenna can result in improved radio 

performance and higher radiated power. You must not use the 

device with a third party antenna or an antenna not approved by 

Garmin

®

. Go to 

www.garmin.com/tracking-legal

 for details about 

the performance and radio frequency of this product, lawful 

accessories, and power limits for countries.

Managing a Group

Before you can create a group, you must pair one or more dog 

devices to your handheld.

1

Select 

Dog List

.

2

Select  .

3

If necessary, select 

Create Group

, and enter a group name.

4

Select a group from the list.

5

Select an option:
• To activate the group, select 

Activate Group

.

• To deactivate the group, select 

Deactivate Group

.

• To add a device to the group, select 

Manage Group

 > 

Add Device

.

• To rename the group, select 

Rename

, and enter a new 

name.

• To delete the group, select 

Delete Group

.

Editing Dog Information

Resetting a Dog's Statistics and Track

You might want to clear the dog statistics and track before a 

new hunt.

1

Select 

Dog List

.

2

Select a dog.

3

Select 

 > 

Reset

.

Changing the Dog Name

1

Select 

Dog List

.

2

Select a dog.

3

Select the dog’s name.

4

Enter the name, and select  .

Changing the Color of the Dog's Track

You can change the track color of the dog. It is helpful to have 

the track color match the color of the collar strap, if possible.

1

Select 

Dog List

.

2

Select a dog.

3

Select the colored square next to the dog’s name.

4

Select a color.

Changing the Dog Type

Before you can change the dog type, the collar must be turned 

on and within range of the handheld device.

1

Select 

Dog List

.

2

Select a dog.

3

Select   > 

Change Dog Type

.

4

Select a dog type.

Changing the Dog ID

Before you can change the dog ID, the collar must be turned on 

and within range of the handheld device.
If you are experiencing interference from other collars or 

handheld devices in the area, you might need to change the ID 

for the dog.

1

Select 

Dog List

.

2

Select a dog.

3

Select   > 

Change ID

.

4

Select an available ID.

If another handheld device is tracking this dog, for best results, 

remove the dog from the device, and use the track and control 

codes to add the dog again (

Adding a Dog Using the Track and 

Control Codes

, page 3

).

Removing a Dog

1

Select 

Dog List

.

2

Select a dog.

3

Select   > 

Remove

.

Fitting the Collar on Your Dog

 CAUTION

To prevent irritation from the contact points, remove the collar 

for at least eight hours out of every 24-hour period.
This device is not intended for human use. Do not attempt to 

use on any person.
Do not spray the device or collar with harsh chemicals including 

but not limited to flea or tick spray. Always ensure that any flea 

or tick spray that is applied to the dog is completely dry before 

placing the collar on the dog. Small amounts of harsh chemicals 

can damage the plastic components and collar laminate.

In order to effectively train the dog, the collar and device must fit 

the dog properly. If the collar is too loose or positioned 

incorrectly, stimulation may be inconsistent. This can delay or 

prevent successful training.

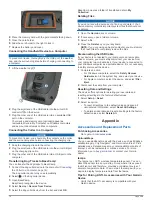
1

Position the device at the front of the dog's neck, with the 

status LED facing toward the dog's chin and the contact 

points against the throat.

2

Tighten the strap so that it is very snug around the dog's 

neck, and fasten the buckle.

NOTE: 

The collar should fit tightly and should not be able to 

rotate or slide on the dog's neck. The dog must be able to 

swallow food and water normally. You should observe your 

dog's behavior to verify that the collar is not too tight.

3

Wiggle the device to work the contact points through the 

dog's coat.

NOTE: 

The contact points must have contact with the dog's 

skin to be effective.

4

Dog Collar Device Setup

Summary of Contents for Alpha 200i

Page 1: ...Alpha 200iwithTraining Owner sManual ...

Page 2: ...ed in the USA and other countries BaseCamp Garmin Explore Garmin Express Garmin HuntView MapShare tempe and TT are trademarks of Garmin Ltd or its subsidiaries These trademarks may not be used without the express permission of Garmin Apple and Mac are trademarks of Apple Inc registered in the U S and other countries The BLUETOOTH word mark and logos are owned by the Bluetooth SIG Inc and any use o...

Page 3: ...ge 8 Checking for Messages 8 Viewing Message Details 8 Navigating to a Message Location 8 Including Location Coordinates in a Message 8 Deleting Messages 8 Messages Settings 8 Tracking 8 Starting Tracking 8 Stopping Tracking 8 Sharing Your MapShare Web Page 8 inReach Tracking Settings 8 SOS 8 Initiating an SOS Rescue 8 Sending a Custom SOS Message 9 Canceling an SOS Rescue 9 Weather 9 Requesting a...

Page 4: ...Settings 15 Sensors Settings 15 Changing the Units of Measure 16 Position Format Settings 16 Device Information 16 Viewing E label Regulatory and Compliance Information 16 Support and Updates 16 Product Updates 16 Updating the Dog Collar Device Software 16 Device Care 16 Cleaning the Device 16 Cleaning the Touchscreen 16 Specifications 16 Alpha Handheld Device Specifications 16 TT 15 Dog Collar De...

Page 5: ...pass page 13 Device Overviews Alpha Handheld Device NOTICE Avoid using a high powered radio greater than 5 W in close proximity to the handheld device It may cause irreversible damage to the handheld device Satellite antenna VHF radio antenna Mounting spine microSD memory card slot under battery Battery cover D ring Micro USB port under weather cap Alpha Device Keys Power key Customizable training...

Page 6: ...r device for the first time you will select the device language from a list of available languages You can change the language setting from the System settings 1 From the main menu select Setup System Language 2 Select a language Using the Touchscreen Select to open a menu Select to return to the home screen Select to return to the previous page If you are more than one menu away from the home scr...

Page 7: ... device This method also adds dog information such as the dog s name communication settings and initial position from the sending handheld device to your device The two handheld devices must be within range 3 m 10 ft to share data wirelessly This method is helpful when you want to add a dog collar device during a hunt but you are not near the dog For example the dogs have already been let loose an...

Page 8: ...the collar must be turned on and within range of the handheld device 1 Select Dog List 2 Select a dog 3 Select Change Dog Type 4 Select a dog type Changing the Dog ID Before you can change the dog ID the collar must be turned on and within range of the handheld device If you are experiencing interference from other collars or handheld devices in the area you might need to change the ID for the dog...

Page 9: ...rrent location Tracking Your Dog on the Map Before you can track a dog on the map you must add it to the handheld device Adding a Dog to the Alpha Handheld Using Wireless Pairing page 3 You can view the dog s location on the map 1 From the home screen select 2 If necessary select and to zoom in and out of the map TIP You can select to track the dog using the dog tracking compass Dog Tracking Compa...

Page 10: ...ntact Points For best results select the correct contact points based on your dog s coat 1 Select the correct contact point length for your dog s coat type For dogs with thicker coats use the longer contact points For dogs with shorter coats use the shorter contact points 2 If necessary use the included wrench to remove the contact points 3 Twist the contact points into the collar 4 Tighten with t...

Page 11: ...e collar as a training tool If the dog does not respond to the stimulation level you have selected Choosing the Correct Intensity Level page 6 increase the stimulation one level at a time until you achieve the appropriate response After you achieve the desired response you can lower the stimulation level as long as the dog maintains consistency As the dog becomes more proficient with the commands ...

Page 12: ...ts the device to ring until you read a new message This feature is helpful if you are in a noisy environment Notifications Alerts you to incoming inReach messages Show On Map Displays inReach messages on the map Tracking You can use the tracking feature to record track points and transmit them over the Iridium satellite network at the specified send interval Starting Tracking Select inReach Tracki...

Page 13: ... downloading the data you can view the forecast at any time until all the information in the forecast has expired You can also update the forecast at any time Updating an inReach Weather Forecast You can update an inReach weather forecast that has expired or contains outdated information Updating a forecast incurs the same data charges or additional charges as requesting a forecast 1 Select inReac...

Page 14: ...ing ANT wireless technology Allows you to add a handheld device that you do not own as a contact This method does not require the contact to find and communicate their device code to the person adding the device The two handheld devices must be within a range of 3 m 10 ft to share data wirelessly This method is helpful when you want to add a handheld device during a hunt without entering the devic...

Page 15: ...shed the number of birds taken and select OK 3 Review and edit location information optional 4 Select Save Active Hunt Metrics You can select Hunt from the main menu to view the active hunt metrics The active hunt metrics page displays the active hunt time and distance traveled for your handheld device and each paired dog collar device It also shows the dog status such as on point treed or barking...

Page 16: ...hat leads you to your final destination Creating a Route 1 Select Route Planner Create Route Select First Point 2 Select a category 3 Select the first point on the route 4 Select Use Select Next Point 5 Select a point 6 Repeat steps 3 through 5 to add all the points in the route Editing the Name of a Route 1 Select Route Planner 2 Select a route 3 Select Change Name 4 Enter the new name and select...

Page 17: ...on Calibrating the Compass NOTICE Calibrate the electronic compass outdoors To improve heading accuracy do not stand near objects that influence magnetic fields such as vehicles buildings and overhead power lines You should calibrate the compass after moving long distances experiencing temperature changes or removing the battery 1 Select Compass Calibrate Compass Start 2 Follow the on screen instr...

Page 18: ...hat counts up from zero Satellite Page The satellite page shows your current location GPS accuracy satellite locations and signal strength Changing the Satellite View By default the satellite view is with North at the top You can change the view of the satellites to be oriented with your current track toward the top of the screen Select Satellite Track Up Turning Off GPS Select Satellite Satellite...

Page 19: ...racks on Map Determines how much of the track log for a tracked dog collar appears on the map Handheld Tracks on Map Determines how much of the track log for a tracked handheld device appears on the map Dog Display Enables and disables the dog information shown on the map Show Offscreen Dogs Enables or disables the offscreen dog indicator on the map Advanced Map Settings Select Setup Map Advanced ...

Page 20: ... 2 Follow the on screen instructions Device Care NOTICE Do not store the device where prolonged exposure to extreme temperatures can occur because it can cause permanent damage Never use a hard or sharp object to operate the touchscreen or damage may result Avoid chemical cleaners solvents and insect repellents that can damage plastic components and finishes Secure the weather cap tightly to preve...

Page 21: ...17 Put the dog collar device into rescue mode to conserve the collar battery Turning On Rescue Mode page 11 1 The device withstands pressure equivalent to a depth of 10 m For more information go to www garmin com waterrating Extend the duration for the collar update rate to conserve the collar battery Changing the Dog Collar Device Update Rate page 17 Adjusting the Backlight Brightness Extensive u...

Page 22: ...lume 3 Select a file 4 Press the Delete key on your keyboard NOTE If you are using an Apple computer you must empty the Trash folder to completely remove the files Disconnecting the USB Cable If your device is connected to your computer as a removable drive or volume you must safely disconnect your device from your computer to avoid data loss If your device is connected to your Windows computer as...

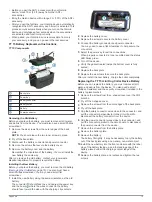
Page 23: ...ump where the wires connect to the battery should face toward the side with the charging clip contacts 2 Replace the battery cover 3 Replace the screws to secure the battery cover 4 Connect the battery connector and power connector You may need to use a flat screwdriver to help secure the connectors 5 Select the power key to test the connections When properly connected a tone is emitted and the st...

Page 24: ...the screw securing the VHF antenna to the back plate 4 Pull the length of the antenna from the antenna guide to remove the old antenna 5 Loop the antenna guide around the collar strap and thread the new VHF antenna through the guide This helps to point the antenna up 6 Replace the screw securing the VHF antenna to the back plate 7 Replace the L shaped cover over the VHF antenna 8 Replace the 4 scr...

Page 25: ... vertical distance of ascent for the current lap Lap Descent The vertical distance of descent for the current lap Lap Distance The distance traveled for the current lap Laps The number of laps completed for the current activity Lap Speed The average speed for the current lap Last Lap Ascent The vertical distance of ascent for the last completed lap Last Lap Descent The vertical distance of descent...

Page 26: ...ertical Dist to Next The elevation distance between your current position and the next waypoint in the route You must be navigating for this data to appear Vertical Speed The rate of ascent or descent over time Vertical Speed to Dest The rate of ascent or descent to a predetermined altitude You must be navigating for this data to appear Waypoint at Dest The last point on the route to the destinati...

Page 27: ... level choosing 6 K keys 1 training 7 L line of sight radio communication 5 M main menu customizing 14 maps 11 12 BirdsEye imagery 14 measuring distances 13 navigation 13 optional 18 orientation 13 15 settings 15 updating 16 zoom 5 15 measuring distances 13 memory card 1 17 messages 7 8 10 deleting 8 navigating 8 microSD card See memory card MicroSD card See memory card N navigation 5 13 altimeter...

Page 28: ...support garmin com GUID 7048343C 0809 4926 9736 E4A24C88F1C4 v2 July 2020 ...

Reviews: