Map datum is a math model which depicts a part of the
surface of the earth. Latitude and longitude lines on a
paper map are referenced to a specific map datum.
1
Find out which map datum and position format was
used when the original waypoint was created.
If the original waypoint was taken from a map, there
should be a legend on the map that lists the map datum
and position format used to create that map. Most often
this is found near the map key.
2
On the chartplotter, select
Settings > Preferences >
Units.
3
Select the correct map datum and position format
settings.
4
Create the waypoint again.
My chartplotter will not acquire
A02759
signals
If the device is not acquiring satellite signals, there could
be a few causes. If the chartplotter has moved a large
distance since the last time it has acquired satellites or has
been turned off for longer than a few weeks or months, the
device may not be able to acquire the satellites correctly.
• Make sure the
A02759
antenna has a clear view of the
sky
to receive the
A02759
signal.
If it is mounted inside of a cabin, it should be close to a
window so it can receive the
A02759
signal.
• Make sure the
A02759
antenna is connected to
the
NMEA
®
network.
• If the chartplotter has more than one
A02759
antenna
source, select a different source.
• Ensure the device is using the latest software, and
update the device software if necessary (Software
Update, page 4).
Software Update
You may need to update the device software when you
install the device or add an accessory to the device.
The software update requires either a Garmin
®
memory
card reader accessory or another Garmin chartplotter
connected over the Garmin Marine Network.
The Garmin memory card reader accessory is sold
separately.
Loading the New Software on a Memory Card
1
Insert a memory card into the card slot on the
computer.
2
Go to www.garmin.com/support/software/marine.html.
3
Select
Download next to
A02759
Series with SD
Card.
4
Read and agree to the terms.
5
Select
Download.
6
Select
Run.
7
Select the drive associated with the memory card, and
select
Next > Finish.
Updating the Device Software
Before you can update the software, you must obtain a
software-update memory card or load the latest software
onto a memory card.
1
Turn on the chartplotter, and wait for the home screen
to appear.
NOTE: In order for the software update instructions to
appear, the device must be fully booted before the card
is inserted.
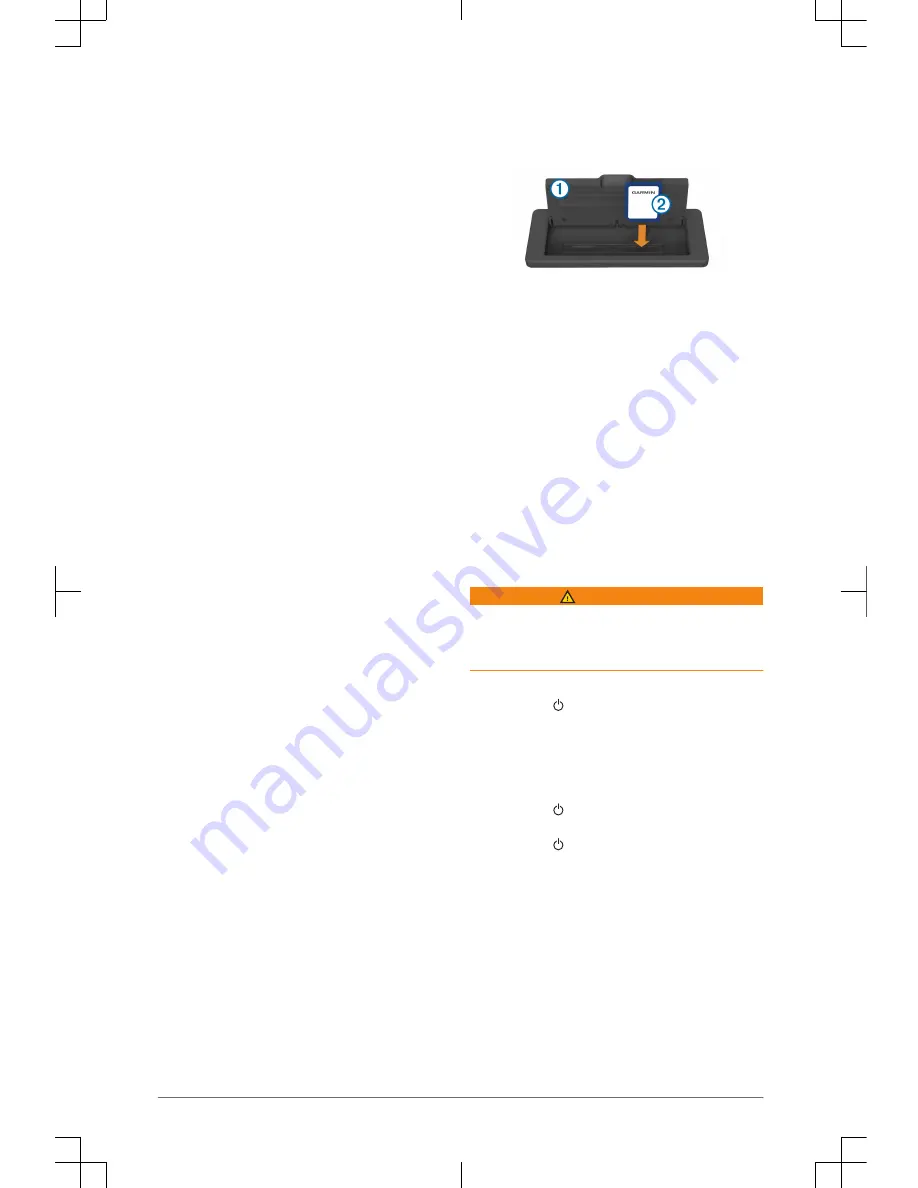
2
Open the memory card door
À
.
3
Insert the memory card
Á
, and press it in until it clicks.
4
Close the door.
5
Follow the on-screen instructions.
6
Wait several minutes while the software update
process completes.
The device returns to normal operation after the
software update process is complete.
7
Remove the memory card.
NOTE: If the memory card is removed before the
device restarts fully, the software update is not
complete.
A02759
Series Manuel
de démarrage rapide
Introduction
AVERTISSEMENT
Consultez le guide Informations importantes sur le produit
et la sécurité inclus dans l'emballage du produit pour
prendre connaissance des avertissements et autres
informations importantes sur le produit.
Conseils et raccourcis
• Appuyez sur pour allumer le traceur.
• Sélectionnez
Accueil à partir de n'importe quel écran
pour revenir à l'écran d'accueil.
• Sélectionnez
Menu à partir de n'importe quel écran
principal pour accéder aux paramètres
supplémentaires de cet écran.
• Appuyez sur pour régler le rétroéclairage et
verrouiller l'écran tactile.
• Appuyez sur et sélectionnez
Éteindre pour éteindre
le traceur.
Utilisation de l'écran tactile
• Touchez l'écran pour sélectionner un élément.
• Faites glisser votre doigt sur l'écran pour le faire défiler
ou pour effectuer un panoramique.
• Resserrez vos deux doigts pour effectuer un zoom
arrière.
• Ecartez vos deux doigts pour effectuer un zoom avant.
Boutons à l'écran
Ces boutons à l'écran apparaissent sur certains écrans et
pour certaines fonctions. Certains boutons ne sont
accessibles que sur les pages combinées ou les
dispositions SmartMode.
4
Manuel de démarrage rapide