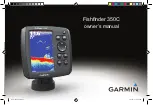
Fishfinder 350C Owner’s Manual
5
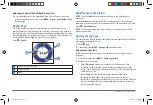
Opening the Numbers Page
NOTE:
The device must be connected to a water-speed-capable transducer to use
the odometer.
Select >
Numbers
.
Resetting the Odometer to Zero
From the Numbers page, select
MENU
>
Reset Odometer
.
Setting Up the Sonar Views
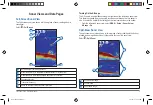
Before you can set up a sonar view, you must open the full-screen sonar view
), the split-zoom sonar view (
), or the split-frequency sonar view
).
Adjusting the Gain Manually
You can control the level of detail shown on any sonar view.
1
Select
GAIN
.
TIP
: You can also select
Menu
>
Gain
>
Manual
.
2
Select an option:
• To increase the gain and see more detail, select .
• To decrease the gain and reduce the clutter or noise on the sonar view,
select .
3
If you are setting the gain on the split-frequency sonar view (
), repeat
steps 1 and 2.
Adjusting the Gain Automatically
1
Press
GAIN
twice.
TIP
: You can also select
Menu
>
Gain
.
2
Select an option:
• To display the sonar view with higher sensitivity and to show weaker signals
and more noise, select
Auto-High
.
• To display the sonar view with normal sensitivity, select
Auto-Med
.
• To display the sonar view with lower sensitivity and less noise, select
Auto-
Low
.
Adjusting the Range Manually
You can adjust the depth of the water shown in the sonar view.
1
Select
RANGE
.
TIP
: You can also select
Menu
>
Range
>
Manual
.
2
Select an option:
• To increase the range of the depth scale, select .
• To decrease the range, select .
Adjusting the Range Automatically
1
Press
RANGE
twice.
TIP
: You can also select
Menu
>
Range
.
2
Select
Auto
.
Zooming the Sonar View Manually
When you zoom in one sonar view, the other sonar views are not affected.
1
Select
SPAN
.
TIP
: You can also select
Menu
>
Zoom
>
Manual Zoom
.
2
Select a span height.
3
Select
DEPTH
.
4
Select and to select the depth at which the sonar view (the span) will be
shown on the sonar.
190-01440-00_0B.indd 5
3/21/2012 1:00:08 PM

